Core Graphics Tutorial: Gradients and Contexts
In this Core Graphics tutorial, learn how to develop a modern iOS app with advanced Core Graphics features like gradients and transformations. By Fabrizio Brancati.
Drawing the Marker
Go to CounterView.swift and add this code to the end of draw(_:) to add the markers to the counter:
// Counter View markers
guard let context = UIGraphicsGetCurrentContext() else {
  return
}

// 1 - Save original state
context.saveGState()
outlineColor.setFill()

let markerWidth: CGFloat = 5.0
let markerSize: CGFloat = 10.0

// 2 - The marker rectangle positioned at the top left
let markerPath = UIBezierPath(rect: CGRect(
  x: -markerWidth / 2,
  y: 0,
  width: markerWidth,
  height: markerSize))

// 3 - Move top left of context to the previous center position
context.translateBy(x: rect.width / 2, y: rect.height / 2)

for i in 1...Constants.numberOfGlasses {
  // 4 - Save the centered context
  context.saveGState()
  // 5 - Calculate the rotation angle
  let angle = arcLengthPerGlass * CGFloat(i) + startAngle - .pi / 2
  // Rotate and translate
  context.rotate(by: angle)
  context.translateBy(x: 0, y: rect.height / 2 - markerSize)

  // 6 - Fill the marker rectangle
  markerPath.fill()
  // 7 - Restore the centered context for the next rotate
  context.restoreGState()
}

// 8 - Restore the original state in case of more painting
context.restoreGState()
In the code above, you:
- Save the original state of the matrix before you manipulate the context's matrix.
- Define the position and shape of the path, though you're not drawing it yet.
- Move the context so that rotation happens around the context's original center, indicated by the blue lines in the previous diagram.
- Save the centered context state for each mark.
- Determine the angle for each marker using the individual angle previously calculated. Then you rotate and translate the context.
- Draw the marker rectangle at the top left of the rotated and translated context.
- Restore the centered context's state.
- Restore the original state of the context before any rotations or translations.
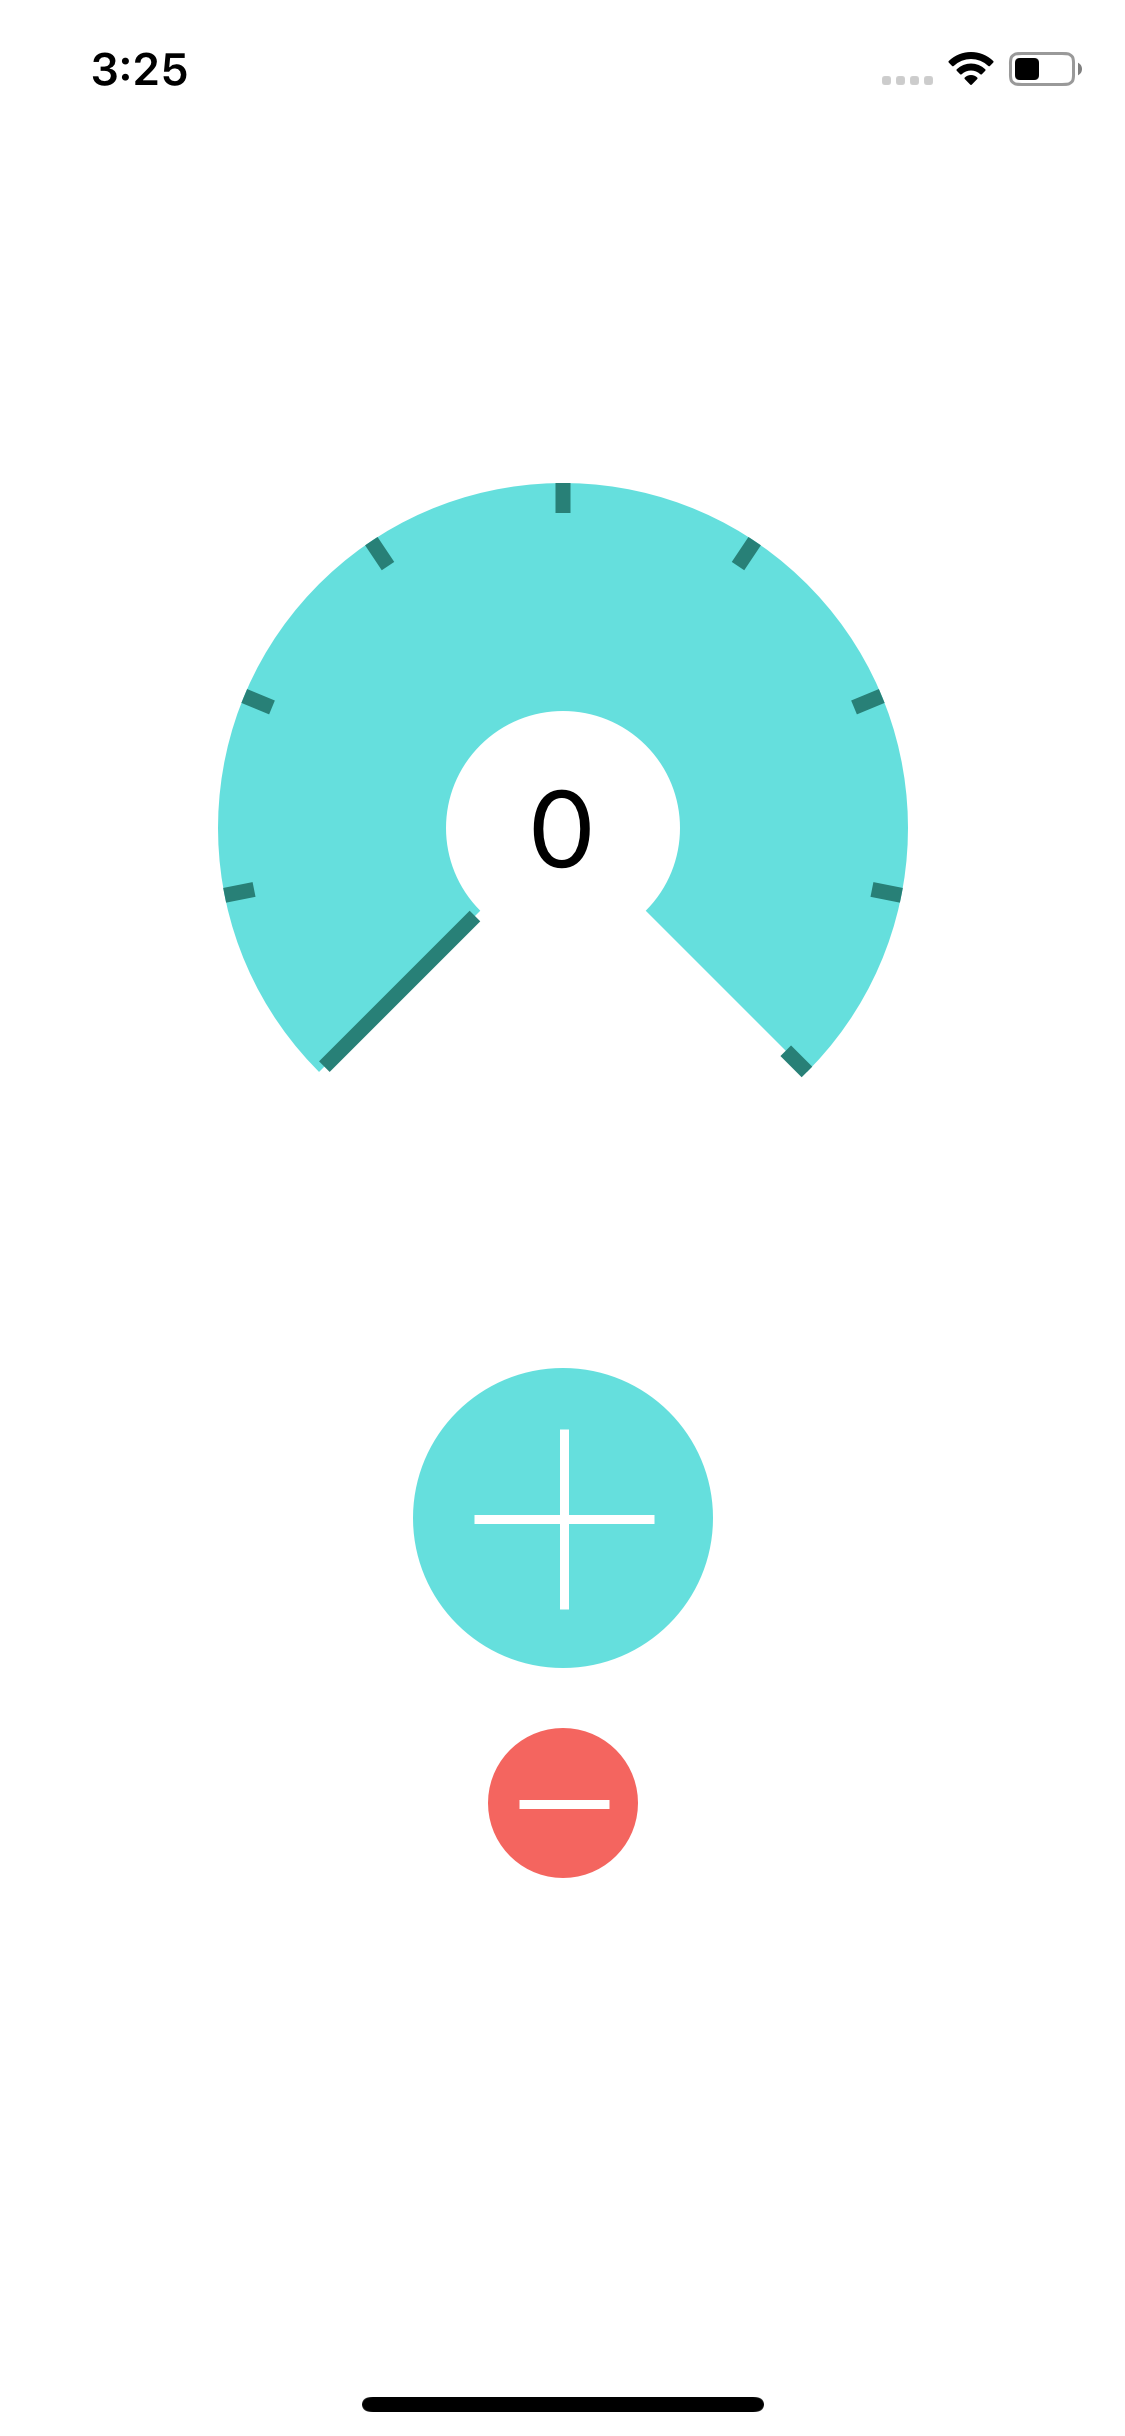
Whew! Nice job hanging in there for that. Now build and run and admire Flo's beautiful and informative UI:
Where to Go to From Here?
You can download the completed version of the project using the Download Materials button at the top or bottom of this tutorial.
At this point, you've learned how to draw paths, gradients, and how to change the context's transformation matrix.
If you'd like to learn more about custom layouts, consider the following resources:
- Check out the Quartz 2D Programming Guide provided by Apple.
- Follow our video course on Core Graphics if you prefer the video format.
If you have any questions or comments, please join the discussion below!