Creating a PDF in Swift with PDFKit
Learn how to create a PDF, work with Core Text and Core Graphics and share the created document by building an app that displays the user’s input on a flyer that can be shared with other iOS apps. By Bill Morefield.
Adding User Text to the PDF
Now it’s time to begin implementing the flyer. Open PDFCreator.swift and add the following lines at the top of PDFCreator.
let title: String
let body: String
let image: UIImage
let contactInfo: String

init(title: String, body: String, image: UIImage, contact: String) {
  self.title = title
  self.body = body
  self.image = image
  self.contactInfo = contact
}
This adds properties to store the title, body text, image and contact information for the flyer. You also define a custom initializer method to set the variables.
Since you have a title for the PDF, you can now add it to the metadata by opening PDFCreator.swift and updating pdfMetaData to:
let pdfMetaData = [
  kCGPDFContextCreator: "Flyer Builder",
  kCGPDFContextAuthor: "raywenderlich.com",
  kCGPDFContextTitle: title
]
Adding the Title With Core Text
You want the title of the flyer to appear at the center and near the top of the PDF page. To make the creation code easier to follow and maintain, you’ll create a separate method for each part of the flyer.
When adding text, you’ll want to take advantage of the additional layout functionality provided by Core Text. So add the following new method at the bottom of PDFCreator:
func addTitle(pageRect: CGRect) -> CGFloat {
  // 1
  let titleFont = UIFont.systemFont(ofSize: 18.0, weight: .bold)
  // 2
  let titleAttributes: [NSAttributedString.Key: Any] =
    [NSAttributedString.Key.font: titleFont]
  // 3
  let attributedTitle = NSAttributedString(
    string: title,
    attributes: titleAttributes
  )
  // 4
  let titleStringSize = attributedTitle.size()
  // 5
  let titleStringRect = CGRect(
    x: (pageRect.width - titleStringSize.width) / 2.0,
    y: 36,
    width: titleStringSize.width,
    height: titleStringSize.height
  )
  // 6
  attributedTitle.draw(in: titleStringRect)
  // 7
  return titleStringRect.origin.y + titleStringRect.size.height
}
Here’s what this method does:
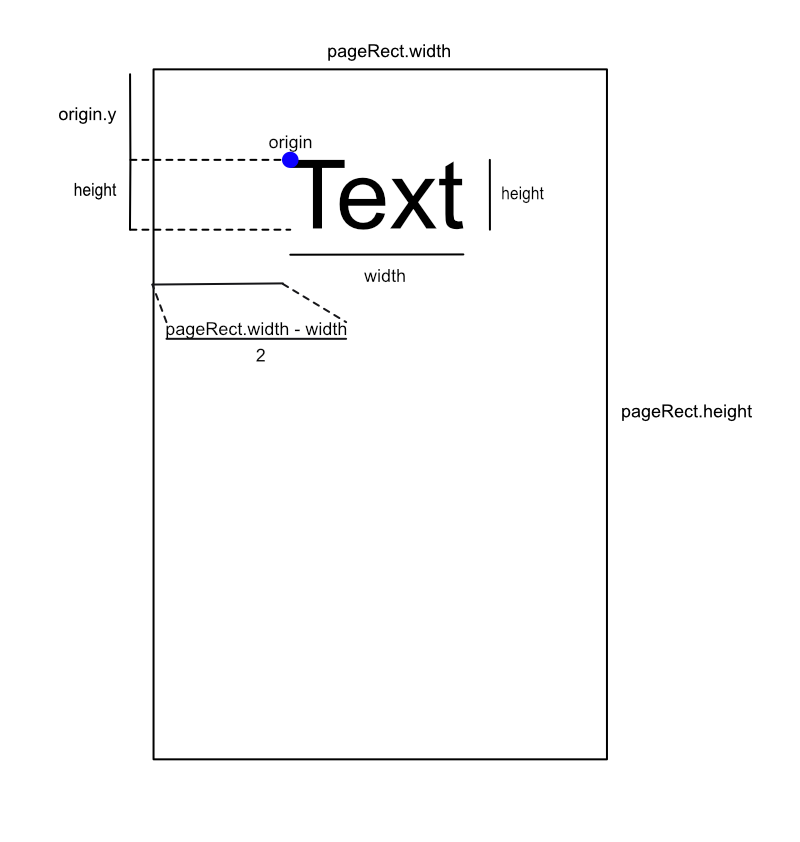
You subtract the width of the string from the width of the page to calculate the remaining space. Dividing this amount by two evenly splits the space on each side of the text.
- You create an instance of the system font that has a size of 18 points and is in bold.
- You create an attributes dictionary and set the NSAttributedString.Key.font key to this font.
- Then, you create
NSAttributedStringcontaining the text of the title in the chosen font. - Using
size()on the attributed string returns a rectangle with the size the text will occupy in the current context. - You now create a rectangle 36 points from the top of the page which horizontally centers the title on the page. The figure below shows how to calculate the
xcoordinate needed to center the text. - Using
draw(in:)onNSAttributedStringdraws it inside the rectangle. - This code adds the
ycoordinate of the rectangle to the height of the rectangle to find the coordinate of the bottom of the rectangle, as shown in the following figure. The code then returns this coordinate to the caller.
You’ll do more with this technique for placing text later in this tutorial, so make sure you understand it before moving forward.
You now need to call the new method when creating the PDF. In createFlyer(), replace this code:
let attributes = [
  NSAttributedString.Key.font: UIFont.boldSystemFont(ofSize: 72)
]
let text = "I'm a PDF!"
text.draw(at: CGPoint(x: 0, y: 0), withAttributes: attributes)
with a call to the new method:
let titleBottom = addTitle(pageRect: pageRect)
Next, you need to pass the title to PDFCreator. So, open FlyerBuilderViewController.swift and replace the implementation of prepare(for:sender:) with:
guard
  segue.identifier == "previewSegue",
  let vc = segue.destination as? PDFPreviewViewController,
  let title = flyerTextEntry.text
  else {
    return
}

let pdfCreator = PDFCreator(
  title: title,
  body: "",
  image: UIImage(),
  contact: ""
)
vc.documentData = pdfCreator.createFlyer()
The PDFCreator initializer sets the title and provides placeholder values for the remaining elements. You’ll replace these as you implement each part of the flyer.
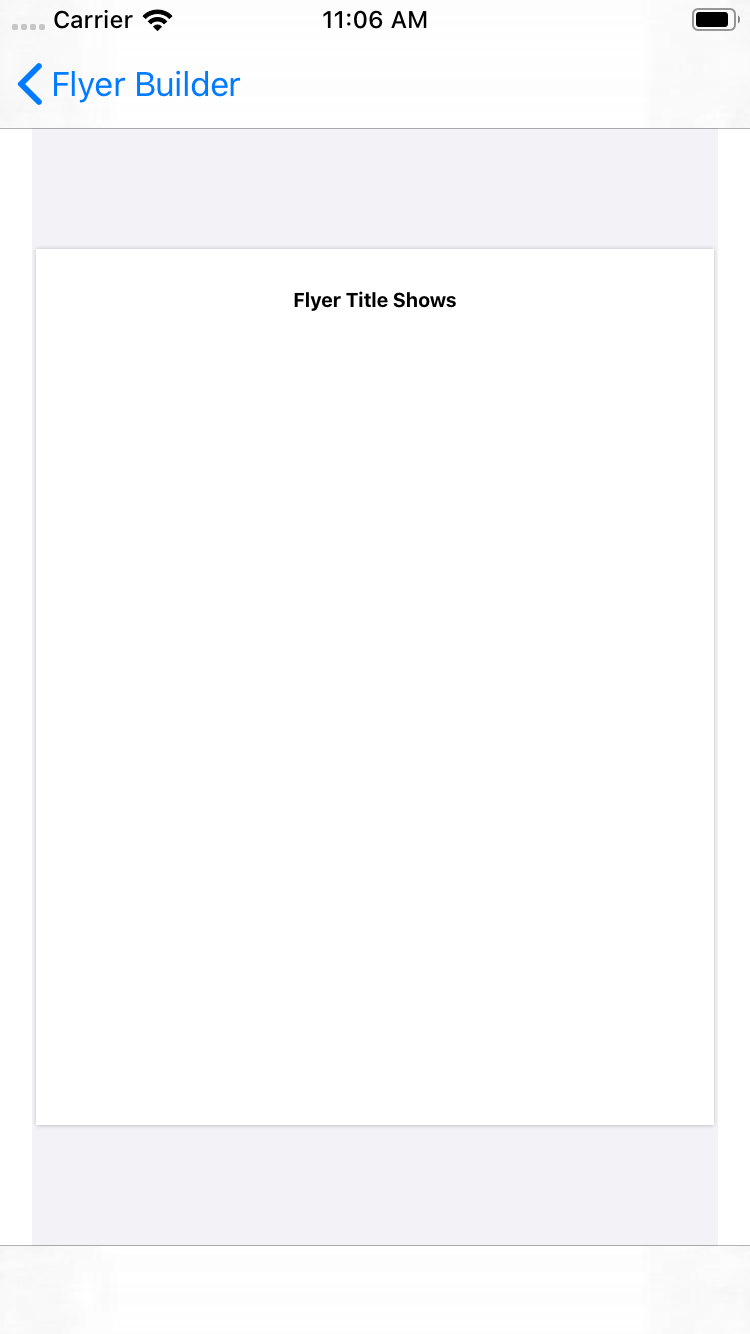
Now, build and run the app. Enter a title, then tap Preview. You should see your title text centered at the top of the page.
Adding Paragraph Text
If you try different titles with the app, you might notice a problem: This method of positioning text only works when the text fits onto a single line. A very long title will go off the sides of the PDF.

While a title will normally be a single line, most text will cover several lines on the page. Fortunately, Core Text provides the NSParagraphStyle class to fix this problem. So now, you’ll find out how to add wrapped text to the app.
Using NSParagraphStyle
To introduce wrapped text to your app, add this new method to the bottom of PDFCreator in PDFCreator.swift:
func addBodyText(pageRect: CGRect, textTop: CGFloat) {
  let textFont = UIFont.systemFont(ofSize: 12.0, weight: .regular)
  // 1
  let paragraphStyle = NSMutableParagraphStyle()
  paragraphStyle.alignment = .natural
  paragraphStyle.lineBreakMode = .byWordWrapping
  // 2
  let textAttributes = [
    NSAttributedString.Key.paragraphStyle: paragraphStyle,
    NSAttributedString.Key.font: textFont
  ]
  let attributedText = NSAttributedString(
    string: body,
    attributes: textAttributes
  )
  // 3
  let textRect = CGRect(
    x: 10,
    y: textTop,
    width: pageRect.width - 20,
    height: pageRect.height - textTop - pageRect.height / 5.0
  )
  attributedText.draw(in: textRect)
}
Here’s what’s different from the method you used to draw a title:
- You create an
NSMutableParagraphStyleobject to define how text should flow and wrap. Natural alignment sets the alignment based on the localization of the app. Lines are set to wrap at word breaks. - The dictionary holds the text attributes that set the paragraph style in addition to the font. You create an
NSAttributedStringthat combines the text and formatting, just like you did with the title. - The rectangle for the text is a little different. It offsets 10 points from the left and sets the top at the passed value. The width is set to the width of the page minus a margin of 10 points on each side. The height is the distance from the top to 1/5 of the page height from the bottom.
Your next step is to update createFlyer() to add the the body text. You’ll also add a half-inch of space between the title and body text. Below the call to addTitle(), add the following:
addBodyText(pageRect: pageRect, textTop: titleBottom + 36.0)
Next, you need to pass the text for the flyer to the preview controller. To do this, open FlyerBuilderViewController.swift and replace the implementation of prepare(for:sender:) with:
guard
  segue.identifier == "previewSegue",
  let vc = segue.destination as? PDFPreviewViewController,
  let title = flyerTextEntry.text,
  let body = bodyTextView.text
  else {
    return
}

let pdfCreator = PDFCreator(
  title: title,
  body: body,
  image: UIImage(),
  contact: ""
)
vc.documentData = pdfCreator.createFlyer()
Build and run your app. Enter a title and some text for the body of the flyer and tap Preview. Look, your PDF now shows both types of text!

Your next goal is to give the user the ability to add an image to the flyer.