Creating a PDF in Swift with PDFKit
Learn how to create a PDF, work with Core Text and Core Graphics and share the created document by building an app that displays the user’s input on a flyer that can be shared with other iOS apps. By Bill Morefield.
A PDF document acts as a bridge between online and printed documents. Adobe invented the PDF format, but it’s now an open standard that defines a document containing text, images and interactive elements.
This standard allows you to create electronic documents that look like printed documents. For many apps, creating a PDF adds value for the user.
PDFKit came to iOS in version 11.0. It provides libraries to display, create and manipulate PDF documents.
While the most common use of PDFKit is adding the ability to view PDF documents to an app, you can also use it to create and change PDF files.
In this tutorial, you’ll build an app that creates a simple flyer as a PDF based on information the user enters.
You should have a basic understanding of iOS app development before proceeding. Familiarity with Core Text and Core Graphics will be useful but isn’t required.
Getting Started
A PDF document consists of a single file ending in the .pdf extension. The file may include metadata that provides information about the document. The specification also allows simple password protection to restrict access and printing.
A PDF document contains pages corresponding to the pages of a printed document. Each page contains text, images, hyperlinks and/or annotations.
The page uses a coordinate system with 72 points to each printed inch. The coordinates originate at the bottom left of the page and increase going upward and to the right.
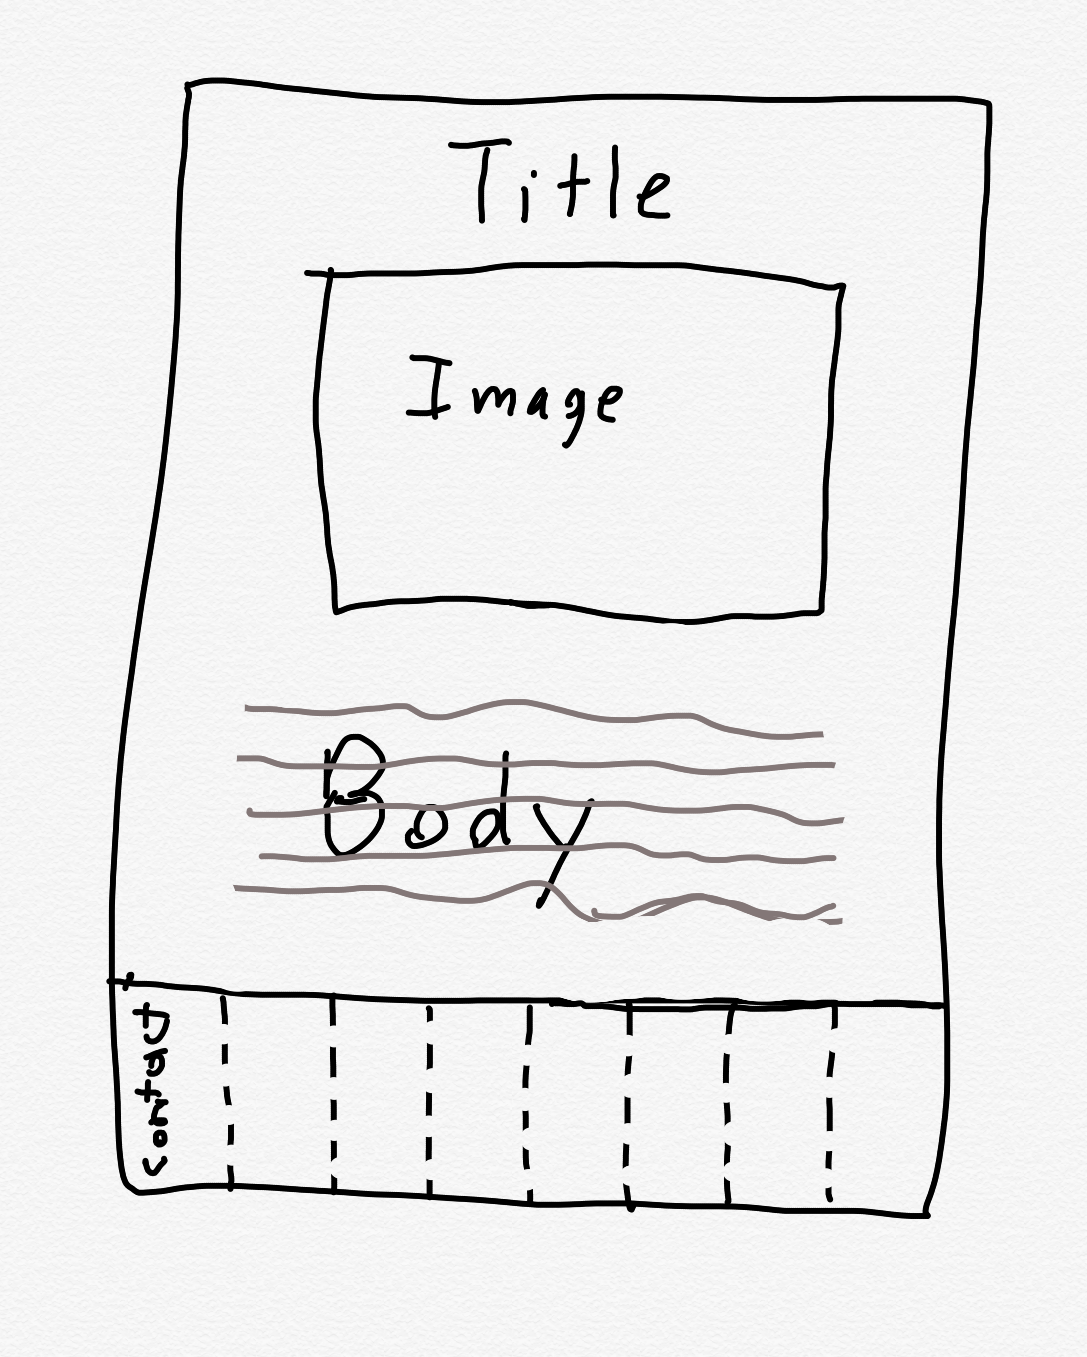
In this tutorial, you’ll build an app to create a simple flyer. The flyer will contain a title, image, body text and several tear-off tabs at the bottom. The app allows the user to enter the information for the flyer and select a photo either from the photo library or from the camera. Once the user has selected an image, a preview of that image will appear. Here’s how the flyer will look:
Begin by using the Download Materials button at the top or bottom of the page. Open the starter project, then build and run the app.

You’ll see a form to enter the information to create the flyer. The tool bar contains a Preview button that will create the PDF and open a view controller with a PDFView to show the flyer. There’s also a Share button that you’ll update so you can share the PDF with other iOS apps.
Creating a PDF With PDFKit
The key class to create a PDF is UIGraphicsPDFRenderer. The process is:
- Instantiate a
UIGraphicsPDFRendererobject, optionally providing parameters to describe the document. You’ll usually want to do this, because if you don’t, iOS will use defaults based on the user’s device. - Call either the
pdfData(actions:)renderer to produce aDataobject or thewritePDF(to:withActions:)renderer to write the document directly to disk. - Use Core Graphics instructions within the renderer method’s enclosure to create the document.
Next, you’ll create a new class to encapsulate the process of building a PDF. In the project choose File ▸ New ▸ File… and select the iOS ▸ Cocoa Touch Class template. Then, click Next.
Once you’ve done that, name the class PDFCreator and make it a subclass of NSObject. Ensure the Language is set to Swift.
Finally, click Next and then Create.
Importing PDFKit
To use PDFKit, you need to import it into the class. Add the following under import UIKit at the top of the file:
import PDFKit
Now, add this new method to create the PDF to PDFCreator:
func createFlyer() -> Data {
  // 1
  let pdfMetaData = [
    kCGPDFContextCreator: "Flyer Builder",
    kCGPDFContextAuthor: "raywenderlich.com"
  ]
  let format = UIGraphicsPDFRendererFormat()
  format.documentInfo = pdfMetaData as [String: Any]

  // 2
  let pageWidth = 8.5 * 72.0
  let pageHeight = 11 * 72.0
  let pageRect = CGRect(x: 0, y: 0, width: pageWidth, height: pageHeight)

  // 3
  let renderer = UIGraphicsPDFRenderer(bounds: pageRect, format: format)
  // 4
  let data = renderer.pdfData { (context) in
    // 5
    context.beginPage()
    // 6
    let attributes = [
      NSAttributedString.Key.font: UIFont.boldSystemFont(ofSize: 72)
    ]
    let text = "I'm a PDF!"
    text.draw(at: CGPoint(x: 0, y: 0), withAttributes: attributes)
  }

  return data
}
Here’s what this code does:
- You create a dictionary with the PDF’s metadata using predefined keys. You can find the full list of keys in Apple’s Auxiliary Dictionary Keys documentation. To set the metadata, you create a
UIGraphicsPDFRendererFormatobject and assign the dictionary todocumentInfo. - Recall that PDF files use a coordinate system with 72 points per inch. To create a PDF document with a specific size, multiply the size in inches by 72 to get the number of points. Here, you’ll use 8.5 x 11 inches, because that’s the standard U.S. letter size. You then create a rectangle of the size you just calculated.
-
UIGraphicsPDFRenderer(bounds:format:)creates aPDFRendererobject with the dimensions of the rectangle and the format containing the metadata. -
pdfData(actions:)includes a block where you create the PDF. The renderer creates a Core Graphics context that becomes the current context within the block. Drawing done on this context will appear on the PDF. -
context.beginPage()starts a new PDF page. You must callbeginPage()one time before giving any other drawing instructions. You can call it again to create multi-page PDF documents. - Using
draw(at:withAttributes:)on aStringdraws the string to the current context. You set the size of the string to 72 points.
Now that you have a simple PDF, you’ll set up the preview for the PDF in the app so you can view it.
Adding a PDF Preview
The starter app already contains a PDFView for preview, but it’s not ready to use. To start setting up your preview, open PDFPreviewViewController.swift. You’ll pass the PDF as a Data object to the class. At the top of PDFPreviewViewController, add a variable:
public var documentData: Data?
Now add the following code at the end of viewDidLoad():
if let data = documentData {
  pdfView.document = PDFDocument(data: data)
  pdfView.autoScales = true
}
When the preview loads, if documentData is set, PDFDocument(data:) creates a PDFDocument from the passed data.
PDFDocument is a PDFKit object that represents PDF data. Assign the document to the PDFView view and set the document to scale to fit the view.
Go back to FlyerBuilderViewController.swift and add the following method to the end of FlyerBuilderViewController. Make sure you add it to the class and not to an extension.
override func prepare(for segue: UIStoryboardSegue, sender: Any?) {
  if segue.identifier == "previewSegue" {
    guard let vc = segue.destination as? PDFPreviewViewController else { return }
    let pdfCreator = PDFCreator()
    vc.documentData = pdfCreator.createFlyer()
  }
}
This method creates the PDF when the user calls the segue on the Preview button. It passes the PDF data to the destination PDFPreviewViewController.
Now, build and run the app. Click Preview in the tool bar and you should see a preview of the PDF file created in the app.

As mentioned earlier, the coordinates of a PDF originate at the bottom left corner. You might be surprised to see the text at the top of the PDF file since it’s drawn at coordinate (x: 0, y: 0). Why does that happen?
[spoiler title=”Answer”]pdfData(actions:) creates a Core Graphics context. The PDF coordinates and Core Graphics share the same point size, but coordinates for a Core Graphics context begin at the top left corner and increase down and to the right.
If you need to convert between the coordinate spaces, there are methods in PDFKit that will do so.[/spoiler]