Drag and Drop Editable Lists: Tutorial for SwiftUI
Grow your SwiftUI List skills beyond the basics. Implement editing, moving, deletion and drag-and-drop support. Then, learn how custom views can support draggable content. By Bill Morefield.
Sign up/Sign in
With a free Kodeco account you can download source code, track your progress, bookmark, personalise your learner profile and more!
Create accountAlready a member of Kodeco? Sign in
Sign up/Sign in
With a free Kodeco account you can download source code, track your progress, bookmark, personalise your learner profile and more!
Create accountAlready a member of Kodeco? Sign in
Contents
Drag and Drop Editable Lists: Tutorial for SwiftUI
30 mins
- Getting Started
- Understanding Data Flow in Drag Todo
- Editing Lists
- Deleting Items
- Using EditButton
- Moving Items
- Getting the Current EditMode
- Introducing Drag and Drop
- Building a Drop Target
- Implementing Your View
- Preparing for Drag Support
- Making a View Draggable
- Preparing for Drop Support
- Conforming to DropDelegate
- Dropping Between Views
- Trying Out Another Way to Drop
- Where to Go From Here
Dropping Between Views
For the final piece of the puzzle, open ContentView.swift and add the following modifier to FocusTodoView underneath its padding() modifier:
.onDrop(
  of: [TodoItem.typeIdentifier],
  delegate: TodoDropDelegate(focusId: $focusId))
Here, you indicate you only want to accept objects with TodoItem‘s type identifier and pass an instance of the delegate you just created with a binding to the focusId state you added earlier.
Build and run. And there you have it! Drag any TODO item from the active list and drop it in the focused area. You can even tap the Completed toggle in the focus area, and you’ll see both elements reflect the change in status.
Trying Out Another Way to Drop
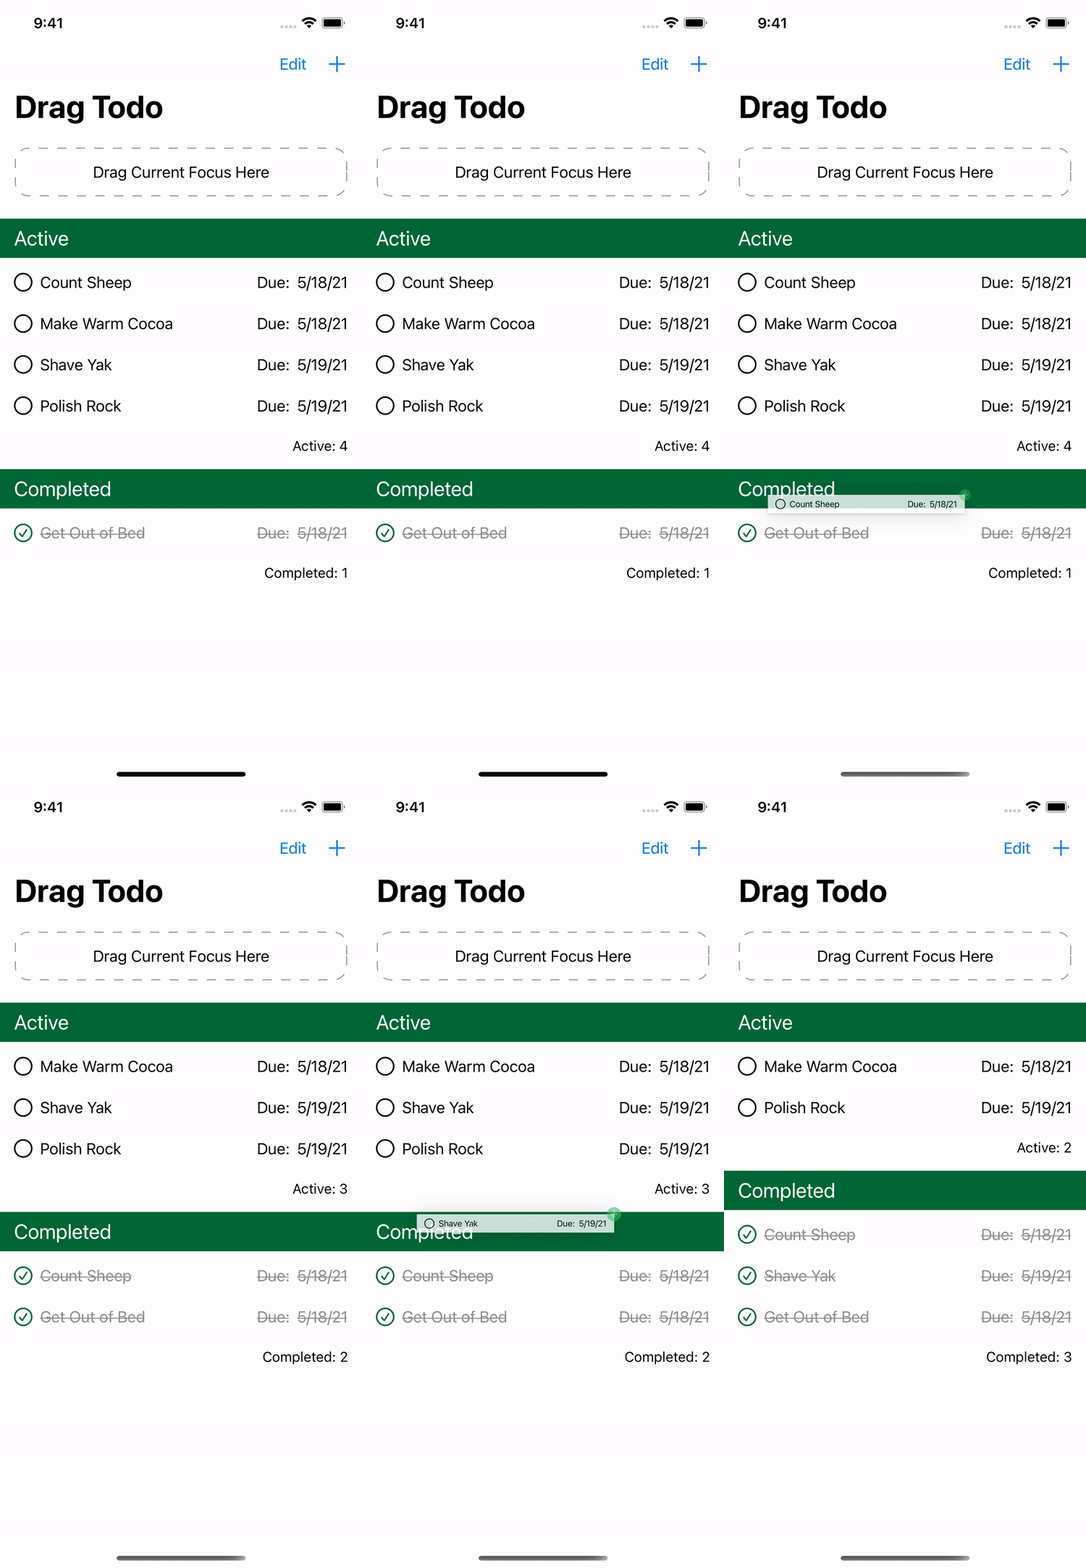
Using DropDelegate isn’t the only way to support dropping. To demonstrate another approach, you’ll add support for dropping an active TODO into the Completed section and marking it as completed at the same time.
Open ContentView.swift and add the following modifier to the CompletedTodoView:
// 1
.onDrop(of: [TodoItem.typeIdentifier], isTargeted: nil) { itemProviders in
  // 2
  for itemProvider in itemProviders {
    itemProvider.loadObject(ofClass: TodoItem.self) { todoItem, _ in
      // 3
      guard let todoItem = todoItem as? TodoItem else { return }
      DispatchQueue.main.async {
        todoList.updateTodo(withId: todoItem.id, isCompleted: true)
      }
    }
  }
  // 4
  return true
}
This might look familiar:
- Instead of
onDrop(of:delegate:), useonDrop(of:isTargeted:perform:), which allows you to perform the drop operation directly inside the closure. - For each
NSItemProviderpassed to the closure, load the TODO, as before, by usingloadObject(ofClass:completionHandler:). - Attempt to cast the loaded object to a
TodoItem. If that succeeds, callupdateTodo(withId:isCompleted:)to updateTodoItemon the main thread. - Return
trueto tell the system you’ve handled the drop event.
Build and run. Drop any active item into the completed list, and you’ll see it marked as completed.
Congratulations! By now, you should have a good handle on how to add editing items and dragging and dropping to your own apps.
Where to Go From Here
Access the final project using the Download Materials button at the top or bottom of this tutorial.
In this tutorial, you explored SwiftUI’s support for user management of the content displayed inside a list. You implemented edit and delete operations and added drag and drop for your custom data type to your app. You also studied the trade-offs on some platforms when using drag and drop.
If you want to explore the concepts in this tutorial further, here are some good resources:
- Chapter 11, “Lists & Navigation” in SwiftUI by Tutorials covers creating and displaying data using lists in more depth.
- The 2019 WWDC presentation SwiftUI Essentials explains Apple’s guidelines on how views and lists fit together.
- You’ll find more on drag and drop in our Drag and Drop Tutorial for iOS and in our intermediate-level tutorial Drag and Drop Tutorial for SwiftUI.
If you have any questions or comments, ask in the forum below!

