Drag and Drop Editable Lists: Tutorial for SwiftUI
Grow your SwiftUI List skills beyond the basics. Implement editing, moving, deletion and drag-and-drop support. Then, learn how custom views can support draggable content. By Bill Morefield.
Lists show up everywhere in mobile apps and users expect to interact with their content in standard ways. SwiftUI’s lists offer a simple, ordered display of data with each item on a separate row. The List view handles much of the organization and structure for list data display on each platform, although as you’ll see throughout this tutorial, there’s still some work for you to do.
In this article, you’ll:
- Use a SwiftUI
Listview to add the ability to edit a list to an app called Drag Todo. - Give the app drag-and-drop support by adding a custom class.
- See the trade-offs and decisions you’ll need to make when you use both functionalities.
List and ForEach views. New to SwiftUI? Start with SwiftUI: Getting Started, read the developer documentation for List and ForEach, then come back here.Now, it’s time to jump in.
Getting Started
Use the Download Materials button at the top or bottom of this tutorial to download the starter project.
Build and run the Xcode project in the starter directory.

Open TodoItem.swift in the Models group. For this tutorial, the app starts with several pre-loaded TODO items, each consisting of a unique ID (not displayed), name, due date and completion status.
You’ll add new items with the Plus button at the top trailing edge of the app. Each item shows a circle you can tap to toggle the completion status. The app stores the TODO items in an array and doesn’t persist data.
ContentView is the main screen of Drag Todo. Open ContentView.swift in the Views group to examine its structure. You’ll see a NavigationView containing a VStack at the top level of the app. The app displays the TODO items within a List view.
The first section of the List is ActiveTodoView. Open ActiveTodoView.swift and you’ll see it contains header and footer views surrounding a ForEach loop.
Why use a ForEach inside a List? Not only does it give you more flexibility, but the editing features you’ll use in this tutorial require it.
You’ll also use two modifiers, onDelete(perform:) and onMove(perform:), that only work with a ForEach view and not the List view.
Understanding Data Flow in Drag Todo
Look through Drag Todo’s code and you’ll notice a class called TodoList. This is the object that manages the collection of TodoItems the user sees and interacts with.
Open TodoList.swift in the Models group and look at what’s happening inside.
The class itself conforms to ObservableObject, causing it to expose published events when @Published properties change. SwiftUI then uses this publisher to reflect the state in the UI.
AppMain.swift injects the TodoList.sampleData() instance into the view hierarchy via environmentObject(_:). Each view accesses the object by declaring a property with the same type using the @EnvironmentObject property wrapper.
TodoList has three main properties:
-
items: A dictionary holding a reference to each
TodoItem. You can access each reference easily via its identifier. -
activeItemIds: An array of identifiers representing active (incomplete)
TodoItems. You’ll use the ordered array to reflect the contents of the Active section you’ll display inContentView. -
completedItemIds: The same as
activeItemIds, except it handles the items in the Completed section.
The rest of the class provides helper methods for accessing items, adding new items and updating an item’s completion state.
Editing Lists
Since the dawn of iOS, lists have supported easy-to-implement editing functionality. Things are no different in SwiftUI with the List view.
Simple lists are straightforward to implement, but there are some interesting ways to build upon them. Over the coming sections, you’ll learn everything you need to know by adding edit support to Drag Todo.
In Drag Todo, users need to be able to work with their TODO items. For example, they need to be able to delete items they’ve completed and to move items from one list to another. You’ll start by working on removing items from lists.
Deleting Items
When deleting items within a List, you need to do two things:
- Tell SwiftUI which content to delete.
- Update your data model to reflect any deletions the user performs.
To make these things happen, you’ll add onDelete(perform:) to the ForEach view containing the items you want to delete.
This modifier has a single parameter, which is a closure. SwiftUI invokes the closure when the user attempts to delete an item from the list. The closure then receives an IndexSet containing the indices of the items the user deleted.
Before adding the modifier, you need to update TodoList to support deleting items. Open TodoList.swift and add the following method under updateTodo(withId:isCompleted:):
func deleteActiveTodos(atOffsets offsets: IndexSet) {
  // 1
  for index in offsets {
    items.removeValue(forKey: activeItemIds[index])
  }

  // 2
  activeItemIds.remove(atOffsets: offsets)
}
In this method, you do the following:
- Iterate over each index in
IndexSetand remove the associatedTodoItemfrom the dictionary. - Remove the IDs corresponding to those items from
activeItemIds.
To use this new method, open ActiveTodoView.swift and add the following code immediately below the ForEach view:
.onDelete(perform: todoList.deleteActiveTodos(atOffsets:))
This implements onDelete(perform:) to define the delete action for the view. When you implement this modifier, SwiftUI knows you support deleting items and calls the new deleteActiveTodos(atOffsets:) to perform the deletion.
That’s all. It’s that simple to allow the user to delete items from the lists in your app! :]
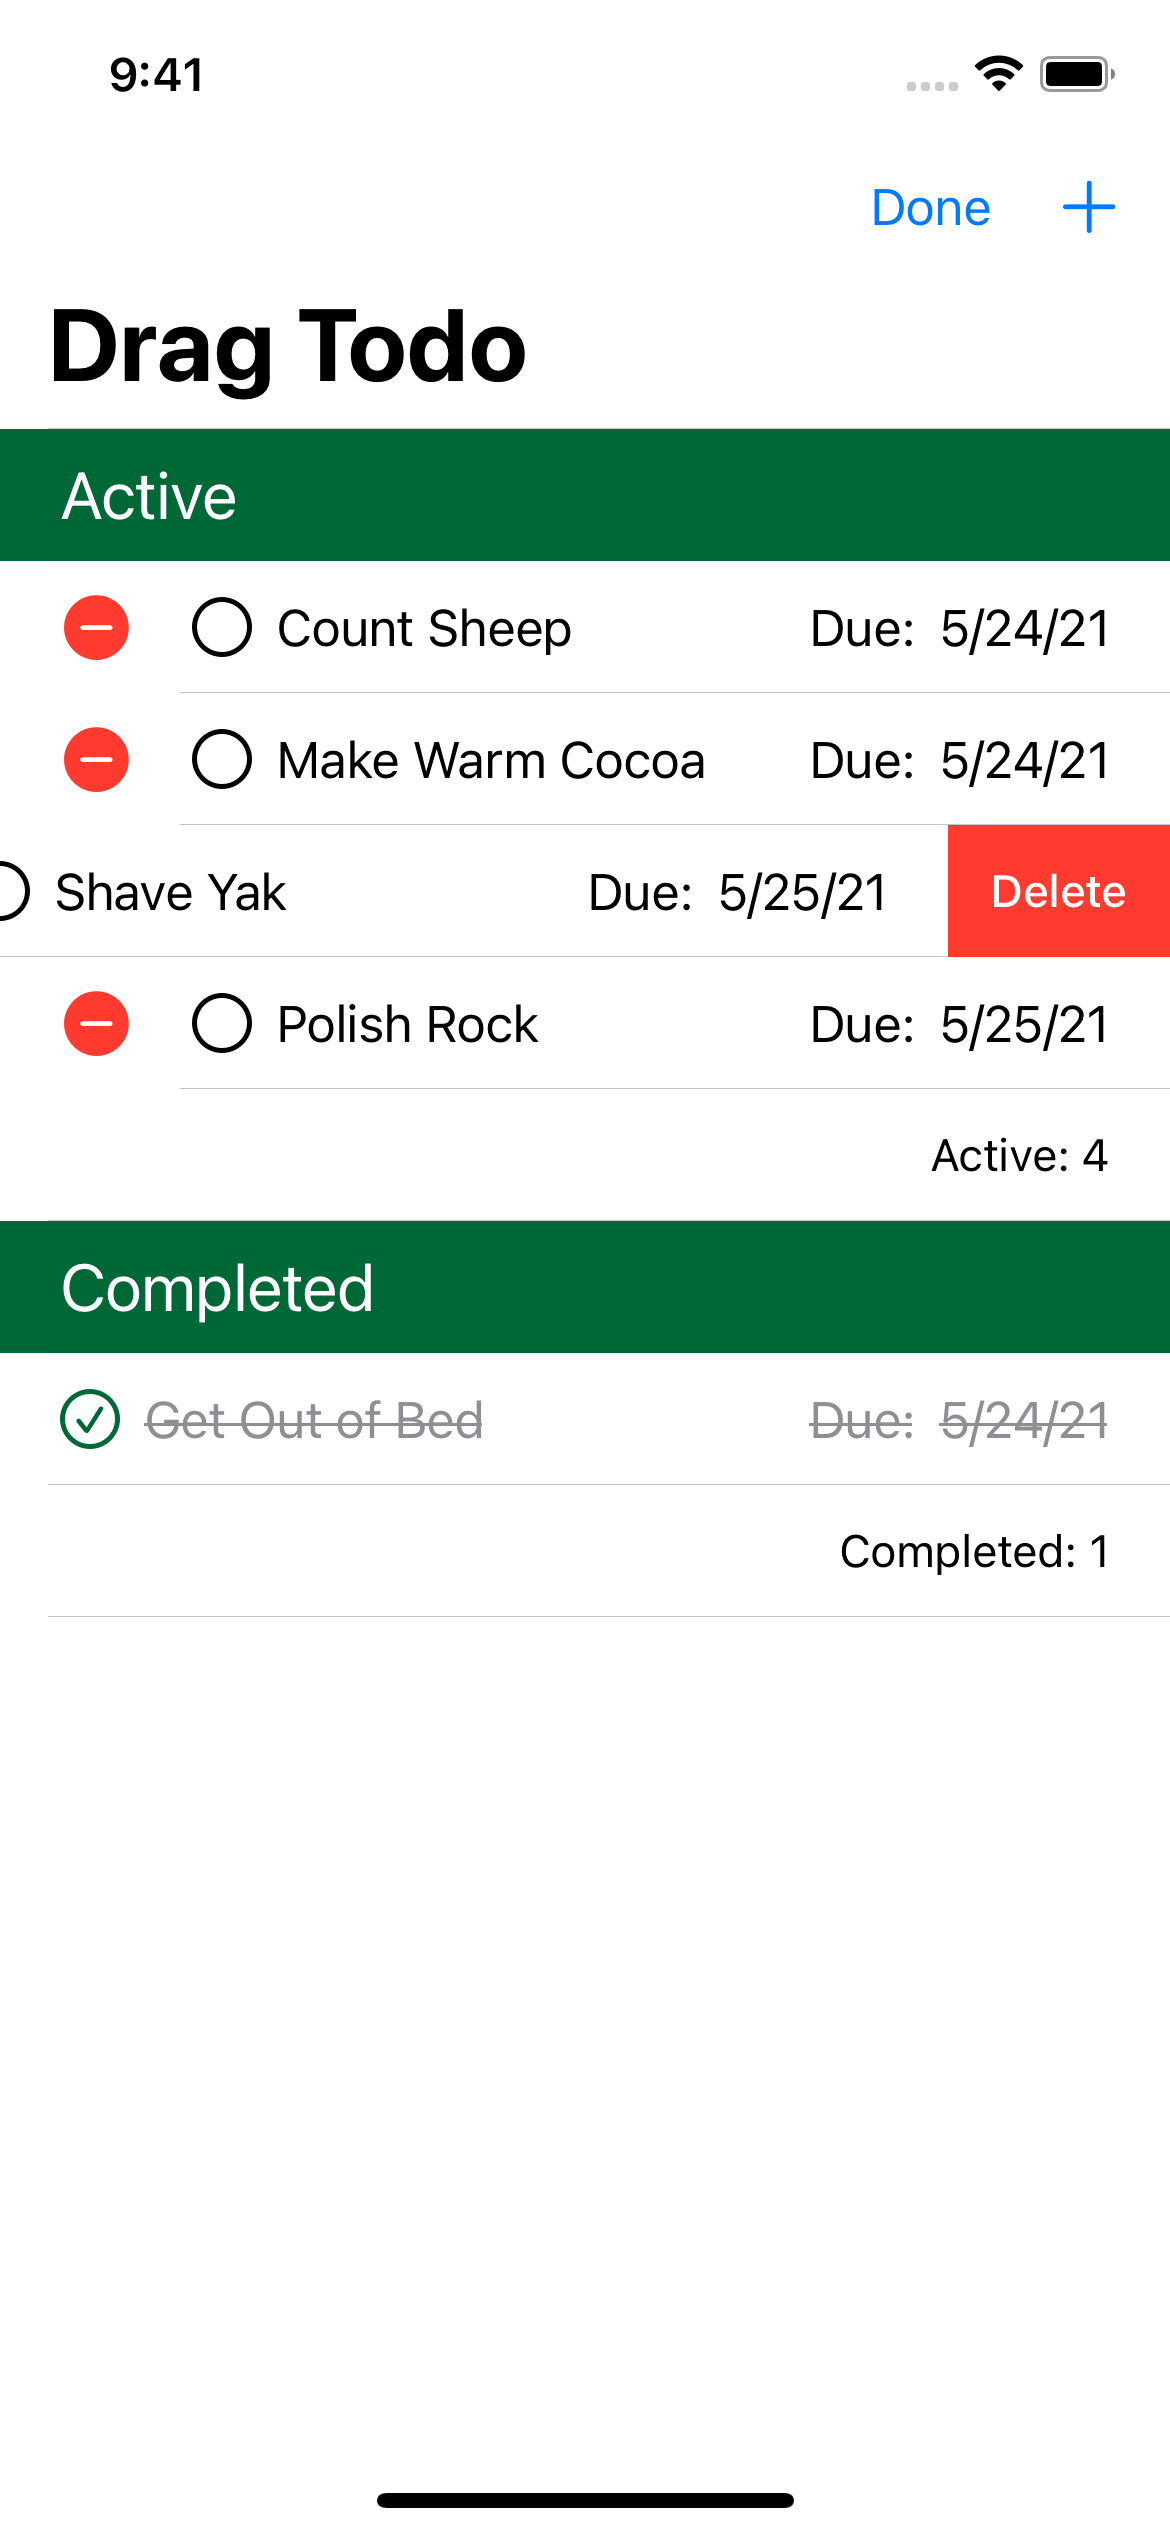
Build and run to try it out:

Swipe from right to left on one of the items in the active list and a Delete button appears. Tap it to remove the TODO item from TodoList.
Using EditButton
While swiping each item is nice, users aren’t likely to discover this function if they aren’t already familiar with it. Fortunately, there’s a well-established design pattern that provides a dedicated mode for editing.
SwiftUI makes it simple to adopt by providing the EditButton view.
EditButton view, visit the official documentation.Open ContentView.swift and look for toolbar. Add the following code immediately before the Button view:
EditButton()
This adds the familiar Edit button to the left of the Plus.
Build and run. You’ll see a new button in the navigation bar. Tap Edit and the list will transition into edit mode.
Since you’ve told the List your Active section supports deletion, each item in the list shows a red circle. Tapping that circle then shows the Delete button you saw earlier. Tapping Done exits edit mode.
At this point, it might not be clear how EditButton and List work together. Don’t worry; you’ll learn more about this later.
Now, users can delete items from their TODO lists. Next, you’ll see how to let users rearrange items by moving them from one list to another.