Drag and Drop Editable Lists: Tutorial for SwiftUI
Grow your SwiftUI List skills beyond the basics. Implement editing, moving, deletion and drag-and-drop support. Then, learn how custom views can support draggable content. By Bill Morefield.
Moving Items
Editing mode makes it easy to allow the user to rearrange items within a list. You only need to implement onMove(perform:) and update your data source appropriately, similar to the process for deletions.
Return to TodoList.swift and add the following method after deleteActiveTodos(atOffsets:):
func moveActiveTodos(fromOffsets source: IndexSet, toOffset destination: Int) {
  activeItemIds.move(fromOffsets: source, toOffset: destination)
}
To move elements, you need to know two things:
- Which elements to move.
- The new destination for those elements.
As with the delete method, you get an IndexSet containing the indices in the list to move. The new location is a single Int, which tells you where in the collection to place those elements.
For convenience, Swift collections include a method that supports these parameters. Call move(fromOffsets:toOffset:) on activeItemIds so the data source will update to reflect the move.
Return to ActiveTodoView.swift and add the following code beneath .onDelete(perform:):
.onMove(perform: todoList.moveActiveTodos(fromOffsets:toOffset:))
Adding this modifier tells SwiftUI your list supports reordering. You provide your method to handle the action.
Build and run. Tap Edit and you’ll now see a new move indicator to the right of each item in the list. Tap and hold the move indicator. You can now drag the item to a new position. When you release the hold, the item will snap into its new location.
Now that you’ve seen how to make the most out of List in edit mode, you’ll take advantage of it in your own views next.
Getting the Current EditMode
You’ve seen List and EditButton respond to edit mode, but what if you want to react to state changes in your own views? Well, you’re in luck! SwiftUI leans on the environment to support this functionality, and as a result, you can too!
Open ContentView.swift and add the following code at the top of the file, right after the declaration of isShowingAddTodoView:
@State private var editMode: EditMode = .inactive
Here, you define a new state property to manage the EditMode enum. You can now use this property to update your UI.
Add the following modifier to both CompletedTodoView and Button within ContentView:
.disabled(editMode.isEditing)
This code uses disabled(_:) to disable each of those views during editing.
Build and run. Tap the Edit button, and… nothing happens to either the Add button or the Completed section. You can still add new items and toggle completion status.
What’s going on?
The problem is, while you’ve defined some states for EditMode, List and EditButton are still using their own states to manage editing. To fix this, you need to inject your state into the environment so List and EditButton can use it.
Add the following line of code after toolbar(content:) and before sheet(isPresented:onDismiss:content:):
.environment(\.editMode, $editMode)
This injects the editMode state property you created earlier into the environment so child views can access it.
Build and run. As the other views update, you’ll see the expected behavior when you start or stop editing.

In the next section, you’ll explore another method of managing list content — drag and drop.
Introducing Drag and Drop
Drag and drop lets the user drag items from one location to another in a continuous gesture. SwiftUI provides an excellent framework for supporting drag and drop in your apps.
Desktop platforms like macOS have long supported these operations using the mouse. Although the touch interface and single-app focus on iOS and iPadOS make the process a bit more complicated, recent versions of these platforms added drag-and-drop support.
In the rest of this tutorial, you’ll add drag-and-drop functionality to your app and explore some of the trade-offs.
Each platform handles drag and drop in different ways. Mac and iPad support drag and drop between apps, enabling a rich set of new experiences when sharing content. On the iPhone, however, the user can only drag and drop within a single app.
You’ll only add support for drag-and-drop operations within the app in this tutorial. However, the concepts and techniques are similar for multi-app drag and drop.
You’ll begin by implementing a focus section in Drag Todo that allows the user to drag and drop TODO items onto that area.
Building a Drop Target
Create a new file to represent the drop view by highlighting the Views group, then right clicking and choosing New File… ▸ SwiftUI View and calling it FocusTodoView.swift. Replace the contents of the file with the following:
import SwiftUI

struct FocusTodoView: View {
  // 1
  @EnvironmentObject private var todoList: TodoList
  var focusId: Int?

  var body: some View {
    VStack {
      if let id = focusId, let item = todoList.items[id] {
        // 2
        Text("Current Focus")
        TodoItemView(item: item)
      } else {
        // 3
        Text("Drag Current Focus Here")
      }
    }
    // 4
    .frame(maxWidth: .infinity)
    .padding()
    // 5
    .background(
      RoundedRectangle(cornerRadius: 15)
        .strokeBorder(Color.gray, style: StrokeStyle(dash: [10]))
        .background(Color.white))
  }
}
Here’s what your new view does:
- Defines the
todoListenvironment property and holds an optional reference to focusId, anIntrepresenting the identifier of the TODO on which the user chooses to focus. - Uses the existing
TodoItemViewto display the item if thefocusIdis set and theTodoListcontains an item with that identifier. - Otherwise, displays a placeholder label to prompt the user to drag and drop a TODO item into this view.
- Sets the frame to fill the available width for the view, regardless of the width of the contents, along with some padding.
- Sets a background using rounded edges and a dashed border.
To see your custom view in action, paste the following code into the bottom of the file:
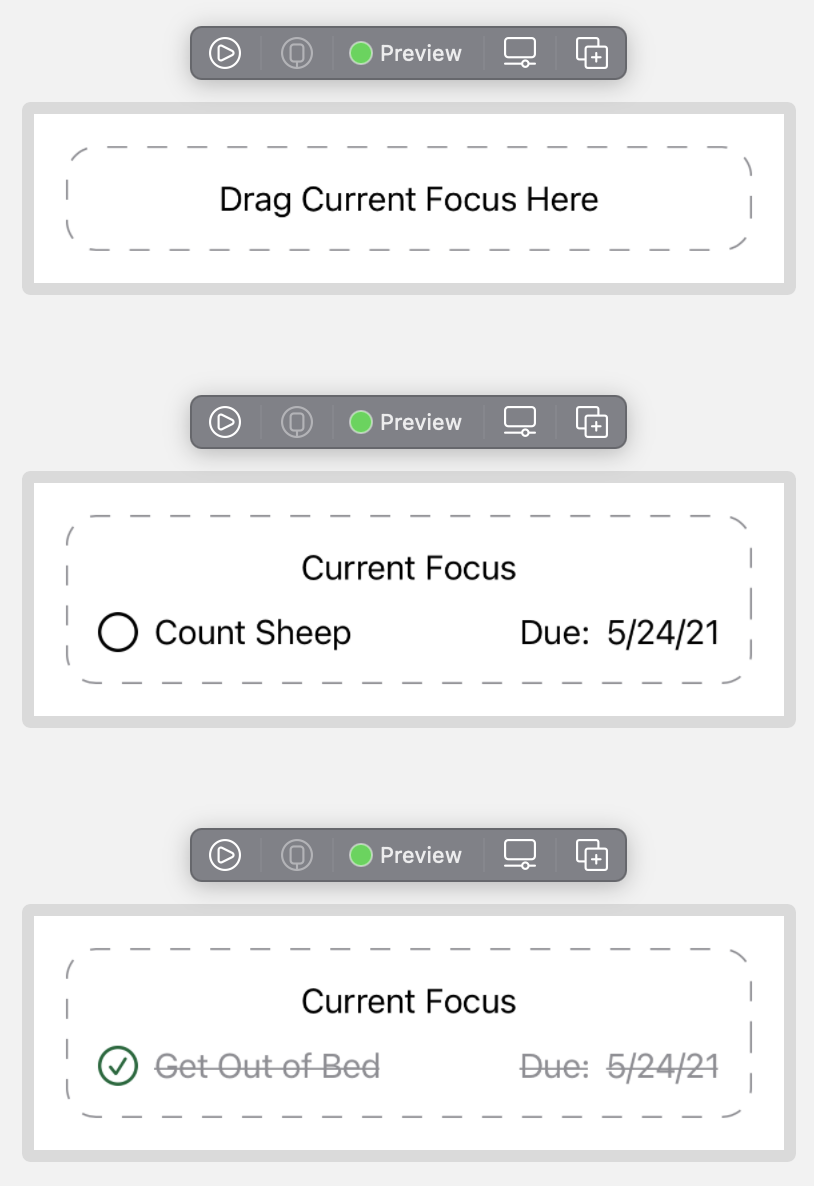
struct FocusTodoView_Previews: PreviewProvider {
  static let list = TodoList.sampleData()

  static var previews: some View {
    Group {
      FocusTodoView(focusId: nil)
      FocusTodoView(focusId: 0)
      FocusTodoView(focusId: 4)
    }
    .environmentObject(list)
    .padding()
    .frame(width: 375)
    .previewLayout(.sizeThatFits)
  }
}
Verify your custom view using Xcode Previews:
Implementing Your View
Now that you’ve created and verified the view, add it to the app.
Open ContentView.swift again and add the following property at the top of the file with the other properties:
@State private var focusId: Int?
This will hold the identifier of the focused TODO item, focusId, as state.
Next, add the following code to the VStack above List:
FocusTodoView(focusId: focusId)
  .padding()
Build and run. You’ll see your FocusTodoView sitting nicely above the content of the List:

In the next section, you’ll implement the functionality to drag and drop from the active section to the focus view.