iOS Unit Testing and UI Testing Tutorial
Learn how to add unit tests and UI tests to your iOS apps, and how you can check on your code coverage. By David Piper.
iOS unit testing isn’t glamorous, but since tests keep your sparkling app from turning into a bug-ridden piece of junk, it’s necessary. If you’re reading this tutorial, you already know you should write tests for your code and UI, but you may not know how.
You may have a working app, but you want to test changes you’re making to extend the app. Maybe you already have tests written, but aren’t sure whether they’re the right tests. Or, you’ve started working on a new app and want to test as you go.
This tutorial will show you how to:
- Use Xcode’s Test navigator to test an app’s model and asynchronous methods
- Fake interactions with library or system objects by using stubs and mocks
- Test UI and performance
- Use the code coverage tool
Along the way, you’ll pick up some of the vocabulary used by testing ninjas.
Getting Started
Start by downloading the project materials using the Download Materials button at the top or bottom of this tutorial. It includes the project BullsEye that’s based on a sample app in UIKit Apprentice. It’s a simple game of chance and luck. The game logic is in the BullsEyeGame class, which you’ll test during this tutorial.
Figuring out What to Test
Before writing any tests, it’s important to know the basics. What do you need to test?
If your goal is to extend an existing app, you should first write tests for any component you plan to change.
Generally, tests should cover:
- Core functionality: Model classes and methods and their interactions with the controller
- The most common UI workflows
- Boundary conditions
- Bug fixes
Understanding Best Practices for Testing
The acronym FIRST describes a concise set of criteria for effective unit tests. Those criteria are:
- Fast: Tests should run quickly.
- Independent/Isolated: Tests shouldn’t share state with each other.
- Repeatable: You should obtain the same results every time you run a test. External data providers or concurrency issues could cause intermittent failures.
- Self-validating: Tests should be fully automated. The output should be either “pass” or “fail”, rather than relying on a programmer’s interpretation of a log file.
- Timely: Ideally, you should write your tests before writing the production code they test. This is known as test-driven development.
Following the FIRST principles will keep your tests clear and helpful, instead of turning into roadblocks for your app.

Unit Testing in Xcode
The Test navigator provides the easiest way to work with tests. You’ll use it to create test targets and run tests against your app.
Creating a Unit Test Target
Open the BullsEye project and press Command-6 to open the Test navigator.
Click + in the lower-left corner, then select New Unit Test Target… from the menu:
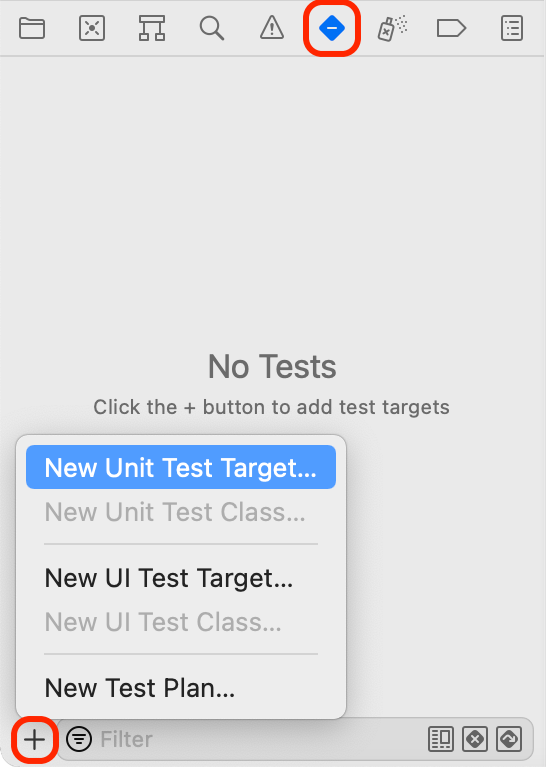
Accept the default name, BullsEyeTests, and enter com.raywenderlich as the Organization Identifier. When the test bundle appears in the Test navigator, expand it by clicking the disclosure triangle and click BullsEyeTests to open it in the editor.

The default template imports the testing framework, XCTest, and defines a BullsEyeTests subclass of XCTestCase, with setUpWithError(), tearDownWithError() and example test methods.
You can run the tests in three ways:
- Product ▸ Test or Command-U. Both of these run all test classes.
- Click the arrow button in the Test navigator.
- Click the diamond button in the gutter.
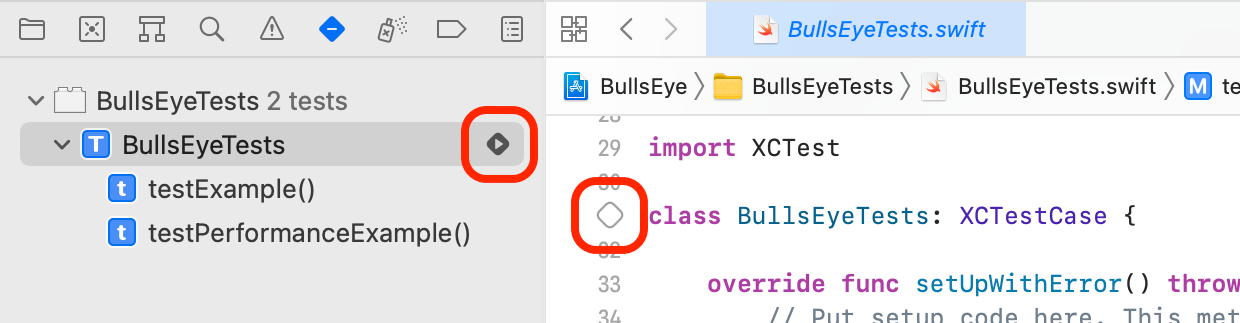
You can also run an individual test method by clicking its diamond in the Test navigator or in the gutter.
Try the different ways to run tests to get a feeling for how long it takes and what it looks like. The sample tests don’t do anything yet, so they run really fast!
When all tests have succeeded, the diamonds will turn green and show check marks. Click the gray diamond at the end of testPerformanceExample() to open the Performance Result:
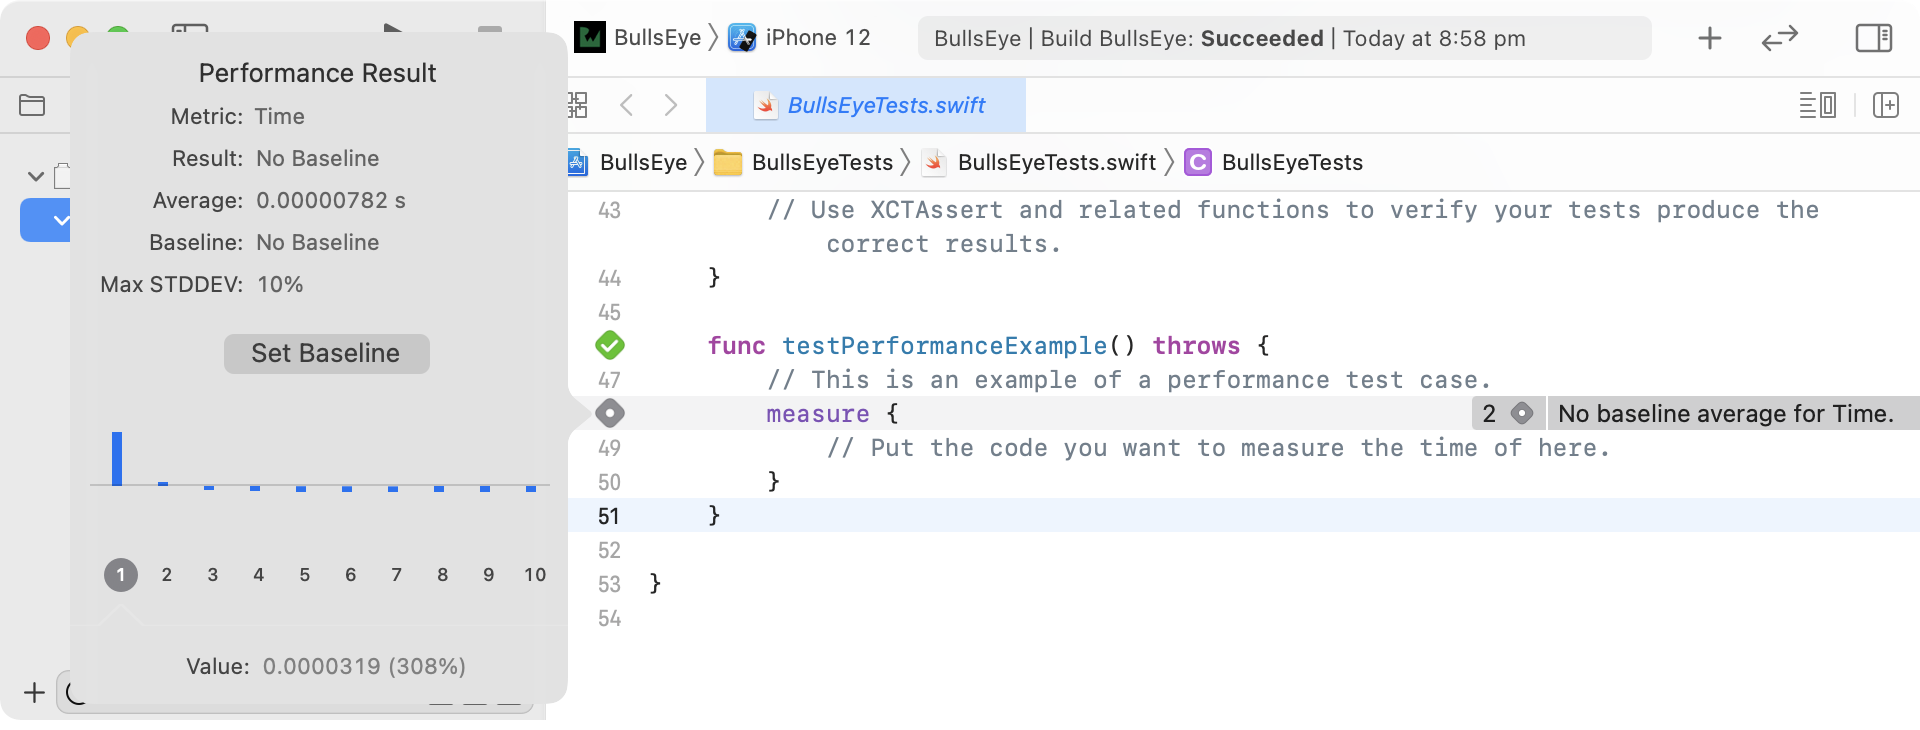
You don’t need testPerformanceExample() or testExample() for this tutorial, so delete them.
Using XCTAssert to Test Models
First, you’ll use XCTAssert functions to test a core function of BullsEye’s model: Does BullsEyeGame correctly calculate the score for a round?
In BullsEyeTests.swift, add this line below import XCTest:
@testable import BullsEye
This gives the unit tests access to the internal types and functions in BullsEye.
At the top of BullsEyeTests, add this property:
var sut: BullsEyeGame!
This creates a placeholder for BullsEyeGame, which is the System Under Test (SUT), or the object this test case class is concerned with testing.
Next, replace the contents of setUpWithError() with this:
try super.setUpWithError()
sut = BullsEyeGame()
This creates BullsEyeGame at the class level, so all the tests in this test class can access the SUT object’s properties and methods.
Before you forget, release your SUT object in tearDownWithError(). Replace its contents with:
sut = nil
try super.tearDownWithError()
setUpWithError() and releasing it in tearDownWithError() to ensure every test starts with a clean slate. For more discussion, check out Jon Reid’s post on the subject.Writing Your First Test
Now you’re ready to write your first test!
Add the following code to the end of BullsEyeTests to test whether you calculate the expected score for a guess:
func testScoreIsComputedWhenGuessIsHigherThanTarget() {
  // given
  let guess = sut.targetValue + 5

  // when
  sut.check(guess: guess)

  // then
  XCTAssertEqual(sut.scoreRound, 95, "Score computed from guess is wrong")
}
A test method’s name always begins with test, followed by a description of what it tests.
It’s good practice to format the test into given, when and then sections:
-
Given: Here, you set up any values needed. In this example, you create a
guessvalue so you can specify how much it differs fromtargetValue. -
When: In this section, you’ll execute the code being tested: Call
check(guess:). -
Then: This is the section where you’ll assert the result you expect with a message that prints if the test fails. In this case,
sut.scoreRoundshould equal 95, since it’s 100 − 5.
Run the test by clicking the diamond icon in the gutter or in the Test navigator. This builds and runs the app, and the diamond icon will change to a green check mark! You’ll also see a momentary pop-up appear over Xcode that also indicates success that looks like this:
