iOS Unit Testing and UI Testing Tutorial
Learn how to add unit tests and UI tests to your iOS apps, and how you can check on your code coverage. By David Piper.
Faking Objects and Interactions
Asynchronous tests give you confidence that your code generates correct input to an asynchronous API. You might also want to test that your code works correctly when it receives input from URLSession, or that it correctly updates the UserDefaults database or an iCloud container.
Most apps interact with system or library objects — objects you don’t control. Tests that interact with these objects can be slow and unrepeatable, violating two of the FIRST principles. Instead, you can fake the interactions by getting input from stubs or by updating mock objects.
Employ fakery when your code has a dependency on a system or library object. Do this by creating a fake object to play that part and injecting this fake into your code. Dependency Injection by Jon Reid describes several ways to do this.
Faking Input From Stub
Now, check that the app’s getRandomNumber(completion:) correctly parses data downloaded by the session. You’ll fake the session of BullsEyeGame with stubbed data.
Go to the Test navigator, click + and choose New Unit Test Class…. Give it the name BullsEyeFakeTests, save it in the BullsEyeTests directory and set the target to BullsEyeTests.

Import the BullsEye app module just below the import statement:
@testable import BullsEye
Now, replace the contents of BullsEyeFakeTests with this:
var sut: BullsEyeGame!

override func setUpWithError() throws {
  try super.setUpWithError()
  sut = BullsEyeGame()
}

override func tearDownWithError() throws {
  sut = nil
  try super.tearDownWithError()
}
This declares the SUT, which is BullsEyeGame, creates it in setUpWithError() and releases it in tearDownWithError().
The BullsEye project contains the supporting file URLSessionStub.swift. This defines a simple protocol, named URLSessionProtocol, with a method to create a data task with a URL. It also defines URLSessionStub, which conforms to this protocol. Its initializer lets you define the data, response and error the data task should return.
To set up the fake, go to BullsEyeFakeTests.swift and add a new test:
func testStartNewRoundUsesRandomValueFromApiRequest() {
  // given
  // 1
  let stubbedData = "[1]".data(using: .utf8)
  let urlString =
    "http://www.randomnumberapi.com/api/v1.0/random?min=0&max=100&count=1"
  let url = URL(string: urlString)!
  let stubbedResponse = HTTPURLResponse(
    url: url,
    statusCode: 200,
    httpVersion: nil,
    headerFields: nil)
  let urlSessionStub = URLSessionStub(
    data: stubbedData,
    response: stubbedResponse,
    error: nil)
  sut.urlSession = urlSessionStub
  let promise = expectation(description: "Value Received")

  // when
  sut.startNewRound {
    // then
    // 2
    XCTAssertEqual(self.sut.targetValue, 1)
    promise.fulfill()
  }
  wait(for: [promise], timeout: 5)
}
This test does two things:
- You set up the fake data and response and create the fake session object. Finally, inject the fake session into the app as a property of
sut. - You still have to write this as an asynchronous test because the stub is pretending to be an asynchronous method. Check whether calling
startNewRound(completion:)parses the fake data by comparingtargetValuewith the stubbed fake number.
Run the test. It should succeed pretty quickly because there isn’t any real network connection!
Faking an Update to Mock Object
The previous test used a stub to provide input from a fake object. Next, you’ll use a mock object to test that your code correctly updates UserDefaults.
This app has two game styles. The user can either:
- Move the slider to match the target value.
- Guess the target value from the slider position.
A segmented control in the lower-right corner switches the game style and saves it in UserDefaults.
Your next test checks that the app correctly saves the gameStyle property.
Add a new test class to the target BullsEyeTests and name it BullsEyeMockTests. Add the following below the import statement:
@testable import BullsEye

class MockUserDefaults: UserDefaults {
  var gameStyleChanged = 0
  override func set(_ value: Int, forKey defaultName: String) {
    if defaultName == "gameStyle" {
      gameStyleChanged += 1
    }
  }
}
MockUserDefaults overrides set(_:forKey:) to increment gameStyleChanged. Similar tests often set a Bool variable, but incrementing Int gives you more flexibility. For example, your test could check that the app only calls the method once.
Next, in BullsEyeMockTests declare the SUT and the mock object:
var sut: ViewController!
var mockUserDefaults: MockUserDefaults!
Replace setUpWithError() and tearDownWithError() with:
override func setUpWithError() throws {
  try super.setUpWithError()
  sut = UIStoryboard(name: "Main", bundle: nil)
    .instantiateInitialViewController() as? ViewController
  mockUserDefaults = MockUserDefaults(suiteName: "testing")
  sut.defaults = mockUserDefaults
}

override func tearDownWithError() throws {
  sut = nil
  mockUserDefaults = nil
  try super.tearDownWithError()
}
This creates the SUT and the mock object and injects the mock object as a property of the SUT.
Now, replace the two default test methods in the template with this:
func testGameStyleCanBeChanged() {
  // given
  let segmentedControl = UISegmentedControl()

  // when
  XCTAssertEqual(
    mockUserDefaults.gameStyleChanged,
    0,
    "gameStyleChanged should be 0 before sendActions")
  segmentedControl.addTarget(
    sut,
    action: #selector(ViewController.chooseGameStyle(_:)),
    for: .valueChanged)
  segmentedControl.sendActions(for: .valueChanged)

  // then
  XCTAssertEqual(
    mockUserDefaults.gameStyleChanged,
    1,
    "gameStyle user default wasn't changed")
}
The when assertion is that the gameStyleChanged flag is 0 before the test method changes the segmented control. So, if the then assertion is also true, it means set(_:forKey:) was called exactly once.
Run the test. It should succeed.
UI Testing in Xcode
UI testing lets you test interactions with the user interface. UI testing works by finding an app’s UI objects with queries, synthesizing events and then sending the events to those objects. The API enables you to examine a UI object’s properties and state to compare them against the expected state.
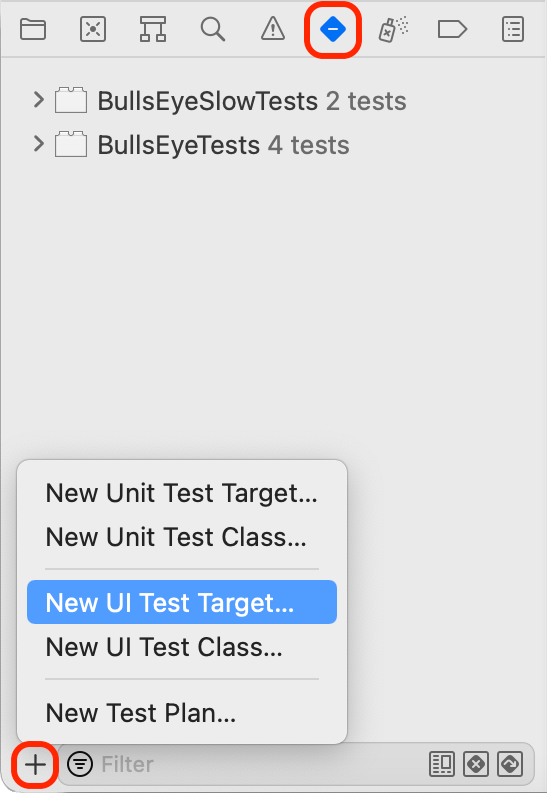
In the Test navigator, add a new UI Test Target. Check that the Target to be Tested is BullsEye, and then accept the default name BullsEyeUITests.
Open BullsEyeUITests.swift and add this property at the top of the BullsEyeUITests class:
var app: XCUIApplication!
Remove tearDownWithError() and replace the contents of setUpWithError() with the following:
try super.setUpWithError()
continueAfterFailure = false
app = XCUIApplication()
app.launch()
Remove the two existing tests and add a new one called testGameStyleSwitch().
func testGameStyleSwitch() {
}
Open a new line in testGameStyleSwitch() and click the red Record button at the bottom of the editor window:

This opens the app in the simulator in a mode that records your interactions as test commands. Once the app loads, tap the Slide segment of the game style switch and the top label. Click the Xcode Record button again to stop the recording.
You now have the following three lines in testGameStyleSwitch():
let app = XCUIApplication()
app.buttons["Slide"].tap()
app.staticTexts["Get as close as you can to: "].tap()
The Recorder has created code to test the same actions you tested in the app. Send a tap to the game style segmented control and the top label. You’ll use those as a base to create your own UI test. If you see any other statements, just delete them.
The first line duplicates the property you created in setUpWithError(), so delete that line. You don’t need to tap anything yet, so also delete .tap() at the end of lines 2 and 3. Now, open the little menu next to ["Slide"] and select segmentedControls.buttons["Slide"].

You should be left with:
app.segmentedControls.buttons["Slide"]
app.staticTexts["Get as close as you can to: "]
Tap any other objects to let the recorder help you find the code you can access in your tests. Now, replace those lines with this code to create a given section:
// given
let slideButton = app.segmentedControls.buttons["Slide"]
let typeButton = app.segmentedControls.buttons["Type"]
let slideLabel = app.staticTexts["Get as close as you can to: "]
let typeLabel = app.staticTexts["Guess where the slider is: "]
Now that you have names for the two buttons in the segmented control and the two possible top labels, add the following code below:
// then
if slideButton.isSelected {
  XCTAssertTrue(slideLabel.exists)
  XCTAssertFalse(typeLabel.exists)

  typeButton.tap()
  XCTAssertTrue(typeLabel.exists)
  XCTAssertFalse(slideLabel.exists)
} else if typeButton.isSelected {
  XCTAssertTrue(typeLabel.exists)
  XCTAssertFalse(slideLabel.exists)

  slideButton.tap()
  XCTAssertTrue(slideLabel.exists)
  XCTAssertFalse(typeLabel.exists)
}
This checks whether the correct label exists when you tap() on each button in the segmented control. Run the test — all the assertions should succeed.