Xcode Server for iOS: Getting Started
In this tutorial, you’ll learn how to install and configure Xcode Server so you can use it for Continuous Integration. By Adam Rush.
Integrations
In CI terms, an Integration is a name given to a single run. In Xcode Server terms, this will be when the Xcode Bot meets the requirements that you set when creating the bot. Recall that you specified to trigger an integration when there is a commit to the GitHub repository.
So if your Xcode Bot has run 12 integrations, it means you have built the project 12 times.
Creating your First Integration
With that in mind, it’s time to continue with the tutorial and get the first integration triggered!
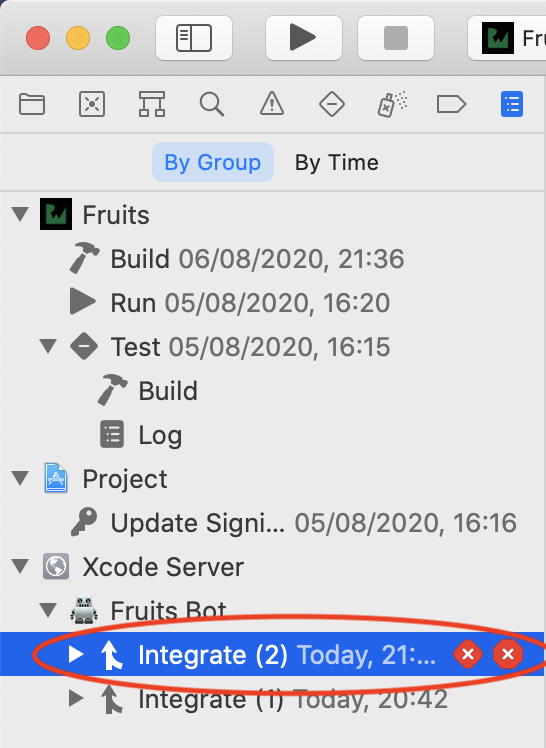
Open the Report navigator in Xcode.

You might already be familiar with this panel, but essentially it displays the latest reports of builds, the running of test targets, and also now your integrations from the Xcode Server.
Click your Xcode Bot.

This screen shows some statistics for the Xcode Bot. You can see here a history of builds and tests, along with the stats such as the total number of integrations run and the success rate. Once you start running your Xcode Bot more regularly, this screen will fill with lots of useful data which you can use to see how your builds are performing.
Expand the Fruits Bot row in the Report navigator.
Now click on the row that was revealed, i.e. Integrate (1).

This is the screen that shows you all the information for a specific integration. It will tell you if the integration is in progress or finished. It will also tell you if there were any warnings, errors, analysis failures or test failures.
If the integration is still processing then you can:
- Cancel Integration. This stops the integration and marks it as “Canceled”.
- View Screen. This allows you to screen share with the machine to watch the build in progress. This is super useful if the machine is shared across the team.
Due to your configuration, you also specified you wanted an archive, which is visible underneath the “Build Results” heading.

You’re going to deep dive further into this display and what it means, but for now: Congratulations! You’ve just got your Xcode Bot running your first successful integration!
Running Unit Tests and UI Tests
A good use case for Continuous Integration is unit tests and UI tests. Every time you check in new code, the CI server will kick in and execute your test suite. If you made an error and tests are failing, you’ll know right there and then that your recent changes broke something, allowing you to fix it while you still have the scenario fresh in your memory.
Xcode Server has full support for this and can provide additional information like code coverage.
In the project Fruits, you have some basic unit and UI tests that you’re going to get your Xcode Bot to execute for you.
Click Edit Bot on the Integration screen.

Click Configuration, check the Test box and make sure Code Coverage is set to Enabled

Also you’re going to ensure that the tests run on both an iPhone simulator and an iPad simulator because you want to test both device classes.
Select the Devices tab and then select Specific iOS Devices and Simulators. Select an iPhone and an iPad simulator from the list.

Click Done, and then click Integrate to start a new integration.

Using your new changes, the integration will build your project and run your unit and UI tests across iPhone/iPad.
Pulling Out Build Reports
Xcode Server will generate build reports and these are called Integration Reports. This means you can interrogate each integration and pull out specific build reports relating to the integration.
Select your newly minted integration which will be called Integrate (2).
If the build is still progressing then you will be able to see the progress from the integration screen. Sit and wait while it finishes — you may want to make yourself a cup of tea because it can take quite a long time to run all the tests!
When it’s finished you might notice that you have just encountered your first failing integration. Try not to panic, because this is quite normal. In fact, once you get this fully operational, this will be great for you to spot issues before your app is ready for the store. So, what went wrong?
Expand Integrate (2) in the Report navigator.

Now within the integration, you should see Tests, Coverage, Commits and Logs. You can really start digging into the details for this particular integration, and this is very useful when something goes wrong.
Inspecting Failed Tests
You should be able to see quickly that one test failed. Click Tests.

You can see a list of all the unit tests alongside the UI tests, and you can see one of the UI tests has failed, but only on iPad. You’re probably thinking (especially because it’s failing only on the iPad): “Is it something to do with device size?”
Click the disclosure triangle next to the iPad device.

Now, expand the Assertion Failure and hover on the Automatic Screenshot then click the “eye” icon (you might be familiar with this icon for QuickView on macOS).

XCUITesting has a built-in screenshot capture and in true Apple style, it’s displayed directly here within your Xcode Bot (how cool is that!). As you can see, the list of Fruits is empty, which explains why this UI test has failed.
Fixing the Error
You are going to make a code change to Fruits to get this failing UI test succeeding again.
Open ContentView.swift and replace body with the following:
var body: some View {
  NavigationView {
    List(viewModel.fruits) { fruit in
      FruitRow(fruit: fruit)
    }
    .onAppear {
      viewModel.loadFruits()
    }
    .navigationBarTitle("Fruits")
  }.navigationViewStyle(StackNavigationViewStyle())
}
In SwiftUI, when running on iPad, the default style of NavigationView will be a SplitView. You can disable this by setting the NavigationViewStyle to a StackNavigationViewStyle as is done in the last line.
Running the Integration Again
OK, that was an easy fix. But how do you tell the Bot that things have changed?
Remember that the Xcode Server works with code in the repository you created in the beginning of this tutorial. So you need to make a commit, which Xcode Server will then pick up on and run an integration as usual.
So make a commit now with your new and improved code. You can do this via Xcode, on the command line or in whatever git GUI you normally use.
Then go back to your Report navigator and run your Bot again by clicking on Fruits Bot in the Report navigator an then Integrate.

All your XCUITests now pass, and the integration was successful! Congratulations — you have successfully set up an Xcode Bot and run your first few integrations on your shiny new CI system!