Xcode Server for iOS: Getting Started
In this tutorial, you’ll learn how to install and configure Xcode Server so you can use it for Continuous Integration. By Adam Rush.
No matter if you’re part of a large team of iOS engineers or a solo indie developer, Continuous Integration (CI) can make your development workflow rapid and consistent, allowing you to spend more time on the thing you really love — writing beautiful code. In this tutorial, you’ll learn all about how to do this with Xcode Server.
In the real world, if you need to maintain a consistent approach to building something, you almost always rely on some form of automation. If you’re producing a batch of cakes, for example, and you want to maintain the same consistent taste and texture, it’s likely there will be some kind of automation involved to make sure that the same recipe and the same cooking techniques are used every time to produce the same consistent and delicious cake.
Continuous Integration (CI for short) is the name given to this approach in software development. It’s a way to automate running builds of your iOS apps over and over as you’re developing your code. Usually you run the builds on a dedicated CI server, which might be a physical machine or could be a shared machine in the cloud. The CI server will build your app and run tests each time you commit code. That way, you will instantly know when something is broken and be able to fix it straight away.
Continuous Integration comes in many flavors (just like those delicious cakes mentioned above), and in this tutorial you’re going to explore Apple’s cloud-based Xcode Server. You will learn how to:
- Set up Xcode Server
- Set up your first Bot
- Run Integrations on every commit
- Run your tests suite in Integrations
Time to get those Bots working!

Getting Started
For this tutorial, you’ll be working with Fruits, a very simple SwiftUI app listing fruits because the world clearly needs more fruit-listing apps :]
Therefore, feel free to download the sample project using the Download Materials button at the top or button of this tutorial to browse the code, but the first step in this tutorial is to fork an already existing repository to get your own code under source control.
This tutorial also assumes that you know how to make commits to a Git repository. If you would like to get up to speed with Git then head over to our beginner Git tutorial.
To get Xcode Server running, you need to have the project under source control so start by setting this up. In this tutorial, you’re going to use GitHub but feel free to use your preference — the logic remains the same.
Forking the Repository
In GitHub, a fork is your own copy of a repository. You can make changes to a fork without affecting the original. You are going to create a fork of Fruits so you can make a few changes.
Log in to GitHub, then visit the Fruits repository and click the Fork button at the top right.
Once you have Fruits forked, you will clone it to your local workstation. Click the green Code button, then click the clipboard icon to add the URL to your clipboard.
Next, open Terminal and type the following commands, substituting the URL for your repository:
# 1
mkdir ~/Fruits
# 2
cd ~/Fruits
# 3
git clone [The-Repository-URL-You-Just-Copied-Here] .
These commands:
- Create a directory in the root of your home directory to hold your code.
- Switch to the new directory.
- Clone the repository into the new directory. Watch out for the ending space and period because both are needed.
You now have a copy of the code in your local workspace.
Next, open Fruits.xcodeproj and build and run.

Congratulations, you now have a local version of Fruits ready for automation!
Setting Up Xcode Server
There are two parts to getting Xcode Server completely up and running.
- Enabling the server.
- Configuring the Integration, which is done through an Xcode Bot.
This tutorial will get you set up with a local Xcode Server, but in the real world, you’ll likely want to host this somewhere other than your own personal computer. For example, you might want to have a Mac Mini that you can share across the team, or you could choose a cloud-based setup.
Don’t panic though: Once you have the local version, it’s very easy to migrate to a hosted solution.
Enabling Xcode Server
Before you begin, you must enable Xcode Server inside Xcode.
Click Xcode then Preferences.
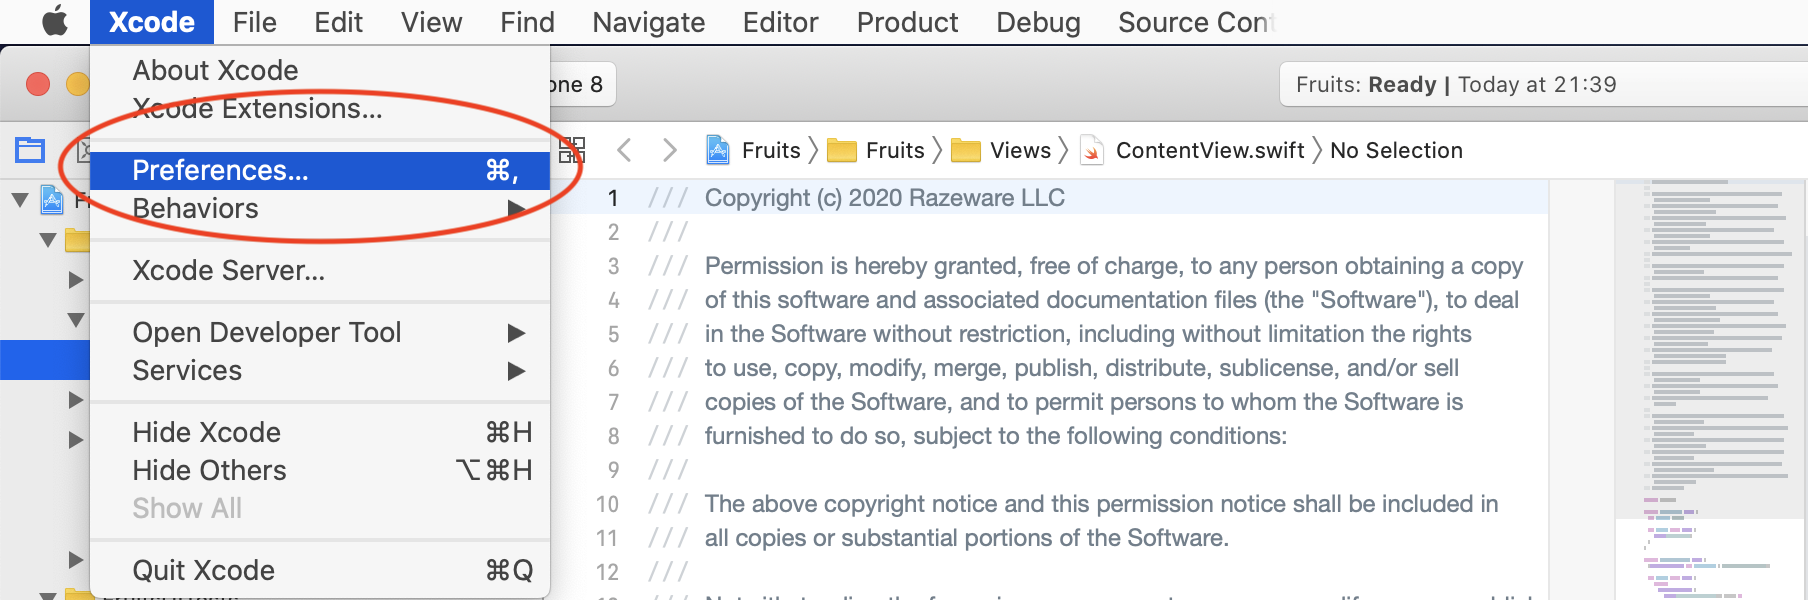
Click Server & Bots.

At the top right, toggle Xcode Server to the on position

Xcode now presents a pop-up to choose which user will act as the Integration User.

If you are installing Xcode Server on a dedicated CI/build server, it’s recommended to use a brand new User for this. Because you are running Xcode Server on your local machine in this article, you’ll use your existing user account, so select your own user account in the drop-down menu.
Xcode now installs various tools required to run a local version of Xcode Server. This can take awhile, so this is a good time for a peak behind the curtain.
Seeing How Xcode Server Works
While you wait, it’s time to cover some theory behind Xcode Server and what’s happening under the hood.
Right now, Xcode Server is currently running on your local machine. Behind the scenes, it’s created a special set of services to run the Xcode Server. You can see these for yourself. Let’s go ahead and do that right now.
Open Terminal and run the following command:
open /Applications/Xcode.app/Contents/Developer/usr/share/xcs
This is all the components of Xcode Server running locally on your machine. This is the whole setup generated when you turned on Xcode Server from within Xcode. The best part is that this is all available to customize to your heart’s content. You can make changes as you wish, including to all the dashboards, to suit your needs.
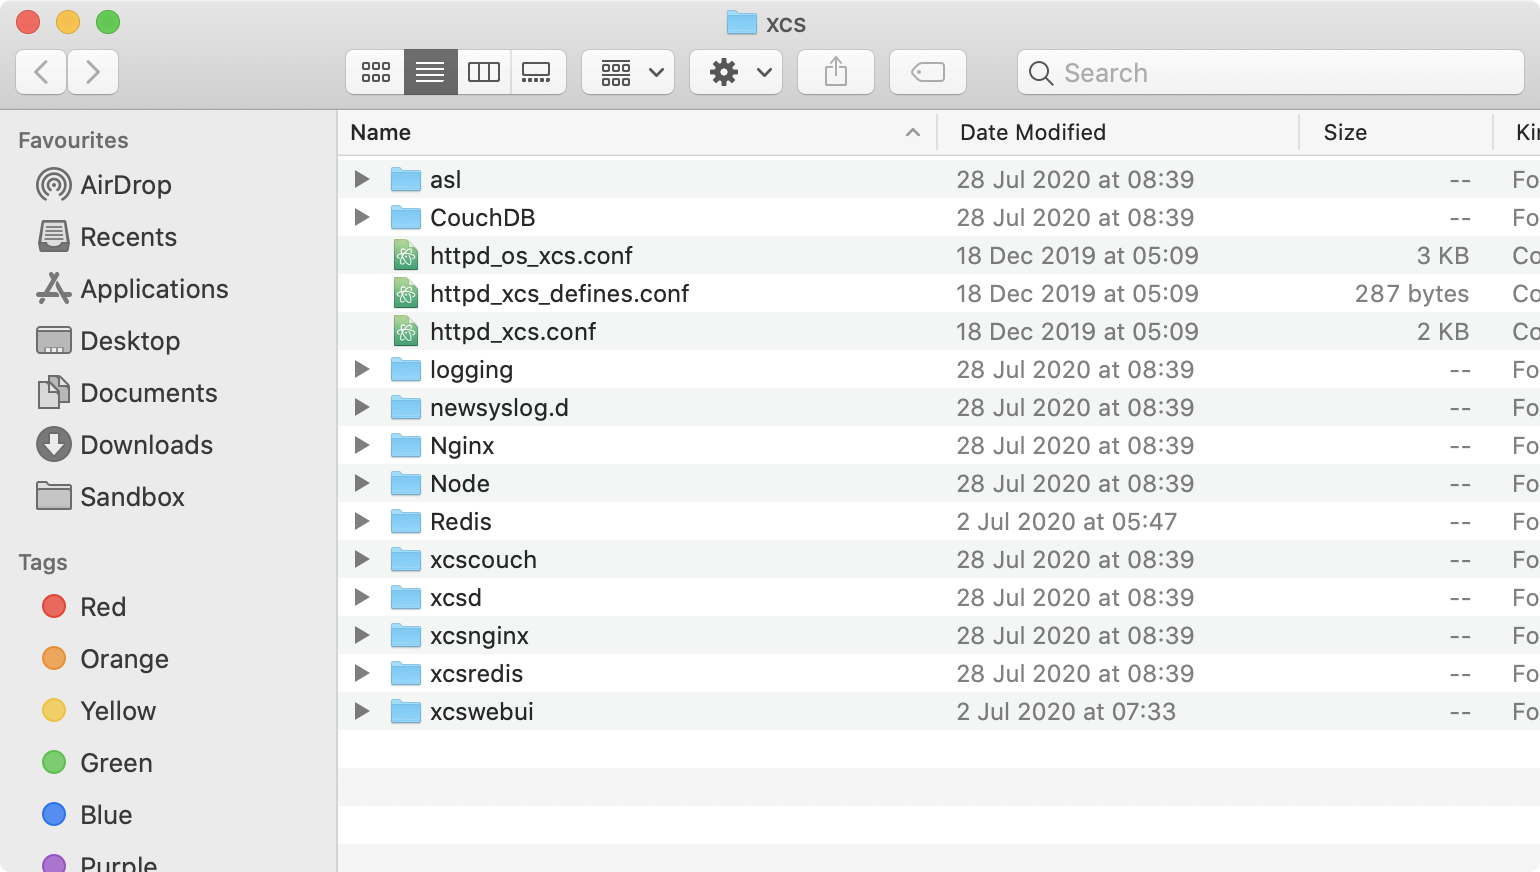
Xcode Server is using nginx, Redis, Node.js, and CouchDB to name just a few. Who would’ve thought Xcode had Node.js bundled in?