Xcode Server for iOS: Getting Started
In this tutorial, you’ll learn how to install and configure Xcode Server so you can use it for Continuous Integration. By Adam Rush.
Creating a New Server
Now that you have Xcode Server enabled, it’s time to create a new instance.
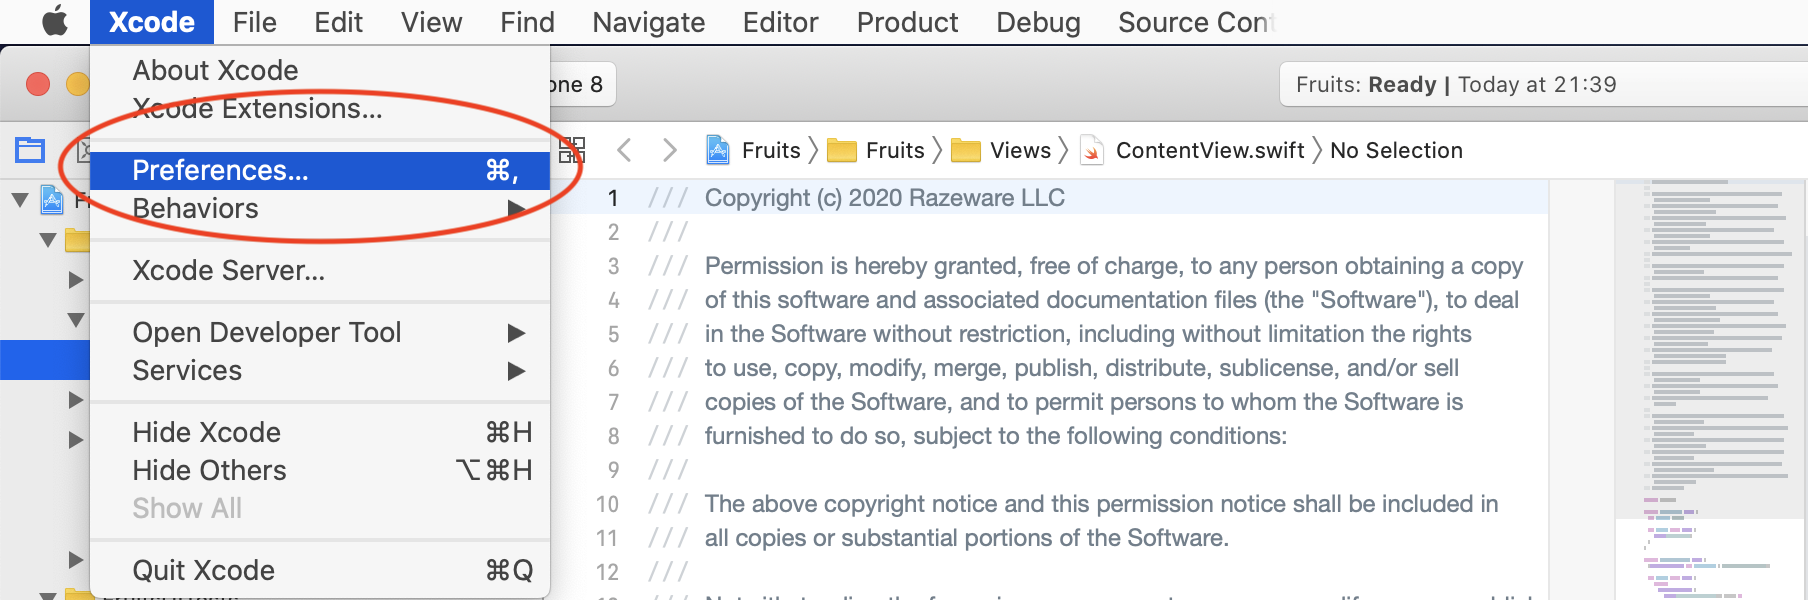
Click Xcode, then Xcode Preferences
Click Accounts.

If you have linked your Apple Developer account before you should see your Apple ID; don’t worry too much if you don’t see this.
Click the + icon to create a new account.

Click Xcode Server and then Next.
You now see a list of available servers on your machine. Unless you have another machine hooked up, you should just see the one machine (your own).
Select your server machine and then click Next.
You are prompted to log in with the User you used when setting up the server (your own user account). Enter the credentials and click Add.
You have now created a local version of Xcode Server running on your machine with your own user account.
If you do consider using a cloud-based solution, the well-known one in the industry is MacStadium, which provides a paid solution to hosting macOS in the cloud.
Carrying on with our cake-making analogy, you now have the equipment to make your cakes a consistent taste and texture. Yet what’s really important is the detail, the recipe, and the exact cooking temperature.
You can relate to this in software development, in which you want to make sure you run the exact same scripts every time so you know that a failure is genuine and not an environmental problem. It also means the build is cut the same way every time, just like your cake :]
Adding a New Bot
Xcode Server includes a concept called the Xcode Bot. Ultimately, below the surface, it’s a separate Scheme that has some configurations that you’re going to define. The biggest difference is an Xcode Bot is for running Integrations on your Xcode Server.
Time to create your first Xcode Bot!
Select Product ► Create Bot….

Give your Xcode Bot a unique name (this is usually the “Product Name” + “Bot”).

Click the Server drop-down menu and select your newly created Server.

Click Next.
At this point, Xcode asks for the source control details for your new bot. Now, the outcome here will depend on how you have used Xcode in the past. If you have previously linked your GitHub account, this will be easy. However, if you have not logged in before, click Sign In….
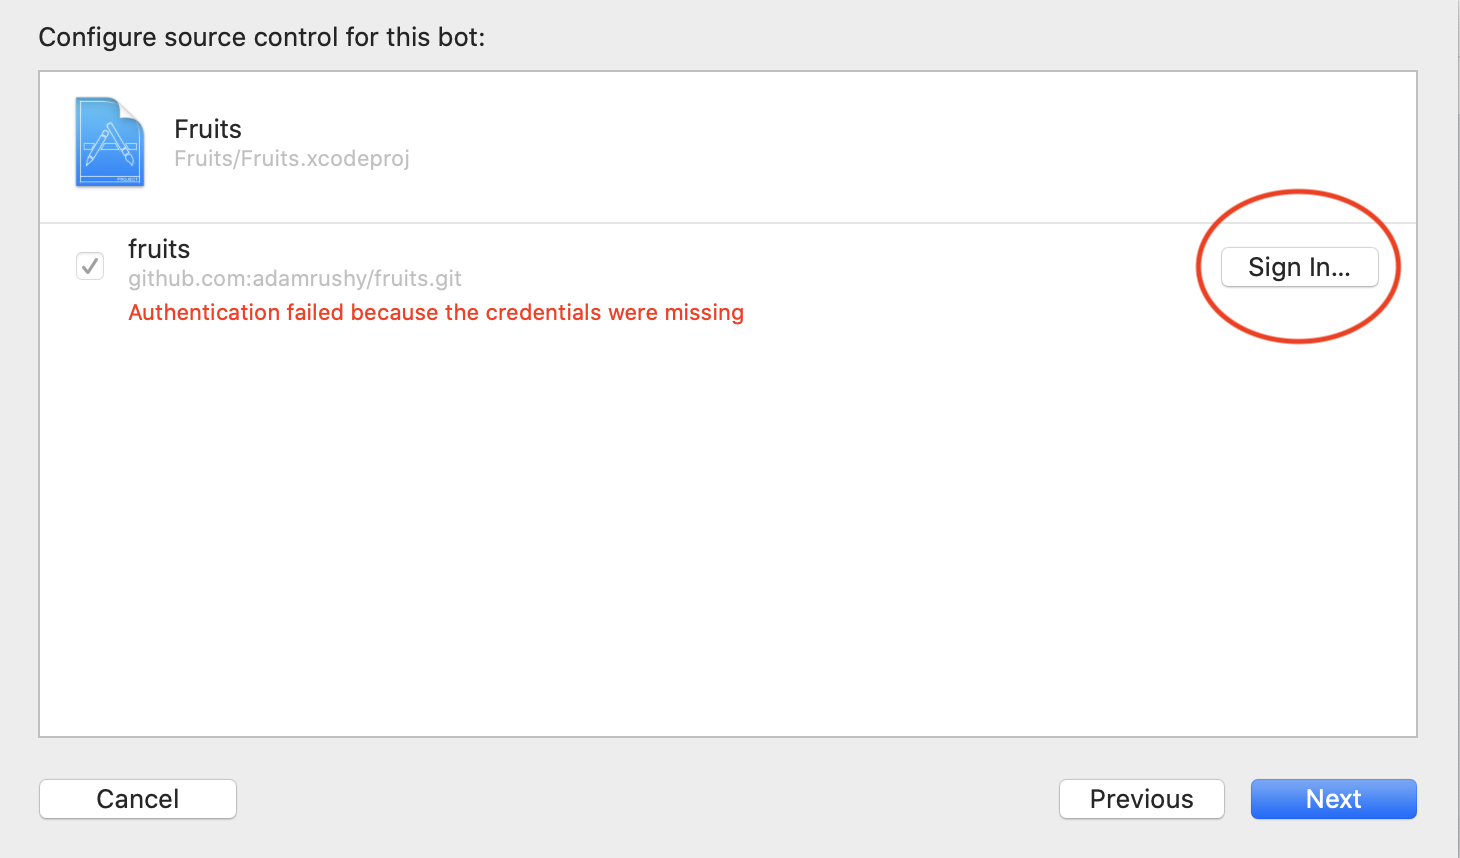
You should enter the GitHub credentials you created earlier or, if you are using SSH, navigate to the location of your SSH keys (typically stored in ~/.ssh).
This gives Xcode Bot permissions to clone the repository.
As previously mentioned, it’s down to the Bot to have full control over how and what it executes on your project. It’s what carries all the information required to cookie-cut your iOS builds.
Click Next.
You should now see the build configuration screen. Here is what each of the options on this screen mean:
- Scheme: The scheme inside the project that the Bot will execute. You’ll keep this as Fruits.
-
Actions: Here you can specify what actions are run on each integration.
- Analyze: Runs the clang static analyzer on the code.
- Test: Runs the unit tests and UI tests. You can optionally specify if code coverage is on and what language and region to run the tests in.
- Archive: Make an archive of the app. Export defines if you would like to export the app as an IPA or not, with various options to choose from.
- Configuration: Which configuration of your build to use. For example you might force it to be in the Debug configuration. Usually you would opt for Use Scheme Setting here.
- Analyze: Runs the clang static analyzer on the code.
- Test: Runs the unit tests and UI tests. You can optionally specify if code coverage is on and what language and region to run the tests in.
- Archive: Make an archive of the app. Export defines if you would like to export the app as an IPA or not, with various options to choose from.
Populate the fields to match the screenshot below:

Click Next.
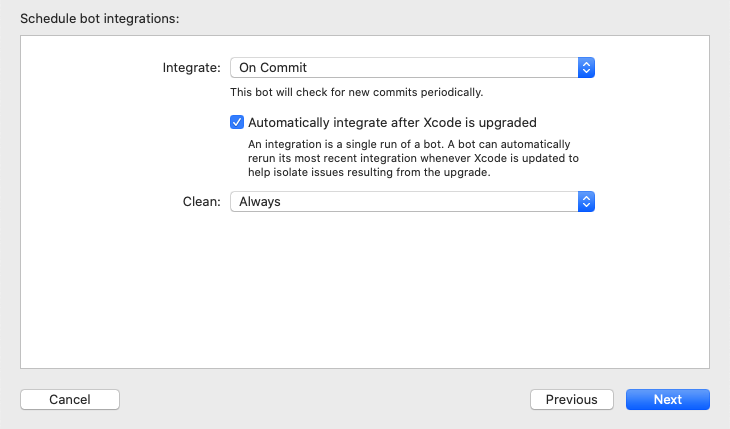
It’s now time to set the schedule for the Integration, you can select from:
- Periodically: Runs the integration at a set time either Hourly/Daily or Weekly.
- On Commit: The Bot checks GitHub regularly for new commits to kick off the integration.
- Manually: You’ll have to trigger a build by a manual process.
Select On Commit, because you’d like the Bot to run every time a developer pushes up a change to the repository.
You can allow your Xcode Bot to run your integration following an Xcode Upgrade, so keep this option ticked for now.
Finally, change the Clean option to Always. This means that a clean will be run before starting the build of the app. This is always recommended so that you have a clean slate for the build to avoid any issues that might arise (or be masked) by builds being different if there are previous build artifacts.
Click Next.
It’s now time to decide what type of device the Bot should be configured to build for. This app only supports iOS which is why the first drop-down is set to iOS and grayed out (there’s no other option!). However, you can select whether to build for devices, simulators or both. For this tutorial, choose iOS Simulators since you only want to check for now that it builds successfully, and the simulator will do for that.

Click Next.
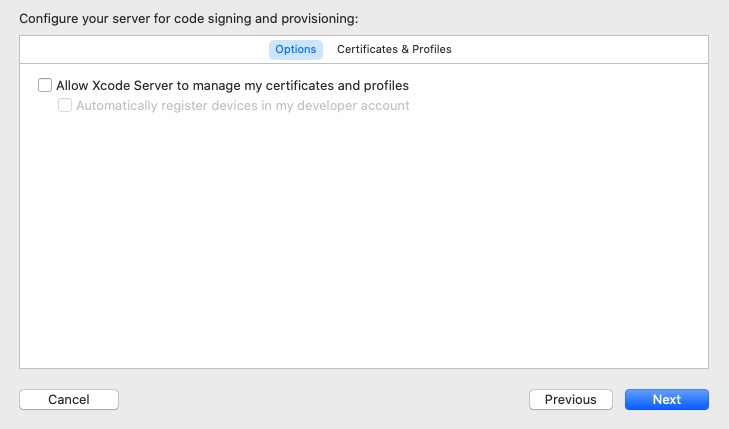
It’s time for the dreaded Provisioning Profile and Certificate joys! Fortunately, you don’t need to do much here so simply click Next.
On this screen, you can define custom flags to pass to xcodebuild and custom environment variables to set while your Bot builds the app. In this tutorial, you won’t need to set anything here.

Skip this part by clicking Next.
The final item is custom triggers. These is essentially build phases but for your Bot. There are many possibilities here such as adding a post-hook to trigger a Slack notification when a build has completed. You won’t set up any triggers in this article so simply click Create.

Congratulations, you now have an Xcode Bot running on your Xcode Server! It’s now ready to “do its thing” whenever a new commit is made to the repository. That raises a question: Just what exactly is its thing? The answer is Integrations.