iOS App with Kotlin/Native: Getting Started
In this tutorial, you’ll build an iOS app using Kotlin/Native. You’ll also take a look at the AppCode IDE from JetBrains! By Eric Crawford.
Creating the ViewController
ViewControllers are the heart of most iOS apps. They are similar to Activities on Android.
You are going to create a ViewController in Kotlin. Since Xcode does not understand Kotlin source code, you will have to create an empty file for your ViewController.
Right-click on the kotlin folder and select New File…. In the template window, scroll down to Other section and select Empty and click Next. Name the file MeteoriteMapViewController.kt, then click Create.

Add the following code to the new file:
// 1
import kotlinx.cinterop.ExportObjCClass
import kotlinx.cinterop.ObjCObjectBase.OverrideInit
import kotlinx.cinterop.ObjCOutlet
import platform.Foundation.*
import platform.UIKit.*
import platform.MapKit.*

// 2
@ExportObjCClass
class MeteoriteMapViewController : UIViewController, MKMapViewDelegateProtocol {

  // 3
  @OverrideInit
  constructor(coder: NSCoder) : super(coder)

  // 4
  override fun viewDidLoad() {
      super.viewDidLoad()
  }
}
Here is what you added:
- Imports for Kotlin to interop with Objective-C and some of the Cocoa Touch frameworks.
- The class inherits from
UIVIewControllerand conforms toMKMapViewDelegateProtocol. The@ExportObjCClassannotation helps Kotlin create a class that is visible for lookup at runtime. - Overrides the
UIViewControllerinitializer with a Kotlin constructor. - Overrides the
viewDidLoad()method.
Hold on a second! Something is missing, here. Where is the syntax highlighting and code completions?

Luckily, the creators of Kotlin can help you out here via the AppCode IDE.
Using AppCode for Kotlin/Native
AppCode is JetBrains dedicated iOS development IDE. It supports Objective-C, Swift and our friend Kotlin (with a plugin). Head over to the AppCode download site to download and install the latest stable version.
Note: Unfortunately AppCode is not free. There is a 30-day trial of the production version.
With AppCode installed, you need to install the Kotlin/Native IDE plugin. Open AppCode, then click Configure ▸ Plugins to show the plugins window.

Now, click on Install JetBrains plugin and then search for kotlin native. The results should include the Kotlin/Native for AppCode plugin:

Go ahead and click Install to install the plugin, and when it’s done installing, restart AppCode. Once restarted, select Open Project and navigate to the root folder of your MeteoriteFinder project (the one that contains the MeteoriteFinder.xcodeproj file) and click Open. Once the project is open, you can expand the folder structure and explore the layout. If you already use Android Studio or IntelliJ IDEA, AppCode will look very familiar.
Fleshing out the ViewController
With AppCode open and ready, it’s time to get back to the project. Double-click on MeteoriteMapViewController.kt and bask in the syntax highlighting provided by the Kotlin/Native plugin and all its glory.
Note: At this point, you may see red underlining under super(coder). This is a false positive, and you may see more through out this tutorial. The Kotlin/Native plugin is in active development and is still in beta. Valid errors will be caught by the compiler when you build/run the project. Also, full syntax highlighting may not show up immediately, but instead only after a short time, once AppCode has fully integrated the Kotlin/Native plugin. The syntax highlighting may also intermittantly not show up fully, due to the beta nature of the plugin.
Under the constructor, add the following:
@ObjCOutlet
lateinit var mapView: MKMapView
The @ObjCOutlet annotation sets the mapView property as an outlet. This allows you to link the MKMapview from the storyboard to this property. The mapView property will be initialized at a later time than the ViewController is created, so you use the lateinit keyword.
In the viewDidLoad() method, add the following under super.viewDidLoad():
// 1
val center = CLLocationCoordinate2DMake(38.8935754, -77.0847873)
val span = MKCoordinateSpanMake(0.7, 0.7)
val region = MKCoordinateRegionMake(center, span)

// 2
with(mapView){
  delegate = this@MeteoriteMapViewController
  setRegion(region, true)
}
Going through this, step by step:
- Create
center,spanandregionproperties that will be used to position the viewable area ofmapView. - Use the Kotlin standard library
withfunction, to scope and setup a couple of themapViewproperties. Inside the scope, you set themapViewdelegate equal to thisMeteoriteMapViewControllerand set the region of themapView.
CLLocationCoordinate2DMake is from a different module, and you will need to import from the CoreLocation module to make the compiler happy. You can write the import at the top of the file:
import platform.CoreLocation.CLLocationCoordinate2DMake
Or instead you can let the IDE add the import for you by setting your cursor on CLLocationCoordinate2DMake and hitting option+return at the same time on your keyboard.
Since MeteoriteMapViewController conforms to MKMapViewDelegateProtocol, setting the mapView delegate to this class allows MeteoriteMapViewController to receive callback events from mapView.
To conform to the protocol, first implement the method mapViewDidFailLoadingMap(), just in case the map fails to load. Add the following under the viewDidLoad() method:
override fun mapViewDidFailLoadingMap(mapView: MKMapView, withError: NSError) {
  NSLog("Error loading map: $withError")
}
Next, you’ll create a method that will insert mock data to be displayed on the map. Add the following method call to the end of viewDidLoad():
createAnnotation()
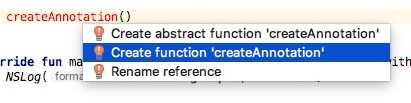
The method call should display red because it isn’t declared yet. Time to do so! Select the method, then press option+return at the same time. In the context menu, select Create function ‘createAnnotation’.
Inside the new createAnnotation() method, delete the TODO template code and add the following:
// 1
val annotation = MKPointAnnotation().apply {
  setCoordinate(CLLocationCoordinate2DMake(38.8935754, -77.0847873))
  setTitle("My mock meteorite")
  setSubtitle("I'm falling........")
}

// 2
mapView.addAnnotation(annotation)
In the above, you:
- Create an
MKPointAnnotationthat will represent a pin on the map. For now, you set up some mock data. - Add the
annotationvariable to themapView. This will add a mock data pin on the map.
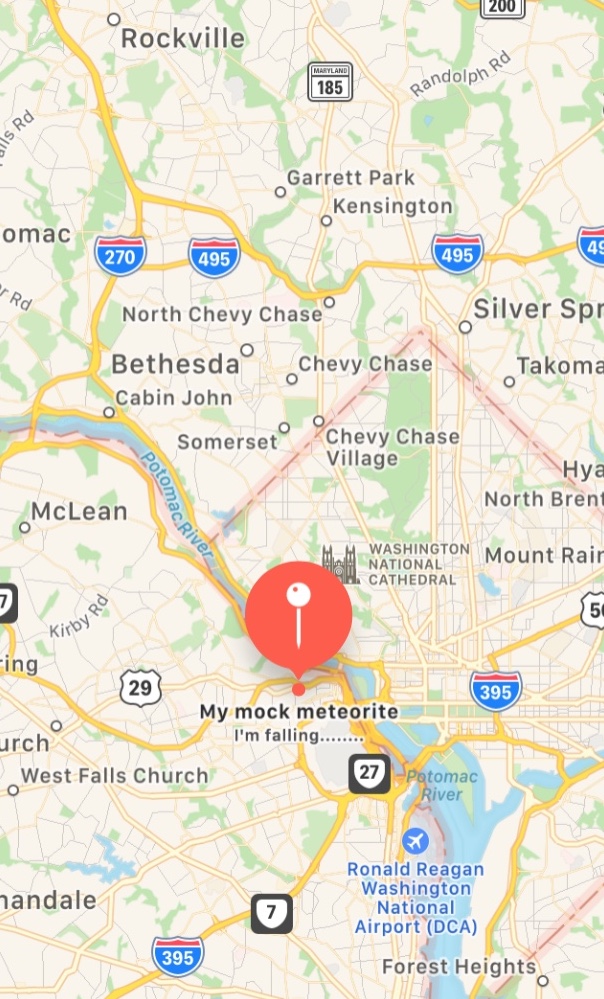
At this point, you’ve created a ViewController that will display a single pin on a map.

Build the project to make sure no errors are showing, by selecting Run from the toolbar and then Build.

The first build in AppCode may take a little time to complete.
Wiring up the Storyboard
Congrats!! No build errors.
Next, you need to connect the ViewController to the layout defined in the storyboard. This means you need to add a reference to your ViewController in the storyboard.
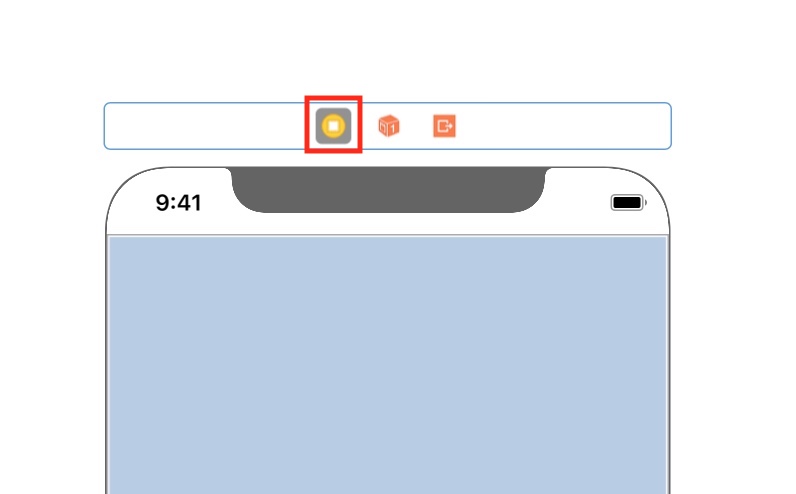
AppCode does not support editing storyboards, so this task will need to be done in Xcode. Double-click on Main.storyboard to open up in Xcode IDE. Then, click on the ViewController icon above the simulated phone:
Next, select the Identity Inspector and enter MeteoriteMapViewController in the Class field.

Finally, you will connect the MKMapView view from the storyboard to the mapView property in the MeteoriteMapViewController class.
Note: In Objective-C and Swift files, Xcode allows you to drag a line from the storyboard view directly to the code and make the connection, automatically. But since Xcode does not understand Kotlin, you will need to do this task manually in XML.
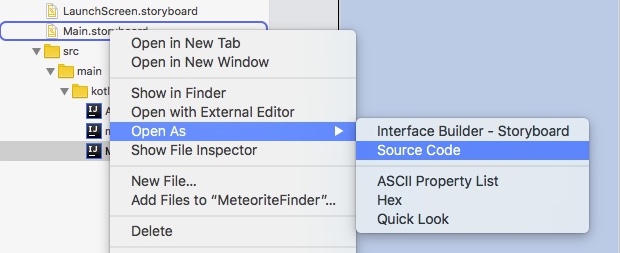
In Xcode, right-click on Main.storyboard then select Open As ▸ Source Code.
In the XML, find the closing </viewController> tag and add the following connection right above it:
<connections>
    <outlet property="mapView" destination="<Your mapView ID>" id="rPX-AH-rma"/>
</connections>
The above code shows how the storyboard knows what views belong to your outlets. The attributes in the outlet tag do all the mapping.
-
propertypoints to the name of the actual property in your code. In this case, it’smapView. For this mapping to work, you also needed to give a hint thatmapViewcan be used as an outlet, which you did with the@ObjCOutletannotation in the ViewController. -
destinationpoints to the id of the outlet themapViewshould be connected to. Usually, these ids are randomly generated by Xcode when connecting an outlet to a property defined in aViewController. Under the<subViews>section, find the<mapView>tag and look for itsidattribute. This is the id to use in thedestinationattribute. -
idis a randomly generated id. You will not be using this directly.
Note: To return to the storyboard layout, right-click on Main.storyboard, then select Open As ▸ Interface Builder – Storyboard. Also, Xcode is only being used for editing the storyboard. Feel free to close Xcode before moving to the next section.
With those changes, you can now run the app from either Xcode or AppCode.
Running in Xcode:
![]()
Running in AppCode:
![]()
After you build and run, the simulator will show your mock Meteorite on the map.