Today Extension Tutorial: Getting Started
Learn how to create a today extension for your app – allowing it to present information in the notification center, search screen and lock screen. By Michael Katz.
Build the Interface
Open MainInterface.storyboard and delete the label. Set the view to 110pts tall and 320pts wide in the Size Inspector. This is the default iPhone widget size.
Drag two Labels and a View from the Object Library onto the view controllers view.
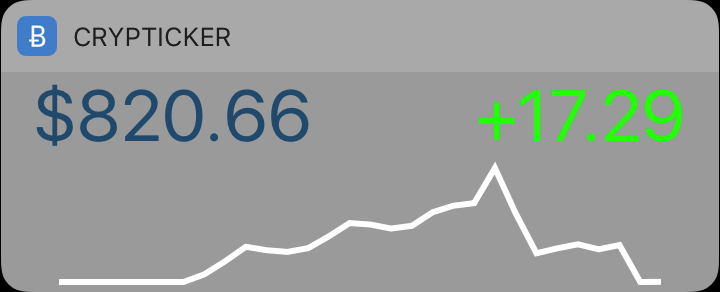
- Position one of the labels in the top left corner, and in the Attributes Inspector set its Text to $592.12 and its Color to Red: 33, Green: 73 and Blue: 108. Set the Font to System 36.0. This label will display the current market price. You want to make it nice and big so it’s easily legible in a quick glance.
- Position the other label at the same height right of the one you’ve just set up, but against the right margin. In the Attributes Inspector set its Text to +1.23 and its Font to System 36.0. This displays the difference between yesterdays price and the current price.
- Finally, position an empty view below the two labels, stretch it so it’s bottom and side edges are touching the containing view. In the Attributes Inspector set its Background to Clear Color, and in the Identity Inspector set its Class to
JBLineChartView.
Note: There is a class named JBLineChartDotView that Xcode may suggest when typing, verify that you chose JBLineChartView.
The view and Document Outline should now look something like this:

Don’t worry about laying things out exactly as shown, as you’ll soon be adding Auto Layout constraints to properly define the layout.
Now open TodayViewController.swift in the editor. Add this at the top of the file:
import CryptoCurrencyKit
This imports the CryptoCurrencyKit framework.
Next, update the class declaration, like this:
class TodayViewController: CurrencyDataViewController, NCWidgetProviding {
Making the TodayViewController a subclass of CurrencyDataViewController.
CurrencyDataViewController is included in CryptoCurrencyKit and is also used by the primary view within Crypticker. Since the widget and app will be displaying similar information through a UIViewController, it makes sense to put reusable components in a superclass and then sub-class that as requirements vary.
NCWidgetProviding is a protocol specific to widgets; there are two methods from the protocol that you’ll be implementing later on.
Since TodayViewController subclasses CurrencyDataViewController, it inherits outlets for the price label, price change label and line chart view. You now need to wire these up.
Open MainInterface.storyboard again.
In the Document Outline, ctrl+drag from Today View Controller to the price label (the one with its text set to $592.12). Select priceLabel from the popup to create the connection. Repeat for the other label, selecting priceChangeLabel from the popup. Finally, do the same for the Line Chart View, selecting lineChartView from the popup.

For your widget to be adaptive, you’ll need to set up Auto Layout constraints. The general idea is that views are designed with a single layout that can work on a variety of screen sizes. The view is considered adaptive when it can adapt to unknown future device metrics. This will be useful later when adding size expansion to the widget.
Select the Price Label label and then select Editor\Size to Fit Content. If the Size to Fit Content option is disabled in the menu, deselect the label, and then reselect it and try again; sometimes Xcode can be a little temperamental.
Next, using the Add New Constraints button at the bottom of the storyboard canvas, pin the Top and Leading space to 0 and 0 respectively. Make sure that Constrain to margins is turned on. Then click Add 2 Constraints.

Select the Price Change Label label and again select Editor\Size to Fit Content. Then, using the Add New Constraints button, pin the Top and Trailing space both to 0.

Finally, select the Line Chart View. Using the Add New Constraints button, pin its Leading and Trailing space to 0 and its Top and Bottom space to 8. Make sure that Constrain to margins is still turned on. Click Add 4 Constraints.

From the Document Outline select the view containing the labels and Line Chart View, then choose Editor\Resolve Auto Layout Issues\All Views in Today View Controller\Update Frames. This will fix any Auto Layout warnings in the canvas by updating the frames of the views to match their constraints. If Update Frames is not enabled then you laid everything out perfect and it is unnecessary to run.

Now the interface is in place and everything is wired up, open up TodayViewController.swift again.
You’ll notice you’re working with a bog-standard UIViewController subclass. Comforting, right? Although later you’ll encounter a new method called widgetPerformUpdate from the NCWidgetProviding protocol. You’ll learn more about that later.
This view controller is responsible for displaying the current price, price difference, and showing the price history in a line chart.
Now replace the boilerplate viewDidLoad method with the following implementation:
override func viewDidLoad() {
  super.viewDidLoad()
  lineChartView.delegate = self
  lineChartView.dataSource = self

  priceLabel.text = "--"
  priceChangeLabel.text = "--"
}
This method simply sets self as the data source and delegate for the line chart view, and sets some placeholder text on the two labels.
Now add the following method:
override func viewDidAppear(_ animated: Bool) {
  super.viewDidAppear(animated)

  fetchPrices { error in
    if error == nil {
      self.updatePriceLabel()
      self.updatePriceChangeLabel()
      self.updatePriceHistoryLineChart()
    }
  }
}
fetchPrices is defined in CurrencyDataViewController, and is an asynchronous call that takes a completion block. The method makes a request to the web-service mentioned at the beginning of the tutorial to obtain Bitcoin price information.
The method’s completion block updates both labels and the line chart. The update methods are defined for you in the super-class. They simply take the values retrieved by fetchPrices and format them appropriately for display.
Now it’s time to see what you have so far. Select the BTC Widget scheme. Build and run.
- If Notification Center doesn’t appear, swipe down from the top of the screen to activate it.
- If the widget doesn’t appear in Notification Center, you’ll need to add it via the Edit menu. Towards the bottom of the Today’s view content you will see an Edit button. Tap the button to reveal a menu of all Today Extensions that are installed on the system. Here you can enable, disable and re-order them as desired. Enable BTC Widget if it isn’t already.
Cool! Your widget now displays real-time Bitcoin pricing right in Notification Center. But you may have noticed a problem: the line chart looks pretty squished.

Fortunately, Notification Center supports expandable widgets that can show more information.
At the bottom of viewDidLoad add the following:
extensionContext?.widgetLargestAvailableDisplayMode = .expanded
This tells the extension context that this widget supports an extended display. This will cause a “Show More” or “Show Less” button to automatically appear on the widget’s title bar.
Note: The main UIViewController of a today extension will have access to its extensionContext, which acts like UIApplication.shared, but for extensions. This provides functions for opening external URLs, and keys to listen for lifetime event notifications.
Next, add the following method:
func widgetActiveDisplayModeDidChange(_ activeDisplayMode: NCWidgetDisplayMode, withMaximumSize maxSize: CGSize) {
  let expanded = activeDisplayMode == .expanded
  preferredContentSize = expanded ? CGSize(width: maxSize.width, height: 200) : maxSize
}
widgetActiveDisplayModeDidChange is an optional NCWidgetProviding method. It is called in response to the user tapping the “Show More” or “Show Less” buttons. Setting the preferredContentSize will change the widget’s height, which in turn updates the chart’s height, giving it more room to breathe.maxSize is the maximum size allowed for the widget, given its display mode. For the .compact mode, the maximum size is also the minimum size, but for .expanded it could be much larger.
After updating the preferred size, you must reload the chart’s data so that it redraws based on the new layout.
You’ll do this in viewDidLayoutSubviews. Add the following to TodayViewController:
override func viewDidLayoutSubviews() {
  super.viewDidLayoutSubviews()
  updatePriceHistoryLineChart()
}
Make sure the BTC Widget scheme is selected. Build and run.
On the left, you’ll see how the widget appears when the widget is collapsed. On the right, you’ll see how it appears when expanded. Not too shabby!
