Migrating to Unified Logging: Console and Instruments
In this tutorial, you’ll learn how to debug your iOS apps like a professional using unified logging with the Console and Instruments apps. By Keegan Rush.
Log Levels
As with any good logging system, unified logging comes with different log levels you can use to customize your logging behavior. The unified logging system can store logs either on disk or only in memory. You can also configure the output so that some log levels aren’t even shown at all.
There are five different log levels:
- Default: Use this level for standard log messages. The logging system stores these logs in memory and moves them to disk when it reaches a limit.
- Error: You use this level when something goes wrong in your app. The logging system always saves these logs to disk.
- Fault: This indicates that something has gone wrong on the system level, such as a device running out of storage. This level is always saved to disk.
- Info: Meant for capturing background information that might help during troubleshooting an issue, this level is not moved to disk immediately. A Fault-level log will cause Info-level logs to move to disk.
- Debug: Use this level for frequent and detailed logs when debugging an issue. This level isn’t meant for production code and will not show in any log output without a configuration change.
Specifying log levels
Your first os_log statement doesn’t specify any logging level, so it uses the default one. Next, you’ll add a log message with a different level. You’ll be stepping out of MainViewController.swift for the time being, so it’s a good idea to create a new OSLog object to keep things separate.
Open Log.swift. Add this to Log:
static let networking = OSLog(subsystem: subsystem, category: "networking")
Now you’re ready to add some logging to the networking layer of the app. Open NetworkingService.swift. Add this import statement to the top of the file so you can make use of os_log:
import os
Next, find this print statement in fetchRecordings(matching:page:onCompletion:):
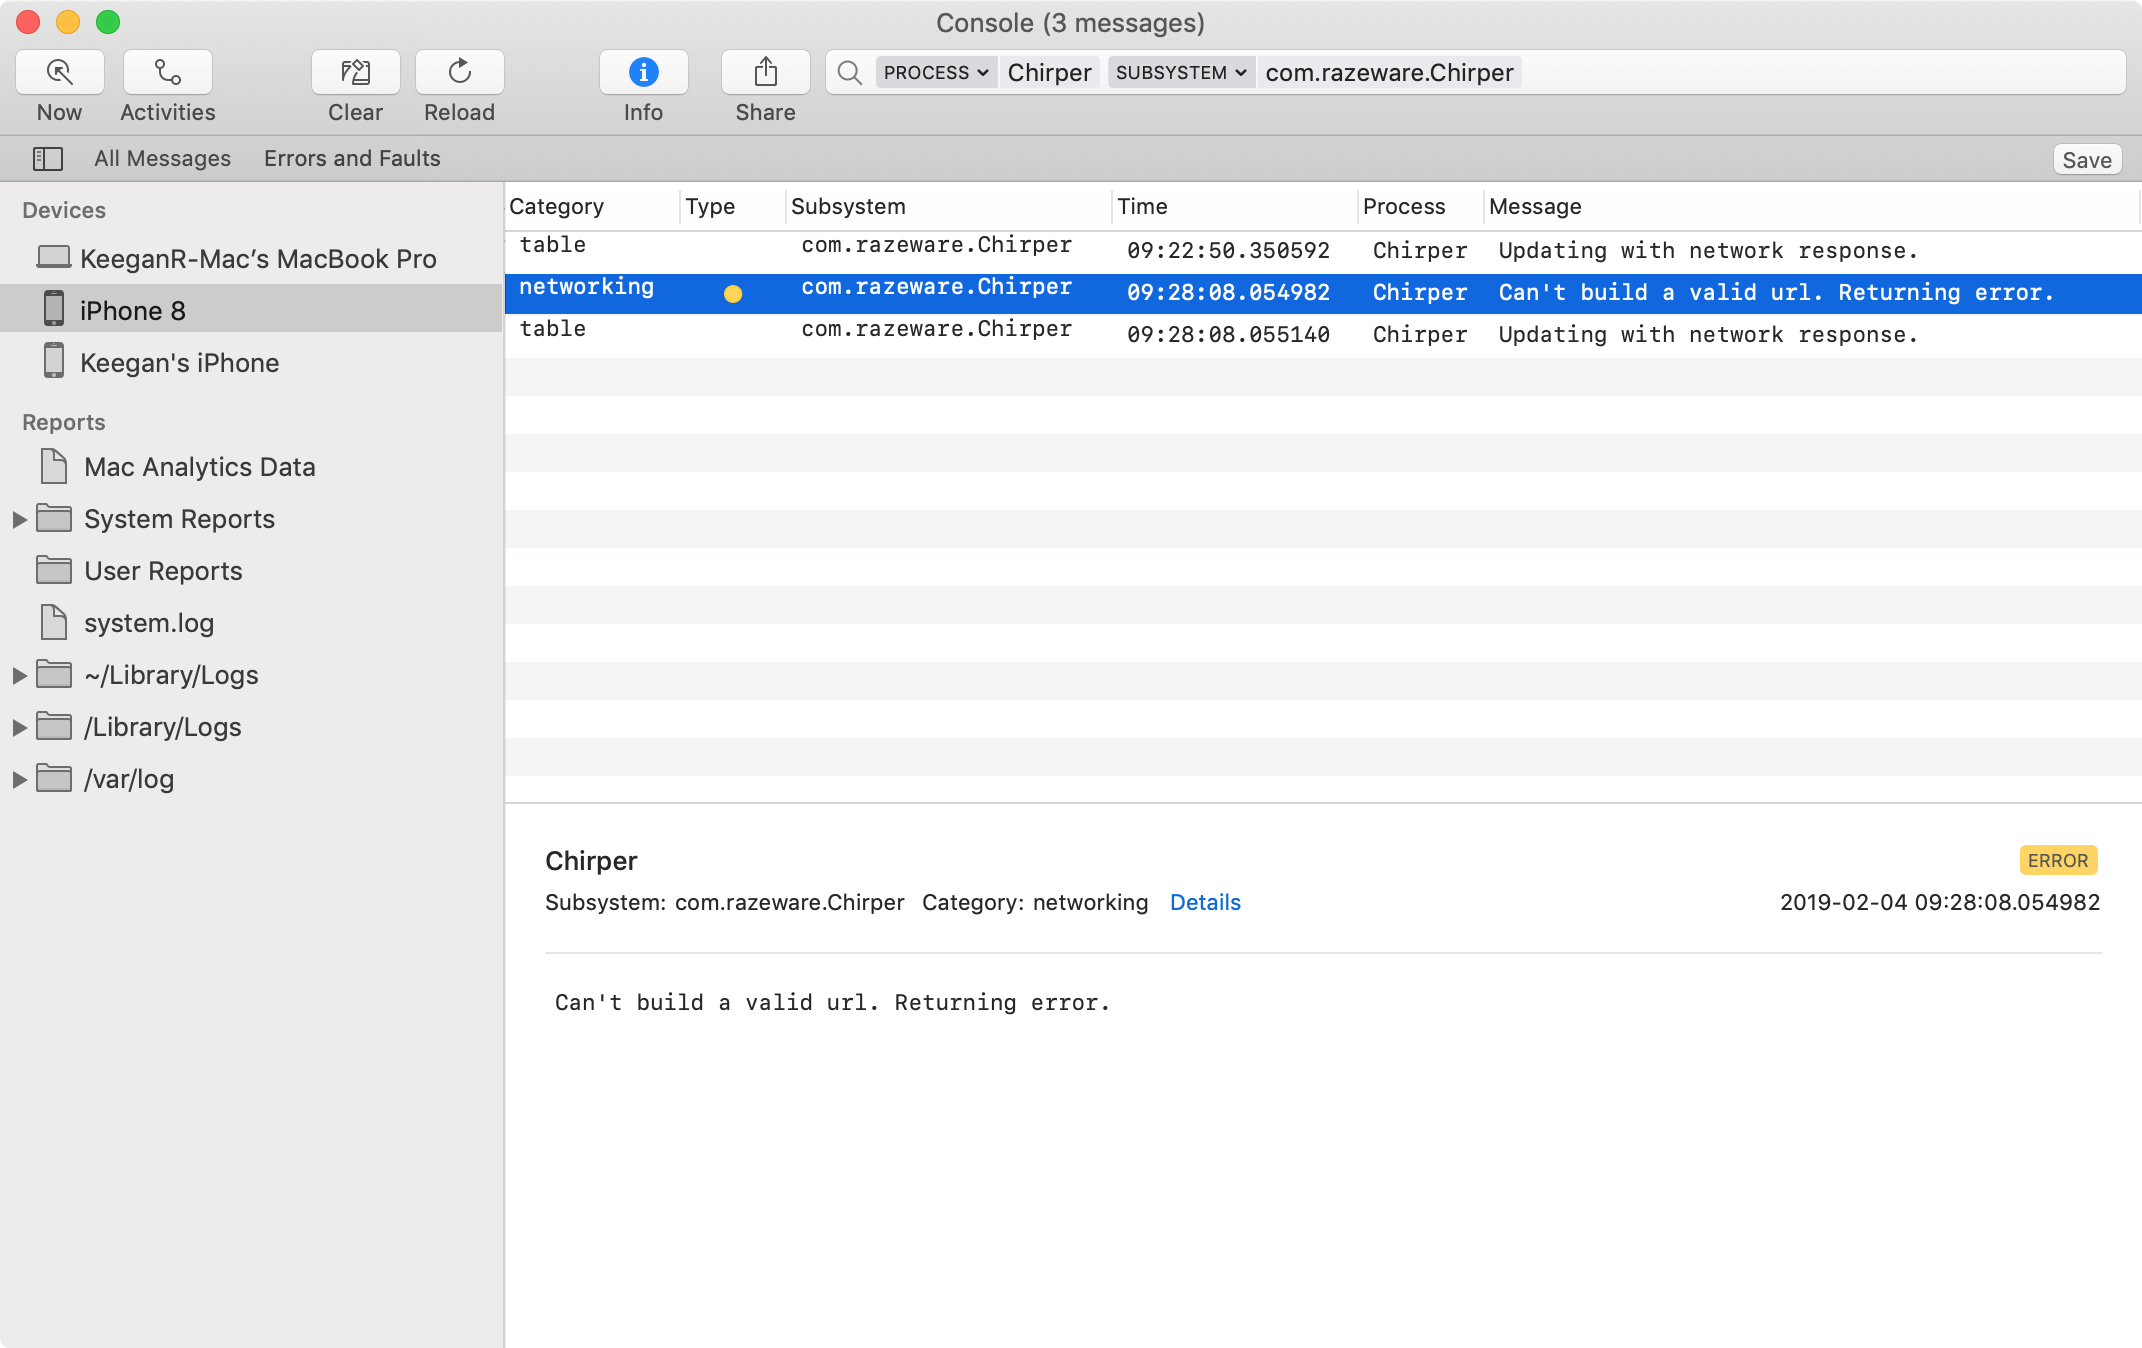
print("Can't build a valid URL. Returning error.")
That looks like a good case for error level logging. Replace this line with an os_log statement of the appropriate log level:
os_log("Can't build a valid URL. Returning error.",
  log: Log.networking, type: .error)
To see what the log looks like in Console, find the endpoint property of NetworkingService — this is a great time to use Control-6 — and change it to an invalid URL:
let endpoint = ">https://www.xeno-canto.org/api/2/recordings"
You’ve added the > to the beginning of the URL, making it invalid.
Build and run, then check Console for the new message:
Once you’re done exploring the logs, change the endpoint property of NetworkingService back:
let endpoint = "https://www.xeno-canto.org/api/2/recordings"
Now you’ve begun to understand how to test out different log messages.
Formatting StaticStrings
Still in NetworkingService.swift, find the following log message:
print("Successfully fetched \(count) recordings.")
This log message records the number of recordings fetched every time you get new results. It’s not a crucial piece of data and it might pollute the logs.
You can use the info type to easily filter it out of your log output. It also won’t save to disk unless a fault occurs, making your clients’ logs easier to read through.
Replace it with the following code:
os_log("Successfully fetched \(count) recordings.",
  log: Log.networking, type: .info)
Something isn’t right, though. You should see this error:

The os_log function doesn’t take a regular String for the log message. Instead, it requires the lesser known, but more performant, StaticString.
StaticString, as the name suggests, doesn’t support the string interpolation that you’re used to in Swift. You need to use some good old-fashioned format specifiers to put dynamic information into your log messages.
Change your log statement to this:
os_log("Successfully fetched %d recordings.",
  log: Log.networking, type: .info, count)
Rather than using the string interpolation that is available in regular Swift strings, you use the %d format specifier and pass the count as the last parameter to os_log.
Console does not show info log messages by default, so open Console and ensure that the Action ▸ Include Info Messages menu item is ticked.
Build and run the app. Once the networking service loads the results, you should see a log message like this show up in Console:

Protecting Privacy
When you’re logging messages for a specific user’s activity inside your app, you should be extremely careful about accidentally logging personal or sensitive information about the user. Aside from the the basic trust between a developer and his users, it’s also bound to get you into trouble with the folks at Apple. ;]
While still in NetworkingService.swift, find the following print statement in fetchRecordings(matching:page:onCompletion:):
print("Getting recordings from \(url)")
Next, convert it to an os_log statement.
os_log("Getting recordings from %s.", log: Log.networking,
  type: .info, url.absoluteString)
The type is set to info since it’s not crucial, but could be useful in case there’s a fault or error. You use the %s format specifier to pass the URL into the log statement.
One of the more interesting features on unified logging is that it’s private by default. If you run the app on a real device, not the simulator, without the Xcode debugger attached, any dynamic strings you log will be redacted like this:

Scalar values such as numbers are public, but any strings or objects are hidden. Great news for anyone that has logged a password to a log file by mistake. :]
When running the app on a simulator, or a device attached to Xcode’s debugger, your dynamic strings will not be publicly viewable. If you’re sure that a string does not contain any sensitive information, you can make it public by using the {public} keyword.
Update the log statement to make the URL public:
os_log("Getting recordings from %{public}s.", log: Log.networking,
  type: .info, url.absoluteString)
Now, the data you’re logging will always be visible in Console.

%{public}, you can make a number or boolean private by using %{private}.