Create ML Tutorial: Getting Started
In this Create ML tutorial, you’ll learn how to transfer your learning to Turi Create, and gain familiarity with machine learning toolsets and terminology. No math needed! By Audrey Tam.
Turi Create
This code is from our tutorial Natural Language Processing on iOS with Turi Create. It trains a sentence classifier with poems from 10 poets, to predict the author of the test text.
import turicreate as tc

# 1. Load data from a JSON file
data = tc.SFrame.read_json('corpus.json', orient='records')

# 2. Create the model
model = tc.sentence_classifier.create(data, 'author', features=['text'])

# 3. Export for use in Core ML
model.export_coreml('Poets.mlmodel')
- Step 1: Like Create ML, you can load data from JSON or CSV files.
- Step 2 trains the model.
- Step 3 exports the Core ML model.
The Turi Create tutorial materials include an iOS app where you can test the model on text pasted into a textview. The app uses a wordCounts(text:) helper function, similar to the bag of words function at the bottom of the Turi Create text classification example.
The Turi Create text classifier expects input in the form of a dictionary of words and word counts. The Create ML text classifier accepts the text input directly, and creates its own bag of words.
Turi Create Image Similarity
Now take some deep breaths — you’re going on a Turi Create adventure!
Turi Create has five task-focused toolkits that aren’t (yet?) in Create ML:
- Recommender systems
- Image similarity
- Object detection
- Style transfer
- Activity classification
Cat and dog pictures are fun to look at, so you’ll train a model to find similar images.
And yes, you need to write some Python. The development environment that will feel the most familiar is a Jupyter notebook — it’s like an Xcode playground, but it runs in your browser.
The easiest way to get going is to use Anaconda — created by the ML community to sort out all the versions of Python and ML libraries, and manage them in separate environments.
Anaconda & Notebooks
Download the Python 3.6 version of Anaconda for macOS, and install it in your home directory, not in your root directory:
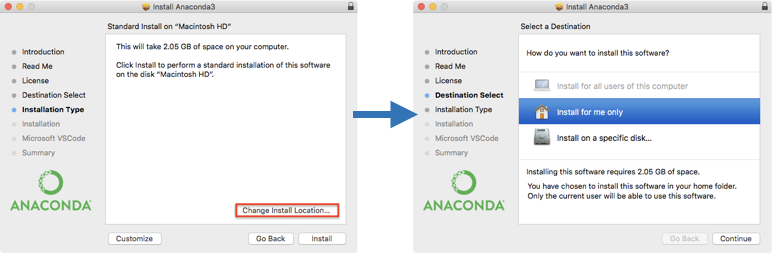
If it says you can’t install it there, click the Install on a specific disk… button, then click back to the Home button — it should be more agreeable:

{ ... }.
Create Turi Create Environment
Use either the Anaconda Navigator GUI or a Terminal command to create an environment where you can run Turi Create code.
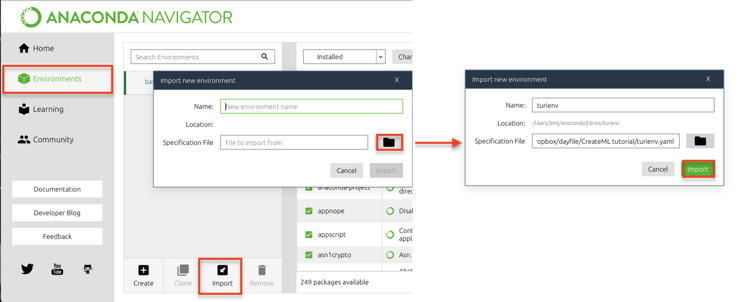
GUI: Open Anaconda Navigator, switch to its Environments tab, and import starter/turienv.yaml — simply click the folder icon and locate the file in Finder. Anaconda Navigator will fill in the environment name from the file:
Terminal: Open Terminal and enter this command:
conda env create -f <drag starter/turienv.yaml file from Finder>
Launch Jupyter Notebook
Use either the GUI or Terminal commands to launch Jupyter notebook in the turienv environment.
First, in Finder, create a local folder named notebooks.
If you have a really new and powerful Mac, download and unarchive the Kaggle Cats and Dogs Dataset, then move the PetImages folder into notebooks, so you can easily load it into the notebook you’re about to create.
The full Kaggle dataset contains 25,000 images, which takes a long time to process on an older Mac. Feel free to use the Pets-1000 folder instead, or create your own dataset.
GUI: If you’re using Anaconda Navigator, switch to the Home tab, check that turienv appears in the Applications on field, then click jupyter Launch:

A terminal window opens to run the Jupyter server, then a browser window displays your home directory. Navigate to your notebooks folder.
Terminal: If you’re using Terminal, enter this command to load turienv:
source activate turienv
The command line prompt now starts with (turienv). Enter this command to start the Jupyter server in the notebooks folder, and display the browser window:
jupyter notebook <drag notebooks folder from the Finder>
Training the Model
Create a new Python 3.6 notebook:

Double-click the title to rename the notebook:

The notebook contains a single empty cell. Type this line in the cell, then press Shift-Enter to run the cell:
import turicreate as tc
A new empty cell appeared below the first. Type the following in it, then run it:
reference_data = tc.image_analysis.load_images('./PetImages')
reference_data = reference_data.add_row_number()
reference_data.save('./kaggle-pets.sframe')
You’re loading the images into a table, adding row numbers to the table, then saving it for future use. Ignore the JPEG decode failure messages.
In the next cell, run this statement to explore the data:
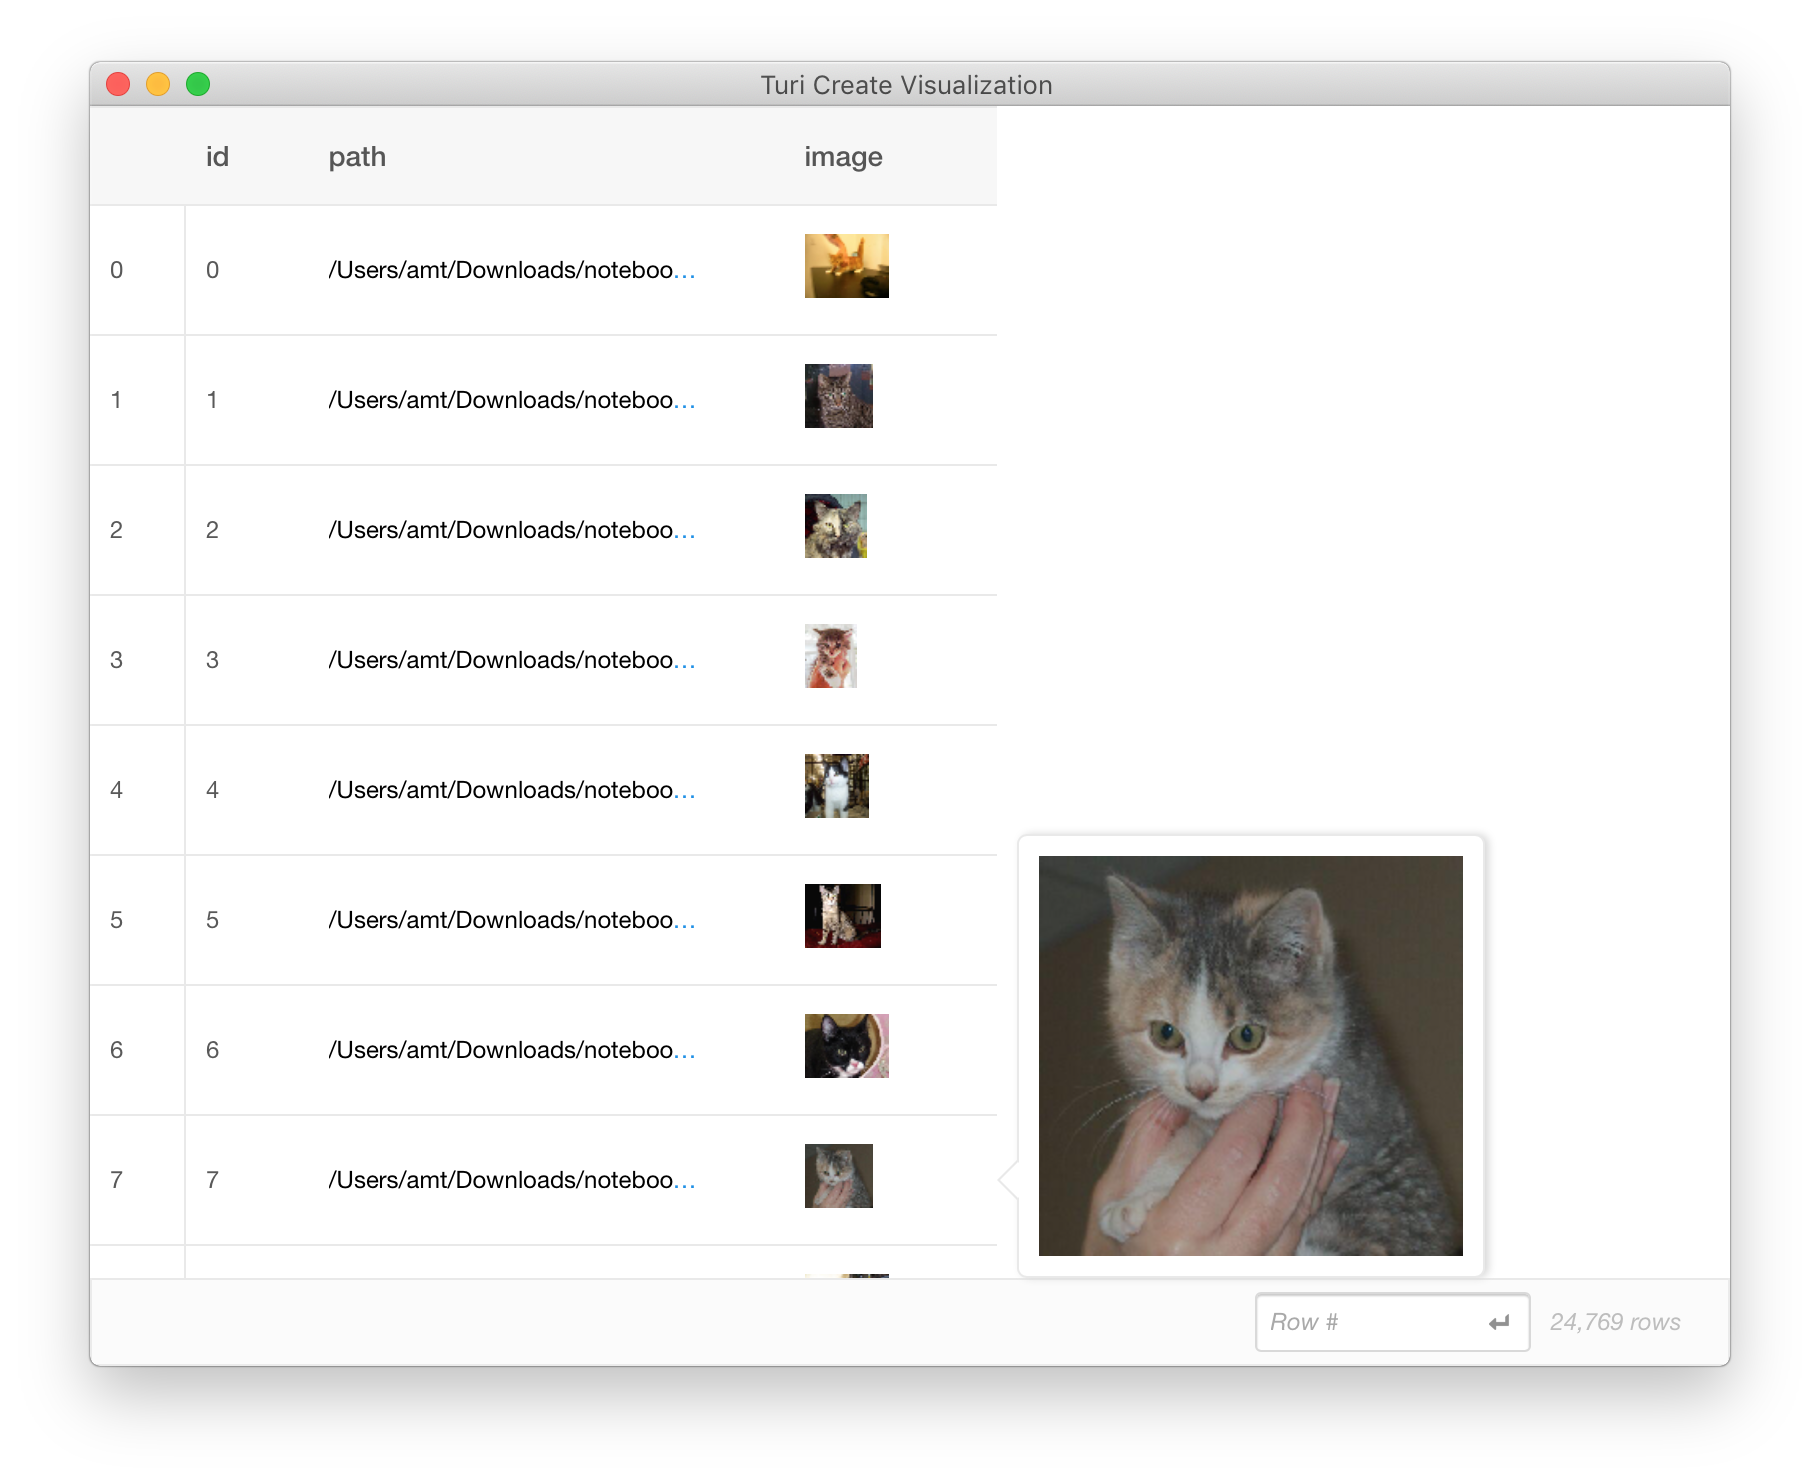
reference_data.explore()
A window opens, displaying id, path and image columns. Hovering the cursor in a row shows the image:
Next, run this statement:
model = tc.image_similarity.create(reference_data)
This will take a while — In [*] shows it’s running. While you wait, read about unsupervised learning.
Unsupervised Learning
Providing labeled data to the image classifier enables it to measure how accurate it is by checking its predictions against the labels. This is supervised learning.
Although you supplied the same labeled dataset to this image similarity trainer, it doesn’t use the labels: this model uses unsupervised learning. The underlying model looked at a very large number of images, and taught itself which arrangements of pixel values constituted features that it could use to cluster “similar” images. So just like the image classifier, most of the training time is used for extracting these features from your dataset. Then it does “brute force” nearest neighbors model training: for each image, it computes its distance to every other image, and ranks the other images into radius bands. Again, this step is fast, compared to the feature extraction.