Building Dart APIs with Google Cloud Run
Learn how to build backend applications using Dart and Google Cloud Run. By Alhassan Kamil.
Adding Middleware
The project uses two types of middleware: ensureResponsesHaveHeaders() and authenticate(). The first middleware adds headers to every response while the second performs authentication. You already have stubs for these middleware in lib/helpers/middleware.dart. So, you only need to make modifications.
Response Headers Middleware
In lib/helpers/middleware.dart, import the following:
import 'dart:convert';
import 'helper.dart';
Now, replace the body of ensureResponsesHaveHeaders() with the code below:
return createMiddleware(responseHandler: (response) {
  return response.change(headers: {
    'Content-Type': 'application/json',
    'Cache-Control': 'max-age=604800',
  });
});
You have created a middleware that changes all responses to have the Content-Type and Cache-Control headers using shelf‘s createMiddleware function.
Content-Type indicates the media type of the resource (i.e application/json: JSON format) while Cache-Control controls how clients cache responses (i.e 7 days maximum, here).
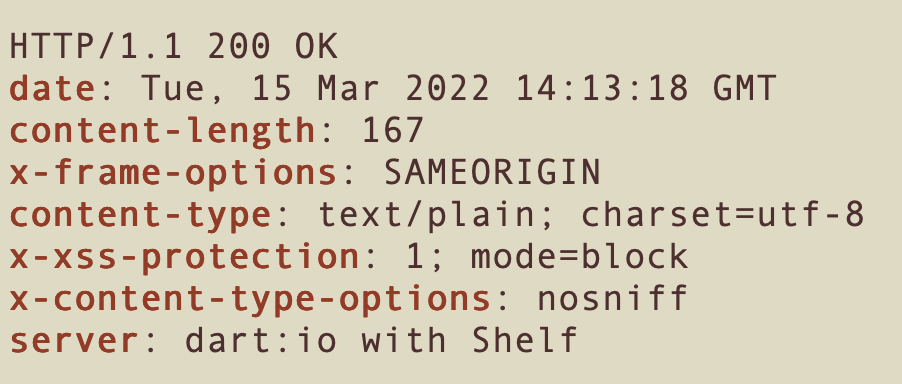
Restart the server; check and confirm that the response headers don’t contain these headers:
curl http://localhost:8080/v1/notes -I
Now, register ensureResponsesHaveHeaders() in bin/mnote.dart by changing handler to the following:
final handler = const Pipeline()
    .addMiddleware(ensureResponsesHaveHeaders())
    .addMiddleware(logRequests())
    .addHandler(app);
Remember to import lib/helpers/middleware.dart:
import 'package:mnote/helpers/middleware.dart';
Restart the server and list headers again:
curl http://localhost:8080/v1/notes -I

Notice that the headers are now in the response.
Authentication Middleware
Lastly, on middleware, modify authenticate() to contain the following:
return createMiddleware(requestHandler: (request) async {
  // 1
  if (request.requestedUri.path == '/v1/' ||
    request.requestedUri.path == '/v1' ||
    request.requestedUri.path.contains('v1/users/login') ||
    request.requestedUri.path.contains('v1/users/register')) {
    return null;
  }
  // 2
  var token = request.headers['Authorization'];
  if (token == null || token.trim().isEmpty) {
    return Response.forbidden(jsonEncode({'message': 'Unauthenticated'}));
  }
  // 3
  if (token.contains('Bearer')) {
    token = token.substring(6).trim();
  }

  try {
    // 4
    final docs = await Helper.getDocs(api, 'users');
    final tokenValid = (docs.documents ?? []).isNotEmpty &&
        docs.documents!.any(
            (e) => e.fields!.values.any((el) => el.stringValue == token));

    if (!tokenValid) {
      return Response.forbidden(
          jsonEncode({'message': 'Invalid API token: ${token}'}));
    }
    return null;
  } on Exception {
    // 5
    return Helper.error();
  }
});
This is what that code is doing:
- Checking whether the currently requested URL is home, login or registration pages. If it’s, halting authentication by returning
null. This is because these endpoints don’t require authentication. - Extracting the user’s API token from the
Authorizationheader, returning a403 Forbiddenresponse if there is no token in the header. - If the token is Bearer token, strip the bearer out.
- Getting all users from the database and checking whether the user with the API token exists. If no such user exists, return a
403 Forbiddenresponse. Otherwise, it allows the request to proceed. - If there was an exception, respond with a
503 Internal Server Error.
Now, change the handler in bin/mnote.dart to contain the authenticate() middleware:
final handler = const Pipeline()
      .addMiddleware(ensureResponsesHaveHeaders())
      .addMiddleware(authenticate(firestoreApi))
      .addMiddleware(logRequests())
      .addHandler(app);
Restart your server and try to send a request to an endpoint that requires authentication:
curl http://localhost:8080/v1/notes
You should receive the response below:

But if you change the request to contain the Authorization header with a valid API key:
curl -H "Authorization: Bearer kRdSd2kTq7oh44xEMMsSEh2EfzcSeLAT2ERlX1y7XX" http://localhost:8080/v1/notes
You get all notes in the system:

Congratulations! The app is complete.
Why not take a break and celebrate your victory before moving on? :] You deserve it.
Deploying Your Dart API on Google Cloud Run
Google Cloud Run is a fully-managed, serverless platform that allows you to deploy autoscaling containerized microservices on Google Cloud Platform (GCP).
To deploy the app on Cloud Run, you need to install Google Cloud CLI (gcloud).
Installing Google Cloud CLI
Installation instructions vary depending on your operating system. Use the following links to install the gcloud CLI:
- Install on Windows
- Installation instructions for macOS
- Installation on Linux systems
- Ubuntu/Debian and Fedora/Red Hat/CentOS
While gcloud CLI is installing, you can proceed to configure the project using a Dockerfile to deploy it as a Docker container.
Configuring the Dockerfile
A Dockerfile contains all command-line instructions you’d specify for Docker to assemble your Docker image. This file will reside at the root of the project.
Now, go ahead and create the file Dockerfile. Open it and add the following:
# 1
FROM dart:stable AS mnote_build
# 2
ENV PORT=8080
WORKDIR /app
COPY pubspec.* ./
RUN dart pub get
# 3
COPY . .
RUN dart pub get --offline
RUN dart compile exe bin/mnote.dart -o bin/mnote
# 4
FROM scratch
COPY --from=mnote_build /runtime/ /
COPY --from=mnote_build /app/bin/mnote /app/bin/
# 5
EXPOSE $PORT
CMD ["/app/bin/mnote"]
This is what the instructions in the Dockerfile mean:
- Firstly, you use the latest stable version of the official Dart image as a starting point for this build. Also, you named this build stage
mnote_buildso you can reference the image later. - Secondly, you defined an environment variable
PORT. Then, you make /app the working directory for this build, making executions of all subsequent Docker instructions relative to this directory. The nextCOPYinstruction will copy allpubspec[pubspec.yaml, pubspec.lock, etc] files to this directory. Then, you rundart pub getto get packages. - Next, you copy all source code files from the current build context to the working directory. You run
dart pub get --offlineto get packages again — this time, making the packages available for offline use. You then compile the code into an executable and output it to bin/mnote. - Then, you start a new build stage using the scratch base image. In this stage, you copy the previously compiled runtime libraries and configuration files mnote_build generated in it’s /runtime/ directory to this new build context. Finally, you copy the mnote executable that was compiled from the mnote_build build stage to the /app/bin/ directory of the current build context.
- Lastly, you expose port
8080for the container to listen at runtime. Then you run the server.
Now’s the time to check the gcloud installation status. Ensure that Google Cloud is installed before continuing.
Deploying to Cloud Run
Before you deploy, delete the service account file, remove getCredentials() in bin/mnote.dart and replace clientViaServiceAccount() with the following:
final client = await clientViaApplicationDefaultCredentials(
  scopes: [FirestoreApi.datastoreScope],
);
clientViaApplicationDefaultCredentials() enables access to your project’s resources through Application Default Credentials. Therefore, it removes the need for service account credentials.
Next, initialize gcloud and follow the instructions to configure it:
gcloud init --project mnote-c7379
Then, run the following while at the root of the project:
gcloud run deploy --source .
This deploys the project on Cloud Run. Running the command brings a series of prompts. Use the following to respond to them:
- For Service name, enter mnote.
- When prompted to specify a region, select the one nearest to your users.
- For any other prompt requesting for [y/N], press y.