How to Create a Framework for iOS
Learn how to create a framework for iOS, allowing you to elegantly and efficiently package up and redistribute your code across different apps and teams By Sam Davies.
Creating a UI Control
Now that you’ve set up your project, it’s time to add some functionality to the library. Since the point of this tutorial is to describe how to build a framework, not how to build a UI control, you’ll borrow the code from the last tutorial. In the zip file you downloaded earlier you’ll find the directory RWKnobControl. Drag it from the finder into the RWUIControls group in Xcode.
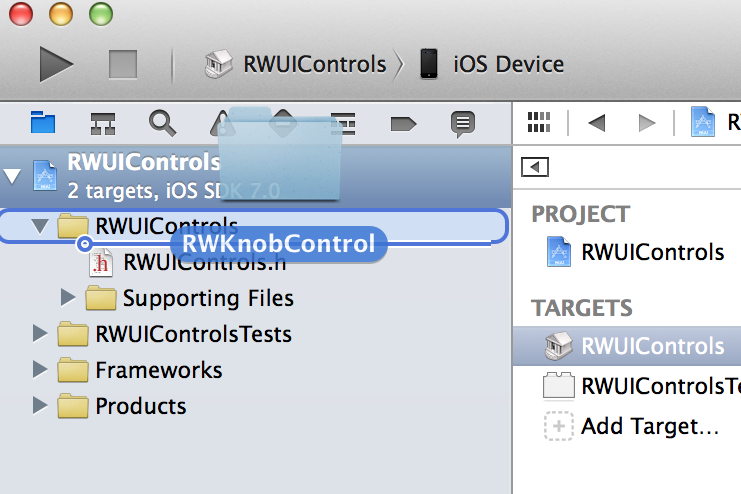
Choose to Copy items into destination group’s folder and ensure the new files go to the RWUIControls static library target by ticking the appropriate box.

This will add the implementation files to the compilation list and, by default, the header files to the Project group. This means that they will be private.

Note: The three section names can be somewhat confusing until you break them down. Public is just as you’d expect. Private headers are still exposed, which is a little misleading. And Project headers are those specific to your project which are, somewhat ironically, private. Therefore, you’ll find more often than not that you’ll want your headers in either the Public or Project groups.
Now you need to share the main control header, RWKnobControl.h, and there are several ways you can do this. The first is to drag the file from the Project group to the Public group in the Copy Headers panel.

Alternatively, you might find it easier to change the membership in the Target Membership panel when editing the file. This option is a bit more convenient as you can continue to add and develop the library.
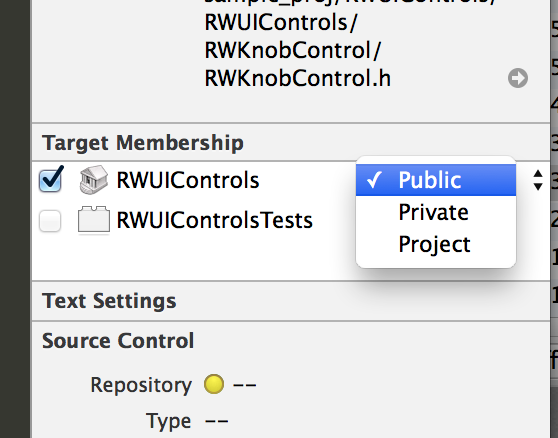
Note: As you continue to add new classes to your library, remember to keep their membership up-to-date. Make as few headers public as possible, and ensure the remainder are in the Project group.
The other thing to do with your control’s header file is add it to the library’s main header file, RWUIControls.h. With such a main header file, a developer using your library only needs to include one file like you see below, instead of having to sort out which pieces they need:
#import <RWUIControls/RWUIControls.h>
Therefore, add the following to RWUIControls.h:
// Knob Control
#import <RWUIControls/RWKnobControl.h>
Configuring Build Settings
You are now very close to building this project and creating a static library. However, there are a few settings to configure to make the library as user-friendly as possible.
First, you need to provide a directory name for where you’ll copy public headers. This ensures you can locate the relevant headers when you use the static library.
Click on the project in the Project Navigator, and then select the RWUIControls static library target. Select the Build Settings tab, then search for public header. Double click on the Public Headers Folder Path setting and enter the following in the popup:
include/$(PROJECT_NAME)

You’ll see this directory later.
Now you need to change some other settings, specifically those that remain in the binary library. The compiler gives you the option of removing dead code; code which is never accessed. And you can also remove debug symbols i.e. function names and other debugging related details.
Since you’re creating a framework for others to use, it’s best to disable both and let the user choose what’s best for their project. To do this, using the same search field as before, update the following settings:
-
Dead Code Stripping – Set this to
NO -
Strip Debug Symbols During Copy – Set this to
NOfor all configurations -
Strip Style – Set this to
Non-Global Symbols
Build and run. There’s not a lot to see yet, but it’s still good to confirm the project builds successfully and without warnings or errors.
To build, select the target as iOS Device and press cmd+B to perform the build. Once completed, the libRWUIControls.a product in the Products group of the Project Navigator will turn from red to black, signaling that it now exists. Right click on libRWUIControls.a and select Show in Finder.

In this directory you’ll see the static library itself, libRWUIControls.a, and the directory you specified for the public headers, include/RWUIControls. Notice the headers you made public can be found in this folder, just as you might expect.
Creating a Dependent Development Project
Developing a UI controls library for iOS is extremely difficult when you can’t actually see what you’re doing, and that seems to be the case now.
Nobody wants you to work blindly, so in this section you’re going to create a new Xcode project that will have a dependency on the library you just created. This will allow you to develop the framework using an example app. Naturally, the code for this app will be kept completely separate from the library itself, as this makes for a much cleaner structure.
Close the static library project by choosing File/Close Project. Then create a new project using File/New/Project. Select iOS/Application/Single View Application, and call the new project UIControlDevApp. Set the class prefixes to RW and specify that it should be iPhone only. Finally save the project in the same directory you used for RWUIControls.
To add the RWUIControls library as a dependency, drag RWUIControls.xcodeproj from the finder into the UIControlDevApp group in Xcode.
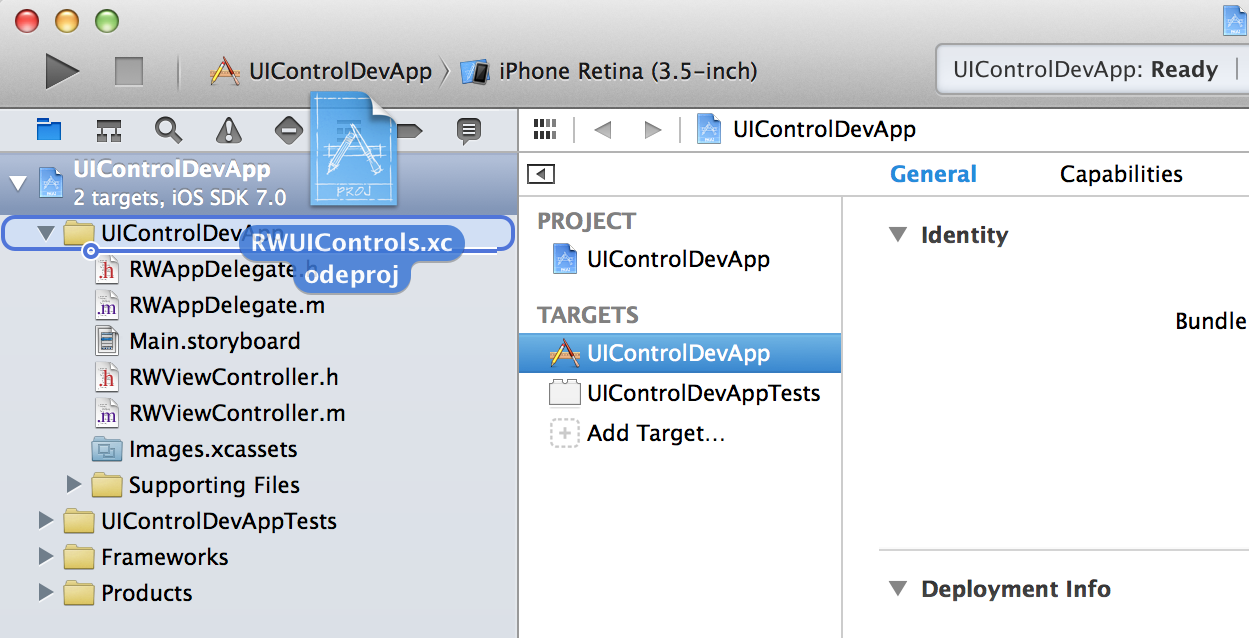
You can now navigate around the library project, from inside the app’s project. This is perfect because it means that you can edit code inside the library and run the example app to test the changes.
Note: You can’t have the same project open in two different Xcode windows. If you find that you’re unable to navigate around the library project, check that you don’t have it open in another Xcode window.
Rather than recreate the app from the last tutorial, you can simply copy the code. First, select Main.storyboard, RWViewController.h and RWViewController.m and delete them by right clicking and selecting Delete, choosing to move them to the trash. Then copy the DevApp folder from the zip file you downloaded earlier right into the UIControlDevApp group in Xcode.

Now you’re going to add the static library as a build dependency of the example app:
- Select the UIControlDevApp project in the Project Navigator.
- Navigate to the Build Phases tab of the UIControlDevApp target.
- Open the Target Dependencies panel and click the + to show the picker.
- Find the RWUIControls static library, select and click Add. This action means that when building the dev app, Xcode will check to see whether the static library needs rebuilding or not.
In order to link against the static library itself, expand the Link Binary With Libraries panel and again click the +. Select libRWUIControls.a from the Workspace group and click Add.
This action makes it so that Xcode will link it against the static library, just as it links against system frameworks like UIKit.

Build and run to see it in action. If you followed the previous tutorial on building a knob control, you’ll recognize the simple app before your eyes.

The beauty of using nested projects like this is that you can continue to work on the library itself, without ever leaving the example app project, even as you maintain the code in different places. Each time you build the project, you’re also checking that you have the public/project header membership set correctly. The example app won’t build if it’s missing any required headers.