How to Create a Framework for iOS
Learn how to create a framework for iOS, allowing you to elegantly and efficiently package up and redistribute your code across different apps and teams By Sam Davies.
How to Use a Framework
Okay, you have a framework, you have libraries and they’re elegant solutions for problems you’ve not yet encountered. But what’s the point of all this?
One of the primary advantages in using a framework is its simplicity in use. Now you’re going to create a simple iOS app that uses the RWUIControls.framework that you’ve just built.
Start by creating a new project in Xcode. Choose File/New/Project and select iOS/Application/Single View Application. Call your new app ImageViewer; set it for iPhone only and save it in the same directory you’ve used for the previous two projects. This app will display an image and allow the user to change its rotation using a RWKnobControl.
Look in the ImageViewer directory of the zip file you downloaded earlier for a sample image. Drag sampleImage.jpg from the finder into the ImageViewer group in Xcode.
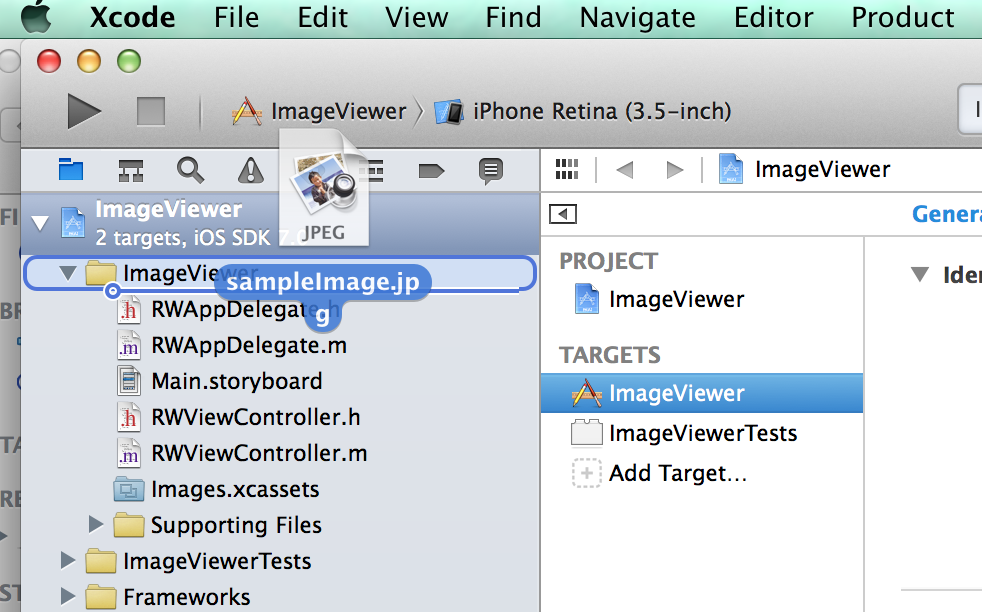
Check the Copy items into destination group’s folder box, and click Finish to complete the import.
Importing a framework follows a nearly identical process. Drag RWUIControls.framework from the desktop into the Frameworks group in Xcode. Again, ensure that you’ve checked the box before Copy items into destination group’s folder.
Open up RWViewController.m and replace the code with the following:
#import "RWViewController.h"
#import <RWUIControls/RWUIControls.h>

@interface RWViewController ()
@property (nonatomic, strong) UIImageView *imageView;
@property (nonatomic, strong) RWKnobControl *rotationKnob;
@end

@implementation RWViewController

- (void)viewDidLoad
{
    [super viewDidLoad];
    // Create UIImageView
    CGRect frame = self.view.bounds;
    frame.size.height *= 2/3.0;
    self.imageView = [[UIImageView alloc] initWithFrame:CGRectInset(frame, 0, 20)];
    self.imageView.image = [UIImage imageNamed:@"sampleImage.jpg"];
    self.imageView.contentMode = UIViewContentModeScaleAspectFit;
    [self.view addSubview:self.imageView];

    // Create RWKnobControl
    frame.origin.y += frame.size.height;
    frame.size.height /= 2;
    frame.size.width  = frame.size.height;
    self.rotationKnob = [[RWKnobControl alloc] initWithFrame:CGRectInset(frame, 10, 10)];
    CGPoint center = self.rotationKnob.center;
    center.x = CGRectGetMidX(self.view.bounds);
    self.rotationKnob.center = center;
    [self.view addSubview:self.rotationKnob];

    // Set up config on RWKnobControl
    self.rotationKnob.minimumValue = -M_PI_4;
    self.rotationKnob.maximumValue = M_PI_4;
    [self.rotationKnob addTarget:self
                          action:@selector(rotationAngleChanged:)
                forControlEvents:UIControlEventValueChanged];
}

- (void)rotationAngleChanged:(id)sender
{
    self.imageView.transform = CGAffineTransformMakeRotation(self.rotationKnob.value);
}

- (NSUInteger)supportedInterfaceOrientations
{
    return UIInterfaceOrientationMaskPortrait;
}

@end
This is a simple view controller that does the following:
- Import the framework’s header with
#import <RWUIControls/RWUIControls.h>. - Set up a couple of private properties to hold the
UIImageViewand theRWKnobControl. - Create a
UIImageView, and use the sample image that you added to the project a few steps back. - Create a
RWKnobControland position it appropriately. - Set some properties on the knob control, including setting the change event handler to be the
rotationAngleChanged:method. - The
rotationAngleChanged:method simply updates thetransformproperty of theUIImageViewso the image rotates as the knob control is moves.
For further details on how to use the RWKnobControl check out the previous tutorial, which explains how to create it.
Build and run. You’ll see a simple app, which as you change the value of the knob control the image rotates.

Using a Bundle for Resources
Did you notice that the RWUIControls framework only consists of code and headers? For example, you haven’t used any other assets, such as images. This is a basic limitation on iOS, where a framework can only contain header files and a static library.
Now buckle up, this tutorial is about to take off. In this section you’ll learn how to work around this limitation by using a bundle to collect assets, which can then be distributed alongside the framework itself.
You’re going to create a new UI control to be part of the RWUIControls library; a ribbon control. This will place an image of a ribbon on the top right hand corner of a UIView.
Creating a bundle
The resources will be added to a bundle, which takes the form of an additional target on the RWUIControls project.
Open the UIControlDevApp project, and select the RWUIControls sub-project. Click the Add Target button, then navigate to OS X/Framework and Library/Bundle. Call the bundle RWUIControlsResources and select Core Foundation from the framework selection box.

There are a couple of build settings to configure since you’re building a bundle for use in iOS as opposed to the default of OSX. Select the RWUIControlsResources target and then the Build Settings tab. Search for base sdk, select the Base SDK line and press delete. This will switch from OSX to iOS.

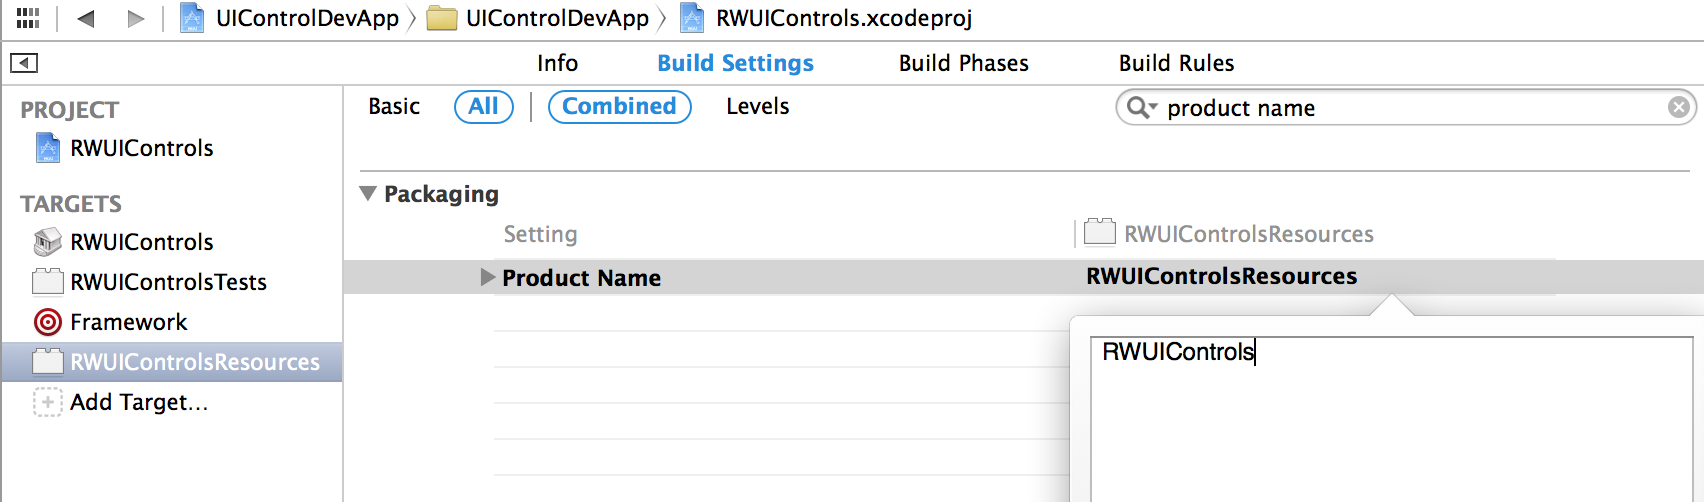
You also need to change the product name to RWUIControls. Search for product name and double-click to edit. Replace ${TARGET_NAME} with RWUIControls.
By default, images which have two resolutions can produce some interesting results; for instance when you include a retina @2x version. They’ll combine into a multi-resolution TIFF, and that’s not a good thing. Search for hidpi and change the COMBINE_HIDPI_IMAGES setting to NO.

Now you’ll make sure that when you build the framework, the bundle will also build and add the framework as a dependency to the aggregate target. Select the Framework target, and then the Build Phases tab. Expand the Target Dependencies panel, click the +, and then select the RWUIControlsResources target to add it as a dependency.

Now, within the Framework target’s Build Phases, open the MultiPlatform Build panel, and add the following to the end of the script:
# Copy the resources bundle to the user's desktop
ditto "${BUILT_PRODUCTS_DIR}/${RW_FRAMEWORK_NAME}.bundle" \
      "${HOME}/Desktop/${RW_FRAMEWORK_NAME}.bundle"
This command will copy the built bundle to the user’s desktop. Build the framework scheme now so you can see the bundle appear on the desktop.

Importing the Bundle
In order to develop against this new bundle, you’ll need to be able to use it in the example app. This means you must add it as both a dependency, and an object to copy across to the app.
In the Project Navigator, select the UIControlDevApp project, then click on the UIControlDevApp target. Expand the Products group of the RWUIControls project and drag RWUIControls.bundle to the Copy Bundle Resources panel inside the Build Phases tab.
In the Target Dependencies panel, click the + to add a new dependency, and then select RWUIControlsResources.

Building a Ribbon View
That’s all the setup required. Drag the RWRibbon directory from inside the zip file you downloaded earlier into the RWUIControls group within the RWUIControls project.

Choose Copy the items into the destination group’s folder, making sure they are part of the RWUIControls static lib target by ticking the appropriate box.

An important part of the source code is how you reference images. If you take a look at addRibbonView inside the RWRibbonView.m file you’ll see the relevant line:
UIImage *image = [UIImage imageNamed:@"RWUIControls.bundle/RWRibbon"];
The bundle behaves just like a directory, so it’s really simple to reference an image inside a bundle.
To add the images to bundle, choose them in turn, and then, in the right hand panel, select that they should belong to theRWUIControlsResources target.

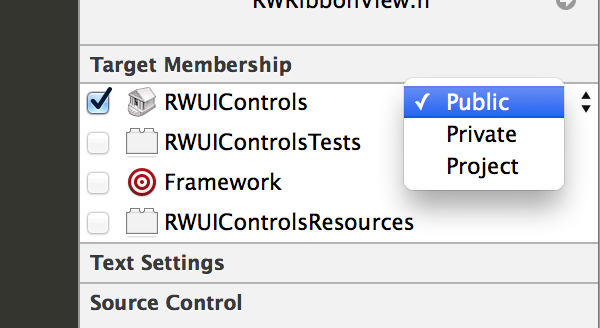
Remember the discussion about making sure the framework is accessible to the public? Well, now you need to export the RWRibbon.h header file, select the file, then choose Public from the drop down menu in the Target Membership panel.
Finally, you need to add the header to the framework’s header file. Open RWUIControls.h and add the following lines:
// RWRibbon
#import <RWUIControls/RWRibbonView.h>