Testing With Hilt Tutorial: UI and Instrumentation Tests
Learn how to get started with testing with Hilt by writing UI and instrumentation tests. By Massimo Carli.
Creating the Skeleton Class for a UI Robolectric Test
Open your newly created RoboMainActivityTest.kt and replace its content with the following:
import dagger.hilt.android.testing.HiltAndroidRule
import dagger.hilt.android.testing.HiltAndroidTest
import dagger.hilt.android.testing.HiltTestApplication
import org.junit.Assert.assertTrue
import org.junit.Before
import org.junit.Rule
import org.junit.Test
import org.junit.runner.RunWith
import org.robolectric.RobolectricTestRunner
import org.robolectric.annotation.Config
import org.robolectric.annotation.LooperMode

@HiltAndroidTest // 1
@Config(application = HiltTestApplication::class) // 2
@RunWith(RobolectricTestRunner::class) // 3
@LooperMode(LooperMode.Mode.PAUSED)  // 4
class RoboMainActivityTest {

    @get:Rule
    var hiltAndroidRule = HiltAndroidRule(this) // 5

    @Before
    fun setUp() {
        hiltAndroidRule.inject() // 6
    }

    @Test
    fun whenMainActivityLaunchedNavigationHelperIsInvokedForFragment() { // 7
        assertTrue(true)
    }
}
There are many important things to note here:
Hilt already provides this with HiltTestApplication. By using @Config, you’re telling Hilt that the Application implementation to use for the tests is HiltTestApplication. As you’ll see later, you can achieve the same result with a configuration in a robolectric.properties file.
- You annotate the test class with
@HiltAndroidTest. This is very important because it tells Hilt you need to create a dependency graph for the test that’s different from the one you use in the app. - As you learned in the previous tutorials, the
Applicationimplementation for the app is the place where the construction of the dependency graph starts. Here, you use@HiltAndroidAppto tell Hilt what this implementation is, just as you did in RwNewsApplication.kt. But, as you just learned, tests require a different dependency graph with different objects that you create using a differentApplicationimplementation. - Using
@RunWith, you explicitly defineRobolectricTestRunneras the TestRunner to be used in order to run the tests in this file. - Threading during the execution of a test is a complex topic that would require its own tutorial to explain thoroughly. Here, you’re using
@LooperMode(LooperMode.Mode.PAUSED)to basically run the Robolectric tests on the main thread. - To create and destroy the Hilt-provided dependency graph for each test execution, you create an instance of
HiltAndroidRuleinhiltAndroidRule. - You invoke
inject()onhiltAndroidRuleat the beginning of each test. As you’ll see later, this injects objects from the Hilt test dependency graph into the test itself. - Of course, you need to create the test function with a name that explains what you’re actually testing. In this case, you’re just asserting something that is true to check that all the configurations are correct.
Now, you’re ready to run the test by selecting the green arrow:
Running RoboMainActivityTest.

This gives you the following result:
RoboMainActivityTest Result

Next, you’ll see how to configure Robolectric tests using a robolectric.properties file.
Configuring Robolectric With robolectric.properties
To configure the SDK version to use when running Robolectric tests,

Then select resources

Then create a new file called robolectric.properties

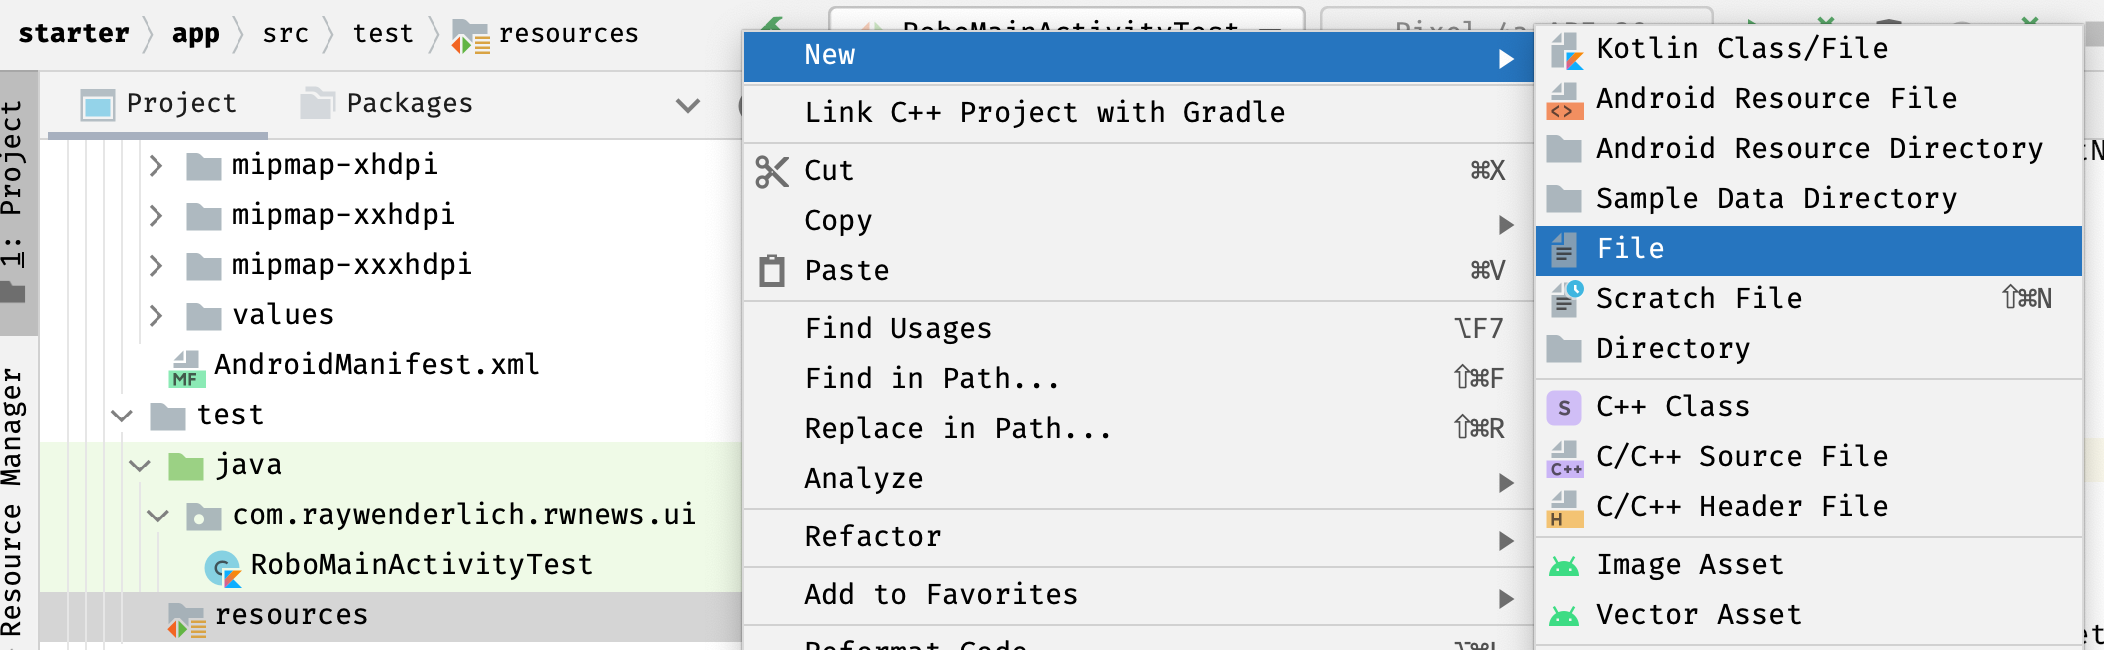
- Right click the test directory and select New > Directory.
- Right click the resources directory and select New > File.
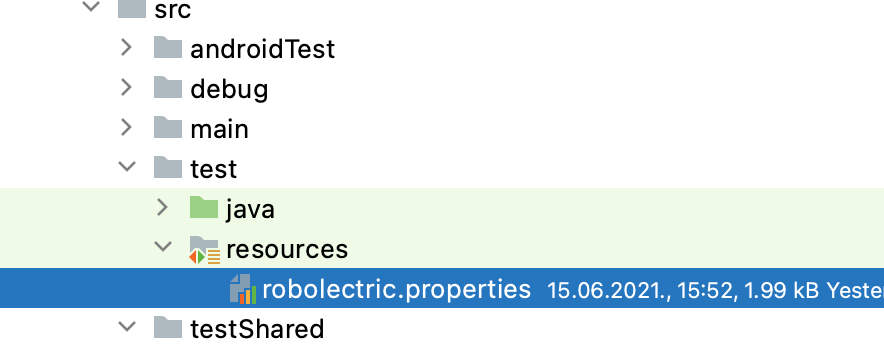
You would have file inside the resource folder for the test build type, like this:
Robolectric Properties File.
Now, add the following properties:
sdk=28
application=dagger.hilt.android.testing.HiltTestApplication
Here, you use sdk to choose the SDK version for the Robolectric tests. You use application to define the Application implementation to use for the tests.
Now, try out the different SDK versions and see how the test results change.
Implementing a Robolectric UI Test
In the previous section, you created an empty test to verify the Hilt configuration for Robolectric. Now, it’s time to create the actual test.
To do this, you need to:
- Configure the ActivityScenario API to launch
MainActivity. - Replace the existing
NavigationHelperimplementation with the fake one. - Implement the assertions that tell you whether the test is successful or not.
Code along to implement the Robolectric UI test.
Configuring ActivityScenario
To configure the ActivityScenario API, open RoboMainActivityTest.kt and replace the existing class code with this:
import androidx.test.ext.junit.rules.ActivityScenarioRule

@HiltAndroidTest
@Config(application = HiltTestApplication::class)
@RunWith(RobolectricTestRunner::class)
@LooperMode(LooperMode.Mode.PAUSED)
class RoboMainActivityTest {

  @get:Rule(order = 0)
  var hiltAndroidRule = HiltAndroidRule(this)

  @get:Rule(order = 1) // 2
  var activityScenarioRule: ActivityScenarioRule<MainActivity> =
      ActivityScenarioRule(MainActivity::class.java) // 1

  @Before
  fun setUp() {
    hiltAndroidRule.inject()
  }

  @Test
  fun whenMainActivityLaunchedNavigatorIsInvokedForFragment() {
    activityScenarioRule.scenario // 3
  }
}
The Activity Scenario API allows you to launch an Activity during a test. To use it, you need to:
- Initialize a new JUnit rule of type
ActivityScenarioRule<MainActivity>inactivityScenarioRule. - Remember that a JUnit rule is a smart way to create and initialize the execution environment of a test and release it when the test completes. If you have multiple rules, the order you execute them in is important. Here, you use
orderto ensure the rules run in the correct sequence.HiltAndroidRuleneeds to be the first rule to run, so you setorder = 0. Note that JUnit added this attribute in version 4.13.1. - To launch
MainActivity, you simply accessscenarioinactivityScenarioRule. Note howMainActivityis the one you set as the parameter type value inActivityScenarioRule<MainActivity>.
Now, everything looks right, but running the test as usual in Android Studio gives you the following error:
kotlin.UninitializedPropertyAccessException: lateinit property navigationHelper has not been initialized
  at com.raywenderlich.rwnews.ui.MainActivity.onCreate(MainActivity.kt:57)
This is not your fault. :] There’s a bug that prevents you from running the test in Android Studio. Until a fix comes along, run the test by using the following command in the terminal:
./gradlew testDebugUnitTest --tests "*.RoboMainActivityTest.*"
Now, the test should run successfully, confirming that you correctly configured the UI test with Robolectric and Hilt. Your next step is to implement the actual test.
Replacing NavigationHelper With a Fake
This is the fun part of implementing tests with Hilt. The current test uses the same dependency graph as the app, but you want to replace NavigationHelper‘s implementation with a fake. This is where Hilt helps. It provides some new annotations, specifically:
- @UninstallModules
- @BindValue
As you know, a @Module tells Dagger how to provide an instance for a specific type. If you open ActivityModule, you can see the following definition for NavigationHelper:
@Module
@InstallIn(ActivityComponent::class) // HERE
interface ActivityModule {

  @Binds
  fun provideNavigationHelper(
    impl: NavigationHelperImpl
  ): NavigationHelper
}
As you can see, @InstallIn is used to install the bindings in the ActivityModule of the component for a specific scope. In this case, it’s ActivityComponent.
To replace the binding for NavigationHelper, you need to be able to uninstall it from the same component. To enable this, you’ll use @UninstallModules in your test.
Open RoboMainActivityTest.kt and add the following definition (adding the missing imports using IDE):
@HiltAndroidTest
@Config(application = HiltTestApplication::class)
@RunWith(RobolectricTestRunner::class)
@LooperMode(LooperMode.Mode.PAUSED)
@UninstallModules(ActivityModule::class) // HERE
class RoboMainActivityTest {
  // ...
}
With this simple line of code, you remove the bindings you defined in ActivityModule. Of course, you need to provide an alternative binding for NavigationHelper.
Create a new file named FakeNavigationHelper.kt in the testShared > kotlin > fakes folder. Then, add the following code in the file:
import androidx.fragment.app.Fragment
import com.raywenderlich.rwnews.ui.navigation.NavigationHelper

class FakeNavigationHelper : NavigationHelper {

  data class NavigationInput(
      val anchorId: Int,
      val fragment: Fragment,
      val backStack: String?
  )

  val replaceRequests = mutableListOf<NavigationInput>()

  override fun replace(anchorId: Int, fragment: Fragment, backStack: String?) {
    replaceRequests.add(NavigationInput(anchorId, fragment, backStack))
  }
}
This is a simple fake NavigationHelper implementation. To add it to the dependency graph for RoboMainActivityTest, you just need to add the following declaration to the class (adding the missing imports using IDE):
class RoboMainActivityTest {
  // ...
  @BindValue // 1
  @JvmField // 2
  val navigator: NavigationHelper = FakeNavigationHelper()  // 3
  // ...
}
With this code, you:
- Use
@BindValueto add the binding forFakeNavigationHelperto the dependency graph for the test. - Use
@JvmFieldto ask Kotlin to generate a navigator as a field without a getter and setter. This is a Kotlin annotation. - Define the
navigatorfield that will contain the instance of the binding forNavigationHelper. In practice, this has the same effect as using@Injectin a normal entry point.
It’s important to mention that, while @UninstallModules uninstalls all the bindings in the module you pass as an attribute value, @BindValue adds a single binding. Later, you’ll see how to replace a complete @Module.