Firebase Tutorial: iOS A/B Testing
iOS A/B Testing is an effective way to test user experiences in iOS apps. Learn how Firebase makes it easy to run experiments and review results. By Ron Kliffer.
Defining Variants
Click Next to move to the Variants section. Here, you’ll assign different Remote Config values to the different groups of people who are placed into your experiment.
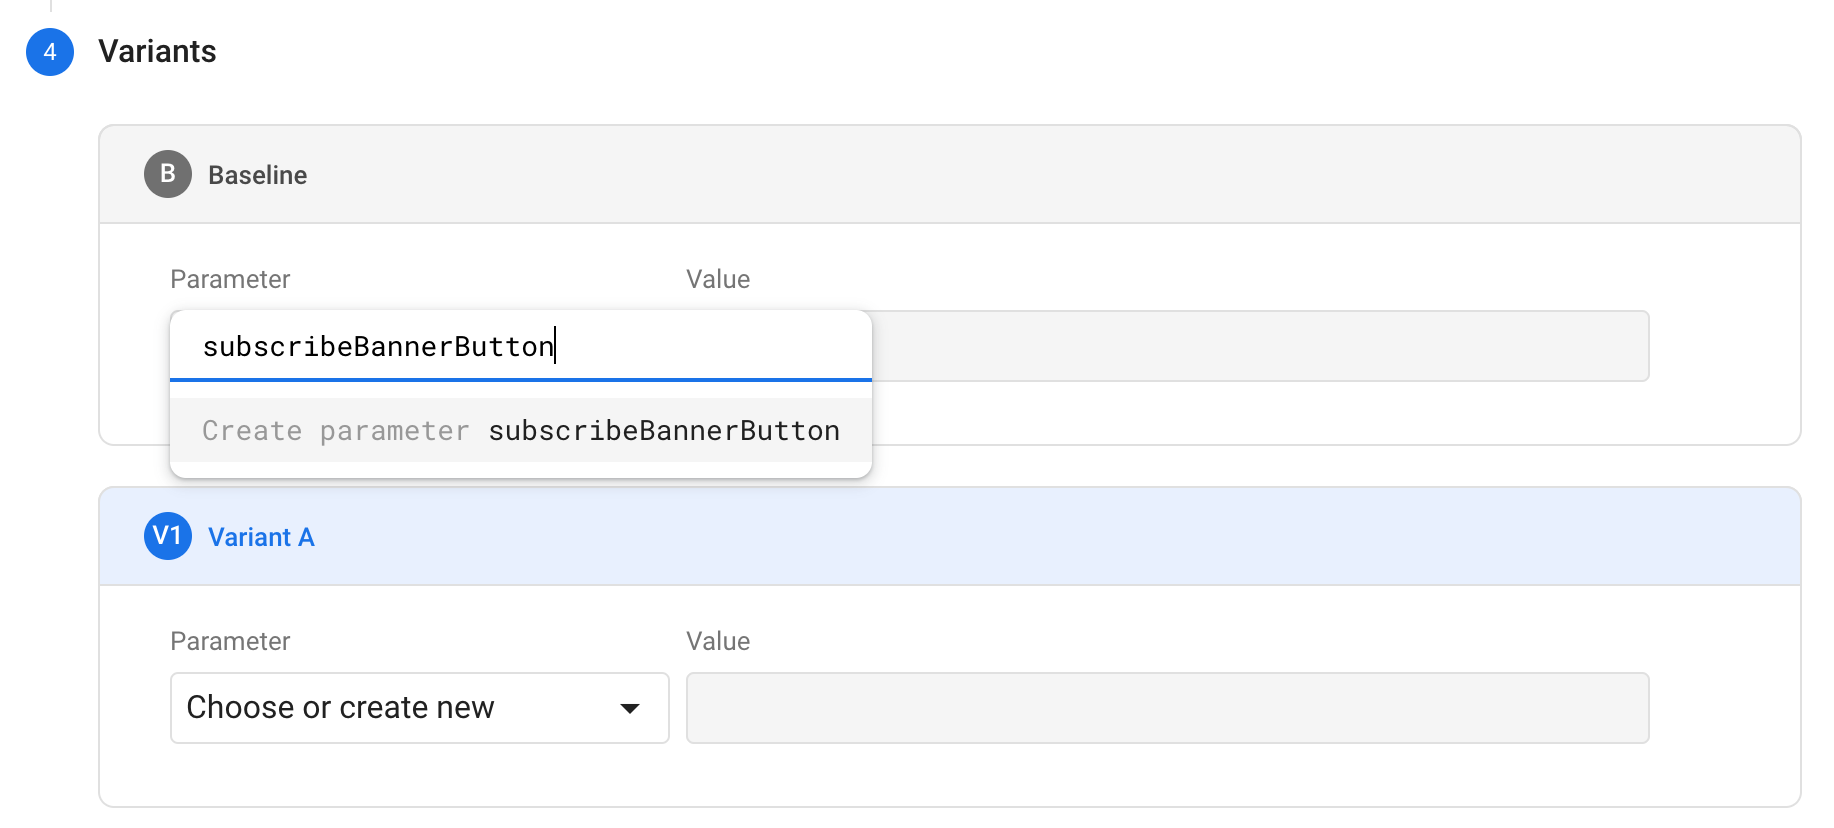
Start by trying different variations of the text that appears in the little banner at the bottom of your main screen. This value is set by the Remote Config variable subscribeBannerButton.
Click Choose or create new. If you used this app in the previous Firebase Remote Config Tutorial for iOS tutorial, you’ll probably see the names of those parameters in a drop-down list. If you don’t have to use those, you can also create new ones! So enter subscribeBannerButton and select the Create parameter option:
You now have the option to add different values of subscribeBannerButton for the different variants in your experiment.
For your control group, leave this value as the default value of (empty string). This will tell Remote Config to use whatever value it would if the user weren’t in your experiment. In your case, this will be the default value of Get our newsletter! as set in RCValues.swift. As a general rule, it’s best if you keep your control group values set to (empty string). That’s the best way to compare your changes against whatever’s currently running in your app.
For the next variant, give the subscribeBannerButton a value of Get more facts!.
Your panel should now look like this:

You’ll also want to experiment with the button that appears in your GetNewsletterViewController — this is the parameter called subscribeVCButton. Click Choose or create new and create a new parameter with that name.
Clarifying the Cause of a Change
You could make this change in Variant A like so:

But this leaves you with a problem. Suppose you found that variant A did better than your control group. How would you know if the change was due to the Get more facts! button on the front page or your renaming of the Subscribe button to Continue? You really wouldn’t know. In fact, there’s always a chance variant A would have done even better if you hadn’t changed the Subscribe button.
A better option would be to try all the different combinations in several variants. This a technique called multi-variant testing, and you’re going to perform a simple version of it now. Leave subscribeVCButton set to (empty string) in Variant A.
Click Add Variant and, this time, leave subscribeBannerButton set to the default and give subscribeVCButton a value of Continue. Then, click Add Variant once more, and give subscribeBannerButton a value of Get more facts! and subscribeVCButton a value of Continue.
Your experiment panel should now look like this:
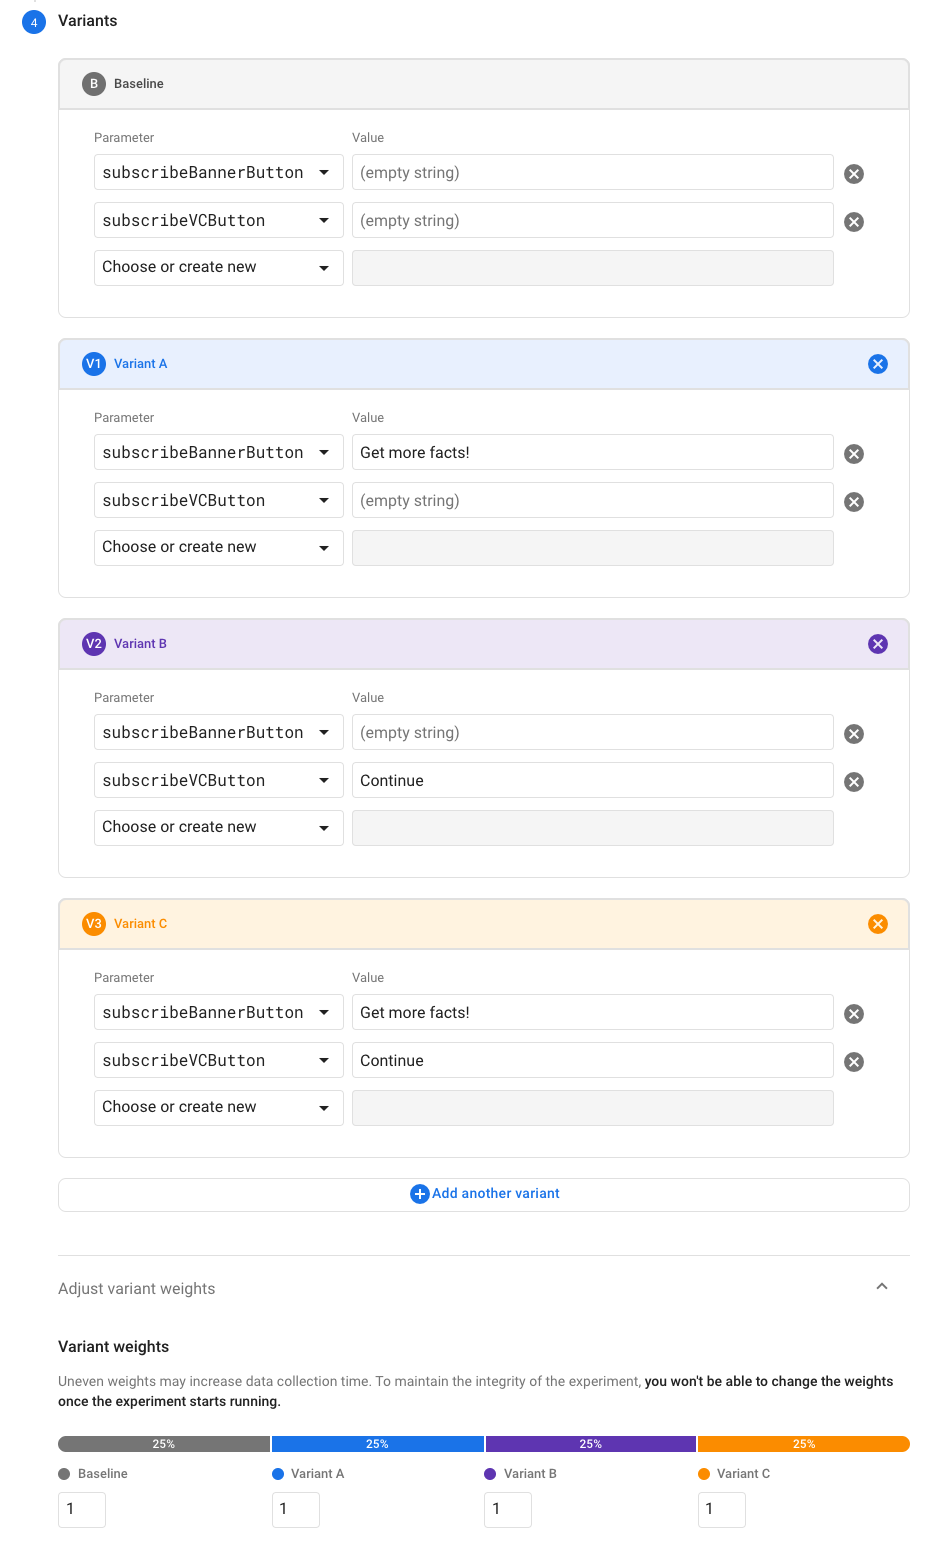
You have successfully added three variants. Two variants where each of the two variables are changed alone, and one variant where both variables are changed at the same time. You could create other variants here to test other strings too!
You’re done creating your experiment! Click Review.
Testing Your Experiment
You probably want to test your experiment before you push it out to the world. Fortunately, Firebase makes it easy to try out all your experiment variations on a single device. To do this, you’re going to need your Instance ID token, which is a unique identifier assigned to every instance of your app.
To fetch it, go back to Planet Tour in Xcode and open AppDelegate.swift. Then, add the following right after the call to FirebaseApp.configure():
Installations.installations().authToken { result, _ in
  print("Your instance ID token is \(result?.authToken ?? "n/a")")
}
Build and run your app. You should see a line like the following somewhere in your Xcode console:
![]()
Go back to your experiment in the Firebase Console and click the Menu button next to the Start experiment button. Then, click Manage test devices:

In the dialog that appears, copy and paste the big instance ID token string from your Xcode console. Then, select a variant from the drop-down list — I like trying variant C because you can test both your changes at once:

Click Add. Then, click Save.
Quit and restart your app. Because your app explicitly has a Remote Config cache time set to zero (see the previous Firebase Remote Config Tutorial for iOS tutorial if you need a refresher on this), you should see your new values right away:

Feel free to try your other variations, too. Simply revisit your Manage test devices dialog, select a different variant from the drop-down list and click Save, and you should see that variant on your test device (or simulator) after you restart the app.
Launching an Experiment
When you’ve tested all your variants and you’re happy with how each one looks on your test devices, you can start the experiment for real. Back in the Firebase A/B test console, click Start Experiment and then click Start.
At this point, 30 percent of your English-speaking audience will be randomly selected to use one of your four different variants. A/B testing will measure their progress, note how many of them reach your final goal of subscribing to the newsletter and tell you in the end which variant appeared to best guide your users toward that goal.
Understanding Your Experiment Results
Firebase A/B testing doesn’t just tell you what variant had the highest “user subscribed to newsletter” rate. It also uses some fancy math known as Bayesian statistics to let you know if these differences are due to the changes you made to your app instead of random chance. This is what people usually mean when they use the phrase “statistically significant”.
For this math to work, Firebase needs to try these different variants on a fairly large number of users. And although Planet Tour is a lovely app, it’s still a test app with a total user count of one. This means that for this tutorial, Firebase A/B testing won’t gather enough data to give you any meaningful results, and you’ll probably be left with a screen that looks like this:

Here’s an example of a completed experiment, from a real live app, that produced a clear improvement:

This has a lot of statistics, but here are the important ones:

This giant label on top gives you the executive summary of your experiment. In this case, it tells you the variant called Guidebot and group improved the baseline by 8 percent. Note that your variants were boringly named Variant A, Variant B and Variant C, however you can actually rename them to give them nice names if you wish.
Below that, you’ll see a graph comparing each variant’s performance over time:

Further down, you’ll see how each variant compares to your control group as a general improvement range in each of the goals you’re measuring:

For example:
- Under Modeled data, you can see it predicts Guidebot and group would perform between 0.3 percent and 16.6 percent better than the control group in driving retention up. Because this is definitely a change for the better, it’s presented in green with an up arrow.
- Observed data measures more of the raw data of the experiment. In this case, you can see that Guidebot and group retained 1,145 users, while the control group only retained 1,064 users.