Firebase Remote Config Tutorial for iOS
In this tutorial, you’ll learn how to make changes to your iOS app immediately without resubmitting to the App Store. By Fabrizio Brancati.
Updating Values From the Cloud
Now that you’re getting proper values from Remote Config, try supplying new values from the cloud.
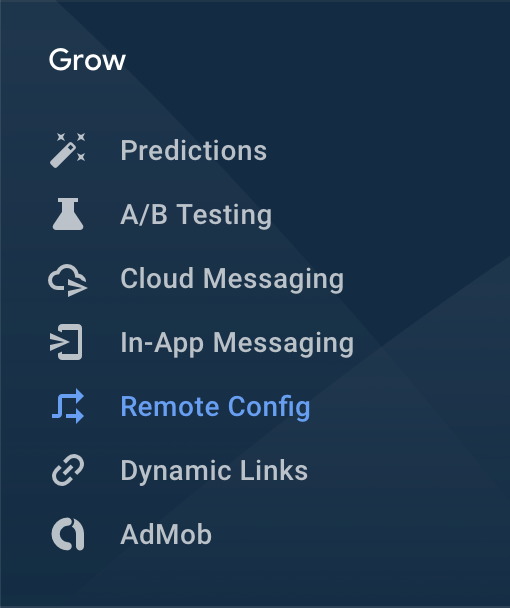
Open the Firebase Console. Look in the left sidebar and expand the Engage section. Click the Remote Config option:
Click Add a parameter. In the form, enter appPrimaryColor for the key and Greg from Marketing’s favorite new green — #36C278 — for the value.

Click Add Parameter, then click Publish Changes twice to update the changes.
Build and run your app.
See what’s in the console now:
Our app's primary color is #36C278
Hooray! You’re updating values from the cloud!
Changing Your App’s Look and Feel
Now, it’s time to hook up your app to use this new value.
First, add an enum to represent your keys. Using raw strings for key names is a recipe for disaster — or at least you’ll spend an afternoon hunting down a mystery bug because you mistyped a key name. By using an enum, Swift can catch errors at compile-time instead of runtime.
Open RCValues.swift and add the following above the class definition:
enum ValueKey: String {
  case appPrimaryColor
}
Next, update loadDefaultValues() to use this enum instead of the raw string:
let appDefaults: [String: Any?] = [
  ValueKey.appPrimaryColor.rawValue : "#FBB03B"
]
Next, add the following helper method to RCValues, which takes in a ValueKey and returns a UIColor based on the string from Remote Config:
func color(forKey key: ValueKey) -> UIColor {
  let colorAsHexString = RemoteConfig.remoteConfig()[key.rawValue]
    .stringValue ?? "#FFFFFF"
  let convertedColor = UIColor(colorAsHexString)
  return convertedColor
}
Finally, change the places in your app using the old AppConstants value to use this new RCValues helper method instead.
Do this in three locations:
1. Open ContainerViewController.swift and change the following inside updateBanner():
bannerView.backgroundColor = AppConstants.appPrimaryColor
to this:
bannerView.backgroundColor = RCValues.sharedInstance
  .color(forKey: .appPrimaryColor)
2. Open GetNewsletterViewController.swift and change the following inside updateSubmitButton():
submitButton.backgroundColor = AppConstants.appPrimaryColor
to this:
submitButton.backgroundColor = RCValues.sharedInstance
  .color(forKey: .appPrimaryColor)
3. Open PlanetDetailViewController.swift and change the following inside updateLabelColors():
nextLabel.textColor = AppConstants.appPrimaryColor
to this:
nextLabel.textColor = RCValues.sharedInstance.color(forKey: .appPrimaryColor)
To be thorough, open AppConstants.swift and delete the following:
static let appPrimaryColor = UIColor(rgba: "#FBB03B")
See ya later, hard-coded value …
Now, build and run your app. You should see the new green throughout the app:

Addressing the Timing of New Values
You don’t have a lot of control over when these new values get applied. The first time you ran the app, you probably saw the default orange on the main menu but then the new green on the planet detail screens once your new values were loaded from the cloud.
This can confuse your users. In this case, you’re only changing some label colors, but it can be quite confusing if your app changes texts or values affecting its behavior while your user is running it.
You can deal with this issue in many ways, but perhaps the easiest might be to create a loading screen. In this tutorial, there’s already one partially set up for you.

Hooking Up a Loading Screen
First, make the loading screen the initial view controller of your app. Open Main.storyboard and Control-drag from your Navigation Controller to the Waiting View Controller — it’s the view controller with the black background, although it might be easier to do this Control-dragging in your storyboard outline. Select root view controller from the pop-up to make your loading screen the initial screen when your app loads.
Now, add the logic to transition to the main menu when Remote Config finishes loading.
Open RCValues.swift, add the following below the sharedInstance property:
var loadingDoneCallback: (() -> Void)?
var fetchComplete = false
Next, find fetchCloudValues() and add the following after the line that prints the app’s primary color:
self?.fetchComplete = true
DispatchQueue.main.async {
  self?.loadingDoneCallback?()
}
Here, you set fetchComplete to true, indicating fetching is complete. Finally, you call the optional callback to inform the listener that the Remote Config values have finished loading. You can use this to tell a loading screen to dismiss itself.
Open WaitingViewController.swift and add the following method:
func startAppForReal() {
  performSegue(withIdentifier: "loadingDoneSegue", sender: self)
}
Next, replace viewDidLoad() with the following:
override func viewDidLoad() {
  super.viewDidLoad()

  if RCValues.sharedInstance.fetchComplete {
    startAppForReal()
  }

  RCValues.sharedInstance.loadingDoneCallback = startAppForReal
}
Here, you’re making startAppForReal() the method RCValues calls when all its values finish loading. You’re also adding a check just in case RCValues somehow manages to finish its network call before the waiting screen finishes loading. This should never happen, but it never hurts to code defensively!
Build and run. You’ll see the waiting screen appear for a short while, depending on your network speed, before jumping into the rest of your app. If you change the value of your app’s primary color in the Firebase console and restart your app, the new color will properly appear everywhere in your app. Remember to click Publish Changes in the Firebase console.

Hook Up the Rest of Your App
Now that you’ve converted one value from AppConstants to RCValues, you can now convert the rest! In this section, you’ll see behind the scenes how the app is wired up. You’ll also see how to organize the supporting code for Remote Config, which you can apply in the future to an app of your own.
Open RCValues.swift and replace ValueKey with the following:
enum ValueKey: String {
  case bigLabelColor
  case appPrimaryColor
  case navBarBackground
  case navTintColor
  case detailTitleColor
  case detailInfoColor
  case subscribeBannerText
  case subscribeBannerButton
  case subscribeVCText
  case subscribeVCButton
  case shouldWeIncludePluto
  case experimentGroup
  case planetImageScaleFactor
}
Next, replace loadDefaultValues() with the following:
func loadDefaultValues() {
  let appDefaults: [String: Any?] = [
    ValueKey.bigLabelColor.rawValue: "#FFFFFF66",
    ValueKey.appPrimaryColor.rawValue: "#FBB03B",
    ValueKey.navBarBackground.rawValue: "#535E66",
    ValueKey.navTintColor.rawValue: "#FBB03B",
    ValueKey.detailTitleColor.rawValue: "#FFFFFF",
    ValueKey.detailInfoColor.rawValue: "#CCCCCC",
    ValueKey.subscribeBannerText.rawValue: "Like PlanetTour?",
    ValueKey.subscribeBannerButton.rawValue: "Get our newsletter!",
    ValueKey.subscribeVCText
      .rawValue: "Want more astronomy facts? Sign up for our newsletter!",
    ValueKey.subscribeVCButton.rawValue: "Subscribe",
    ValueKey.shouldWeIncludePluto.rawValue: false,
    ValueKey.experimentGroup.rawValue: "default",
    ValueKey.planetImageScaleFactor.rawValue: 0.33
  ]
  RemoteConfig.remoteConfig().setDefaults(appDefaults as? [String: NSObject])
}
Next, add three helper methods at the end, below color(forKey:), to allow retrieving values other than colors:
func bool(forKey key: ValueKey) -> Bool {
  RemoteConfig.remoteConfig()[key.rawValue].boolValue
}

func string(forKey key: ValueKey) -> String {
  RemoteConfig.remoteConfig()[key.rawValue].stringValue ?? ""
}

func double(forKey key: ValueKey) -> Double {
  RemoteConfig.remoteConfig()[key.rawValue].numberValue.doubleValue
}
Next, replace every part of your app that uses AppConstants with the corresponding call to RCValues.
You’ll make nine changes throughout your app:
1. Open ContainerViewController.swift and replace updateNavigationColors() with the following:
func updateNavigationColors() {
  navigationController?.navigationBar.tintColor = RCValues.sharedInstance
    .color(forKey: .navTintColor)
}
2. Replace updateBanner() with the following:
func updateBanner() {
  bannerView.backgroundColor = RCValues.sharedInstance
    .color(forKey: .appPrimaryColor)
  bannerLabel.text = RCValues.sharedInstance
    .string(forKey: .subscribeBannerText)
  getNewsletterButton.setTitle(RCValues.sharedInstance
    .string(forKey: .subscribeBannerButton), for: .normal)
}
3. Open GetNewsletterViewController.swift and replace updateText() with the following:
func updateText() {
  instructionLabel.text = RCValues.sharedInstance
    .string(forKey: .subscribeVCText)
  submitButton.setTitle(RCValues.sharedInstance
    .string(forKey: .subscribeVCButton), for: .normal)
}
4. Open PlanetDetailViewController.swift and in updateLabelColors(), replace the line:
nextLabel.textColor = AppConstants.detailInfoColor
with:
nextLabel.textColor = RCValues.sharedInstance.color(forKey: .detailInfoColor)
5. Replace the line:
planetNameLabel.textColor = AppConstants.detailTitleColor
with:
planetNameLabel.textColor = RCValues.sharedInstance
  .color(forKey: .detailTitleColor)
6. Open PlanetsCollectionViewController.swift, and inside customizeNavigationBar(), replace the line:
navBar.barTintColor = AppConstants.navBarBackground
with:
navBar.barTintColor = RCValues.sharedInstance
  .color(forKey: .navBarBackground)
7. Inside collectionView(_:cellForItemAt:), replace the line:
cell.nameLabel.textColor = AppConstants.bigLabelColor
with:
cell.nameLabel.textColor = RCValues.sharedInstance
  .color(forKey: .bigLabelColor)
8. Open SolarSystem.swift and, inside init(), replace the line:
if AppConstants.shouldWeIncludePluto {
with:
if RCValues.sharedInstance.bool(forKey: .shouldWeIncludePluto) {
9. Finally, inside calculatePlanetScales(), replace the line:
scaleFactors.append(pow(ratio, AppConstants.planetImageScaleFactor))
with:
scaleFactors.append(pow(
  ratio,
  RCValues.sharedInstance.double(forKey: .planetImageScaleFactor)))
Whew! That was a lot of changes, but now you should have your entire app switched over. To complete the refactoring, do a search in your app for AppConstants — you should have only one result left, which defines the struct itself:

To be really sure, use the Project navigator to locate your AppConstants.swift file, select it and delete it. Build and run. If your refactoring was successful, you won’t see any errors.

Now that your app is fully wired up to Remote Config, you can make other changes besides the green color that Greg likes so much.