Introduction to Unity: Getting Started – Part 2/2
In this second part of the Introduction to Unity tutorial you’ll learn: “How to use the Project window to import and organize your assets”, “The difference between GameObjects and Prefabs”, “How physics work in Unity”, “How cameras work and which types of projections are available” and “The basics of Materials in Unity”. By Brian Moakley.
Working with GameObjects
As noted in Part 1 of this tutorial series, everything in your Hierarchy will be a type of GameObject. A GameObject by itself contains what’s known as a transform, which has information about the position, scale, and rotation of the GameObject.

You customize GameObjects by adding Components to them. You can think of components as representing the behavior and appearance of the GameObject.
For instance, you can add a lighting component to illuminate your GameObject. You can add an Audio Source to make your GameObject emit sound. Or you can even write your own components as scripts and attach them to GameObjects.
GameObjects can also act as containers. Hold down the Alt key and click on the disclosure triangle to the left of hextraction_pod in the Hierarchy. This will expand the GameObject and all levels below it. You’ll see the following collection of GameObjects:
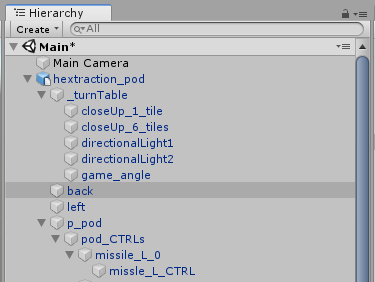
A lot of these are empty GameObjects that represent the structure of a model. Unity creates these GameObjects when you import a model. Other GameObjects, such as the children of pod_mesh, contain components such Skinned Mesh Renderers to display geometry on the screen.
You’ll notice that some GameObjects in the Hierarchy are labeled in black, while others are labeled in blue.

The black color means it’s a standard GameObject. The blue text tells you the GameObject is an instance of a model or if it’s connected to other objects with a Prefab. Sometimes GameObjects also turn brown. This means they’ve lost the prefab connection.
You can tell that you have an instance of a model by its icon.
![]()
Working with Prefabs
Generally, you don’t want to use model instances. It’s better to use prefabs. Prefabs let you save GameObjects so they’re easily duplicated either using code or through dragging new instances into the Scene view.
Prefabs are a bit like using sand forms. Except, the instances of the Prefab are all connected. When you change the Prefab, the instances will change as well.
Once you have an instance of a Prefab in the Scene view, you can customize it as you like. There may be times when you want to push these changes to existing Prefabs (because you liked them) or reset the instance to the state of the original prefab (because you messed up).
To create a Prefab, you drag a GameObject from the Hierarchy and into the Project window.

When you do this, you’ll get a dialog that asks whether you want to create a new prefab or a variant of a prefab.

Since you don’t have a prefab, click the Original Prefab button.
You’ll notice that your icon will turn completely blue. This means you’re working with a prefab instance.
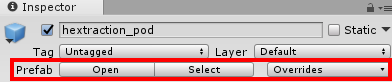
Select hextraction_pod from the Hierarchy. In the Inspector window you’ll see two buttons: Open and Select. There’s also a dropdown called Overrides:
Open allows you to open the prefab and edit it. This allows you to focus on just the prefab. The Hierarchy will only show the selected prefab. To return back to normal editing, click the back arrow in the Hierarchy.

Select locates the Prefab in your Project window. This is particularly useful when you misplace your Prefab in a complicated folder structure within your Project window. Try it now to see what happens.
When you make changes to a Prefab, you’re making a change to a single instance of the Prefab. In Unity-speak, you’re overriding parts of the Prefab. You can apply these changes to the other Prefabs, Revert the changes, or you can just leave them as is. This is done by pressing the Overrides dropdown.

Currently, the player’s ship has a tiled grid underneath it, which looks a bit strange. First, you need to edit the prefab.
Select the prefab and in the Inspector window, click the Open button. Then, select the tile_reference GameObject from the Hierarchy. This is a direct child of the hextraction_pod GameObject.
Delete the grid by pressing the Delete key on Windows or Cmd-Delete on macOS. Click the back arrow in the Hierarchy to exit Prefab editing.
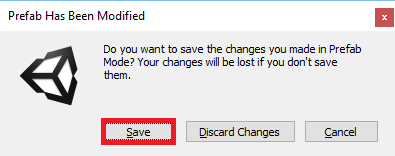
You’ll be prompted to save your changes as you exit Prefab mode. Click Save.
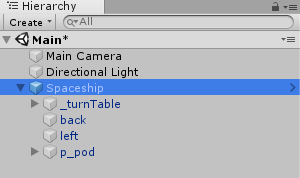
Next, right click on hextraction_pod in the Hierarchy window, select Rename from the drop down menu that appears, and rename the GameObject to Spaceship. It should look like the following:
Dragging a GameObject into the Project window converts it into a prefab without any extra effort on your part. You could create as many instances of the Spaceship as you want by dragging them from the Project window into the Scene view.
Currently, this only copies the model, but later it could contain scripts, audio settings, and much more. As you can see, Prefabs can be really helpful.
Go forth my unstoppable army of spaceships! Muhahaha!
Controlling the Camera
A spaceship isn’t really useful if it can’t move. In this section, you’ll give the player control of the spaceship.
To do that, you’ll need to deal with two things: The camera and the physics system. Don’t worry, you won’t need to learn subatomic particle physics today! :]
First, you need to set up the ship.
- Select the Spaceship in the Hierarchy window.
- Use the Inspector window to set its Position to (X:10.66, Y:1.99, Z:10).
- Set the Rotation to (X:270, Y:0, Z:0).
The values in the Inspector window will match those shown below.

So how did I come up with these values? They are actually quite random.
As I developed the game, I placed the objects in these starting positions. If you made the game, you might have chosen different positions.
Looking at the Game view, you can see that the ship is still a little too close to the camera.
There are two ways to fix this. You can either move the ship further back, or you can reconfigure the camera. Prepare to become a camera assistant! :]
Select the Main Camera in the Hierarchy. You’ll see a Camera component in the Inspector. There are a ton of options here, but for now ignore everything except Projection and Field of View.

You can choose Perspective or Orthographic for your projection field. This choice determines the ultimate appearance of the game.
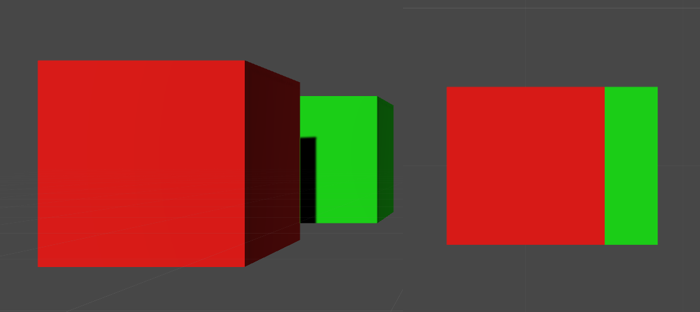
Perspective projection behaves very much like your eye does. The closer an object is to your eye, the larger it appears. Orthographic projections discard depth information. Objects closer to you, or in this case, the camera, will appear the same size as objects farther away.
The two cubes in the left are shown with Perspective projection while the cubes on the right are Orthographic.
Generally speaking, 3D games should use Perspective projection. Games without depth, like 2D games, should use Orthographic projection.
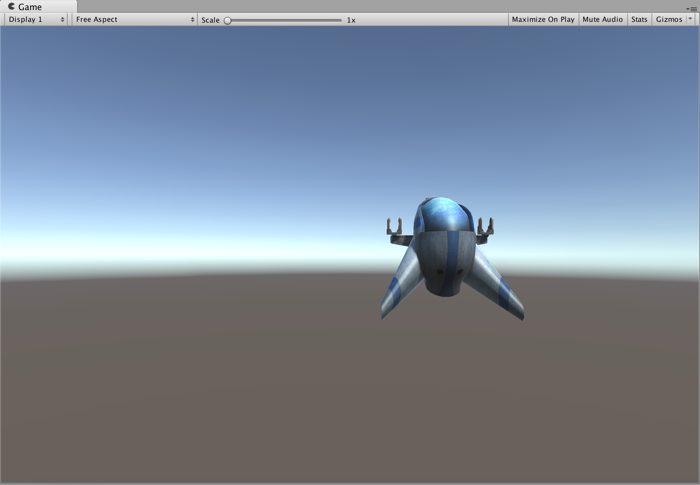
While your game has 3D elements, the gameplay is essentially 2D. In the Projection field, select Orthographic. Next, set the size to 18.85. Your Game view should look like the following:

A spaceship should fly, shouldn’t it? To do this, you’d have to write some code in C# to move the ship frame-by-frame. To save you some work, the example files contain a ready-to-use script. The question is, how do you add it to your ship?
A script is simply another type of component, and there are lots of ways to add components to GameObjects. You’ll experiment with a few methods in this tutorial.
For now, select Spaceship from the Hierarchy. Then select the Component option from the menu bar. At the bottom, you’ll see an option called Scripts with a flyout menu of available scripts. Select the Ship Controller script.

You should now see that the Ship Controller script has been added as a Script component to the Spaceship GameObject in the Inspector window.
Just as with other components, you can define fields in your scripts that you can access in the editor. This gives you the ability to change properties of your scripts while your game is being played.

Set the Move Speed of your component to 22 and Rotation Speed to 2.
The move speed determines the speed of the ship, while the rotation speed determines how quickly the ship can turn. Hit the Play button in the center top of the Unity interface. This starts the game. Use the arrow keys to move your ship.
Unfortunately, your ship will fly off the screen, to Alpha Centauri and beyond. You’ll need to fix that.
Use the menu bar as before to add the Screen Wrap script to the spaceship.

You’ll notice that this component has a field named Renderers, which takes an array of Skinned Mesh Renderers. This is the geometry that creates a model.
If a renderer isn’t onscreen, then it teleports the GameObject to another position on screen based on its movement direction and current position.
Expand the Spaceship node until you find the body GameObject, then drag body into the Renderers field.

Now run your game. To infinity… and beyond! :]

Did you remember to save your work?