macOS Controls Tutorial: Part 1/2
Learn how to use common macOS UI controls like NSTextField, NSComboBox, NSButton, and more in this two-part series — updated for Xcode 11.3 and Swift 5! By Roberto Machorro.
Text is Next – NSTextView
Text views, unlike text fields, are usually the control of choice for displaying rich text. Some implementations even allow for more advanced features such as displaying inline images.
The macOS Control responsible for this is NSTextView.
A great example of an application using all of what NSTextView has to offer is TextEdit:
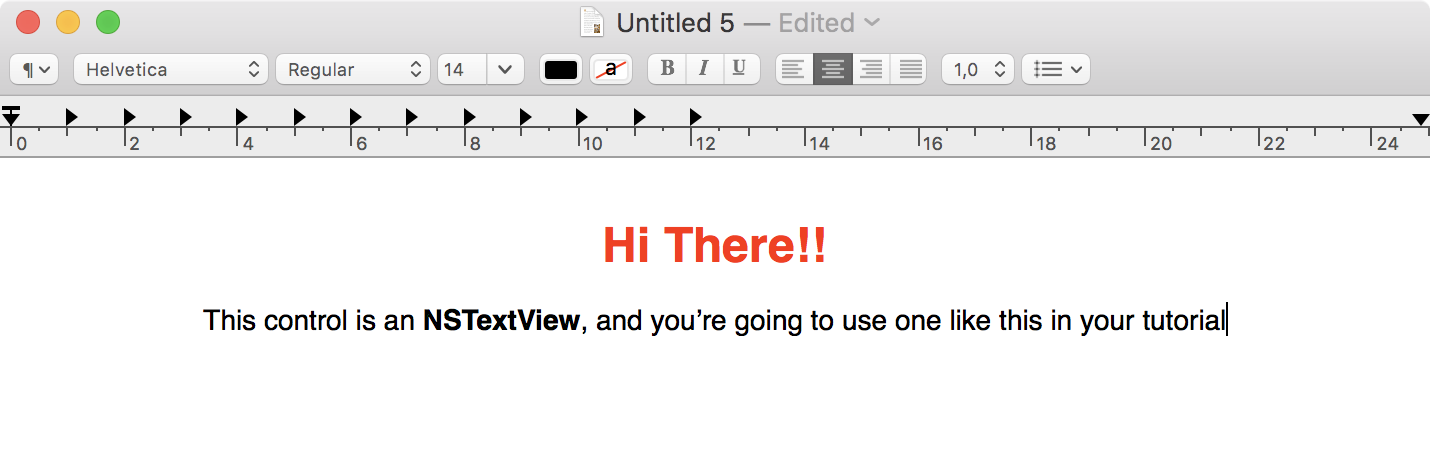
NSTextView is so feature-rich that to cover everything would warrant a tutorial of its own, so here you’ll just see a few of the basic features in order to get you up and running! (Did you just breathe a sigh of relief?) :]
Here are the basic methods you’ll need to work with text views:
// Get the text from a text view
let text = myTextView.string

// Set the text of a text view
myTextView.string = "Text views rock too!"

// Set the background color of a text view
myTextView.backgroundColor = NSColor.white

// Set the text color of a text view
myTextView.textColor = NSColor.black
Relatively simple – nothing too shocking here.
NSTextView also has built-in support for NSAttributedString. If you pass an attributed string to a text view, the string will be displayed correctly using all the appropriate attributes such as font, font size, and font color.
Note: An attributed string is a special type of string where you can tag subsets of the string with different attributes – such as its font, its color, whether its bolded, and so on. To learn all about attributed strings, check out our TextKit Tutorial. It’s an iOS tutorial, but the information about NSAttributedString applies to Mac development as well.
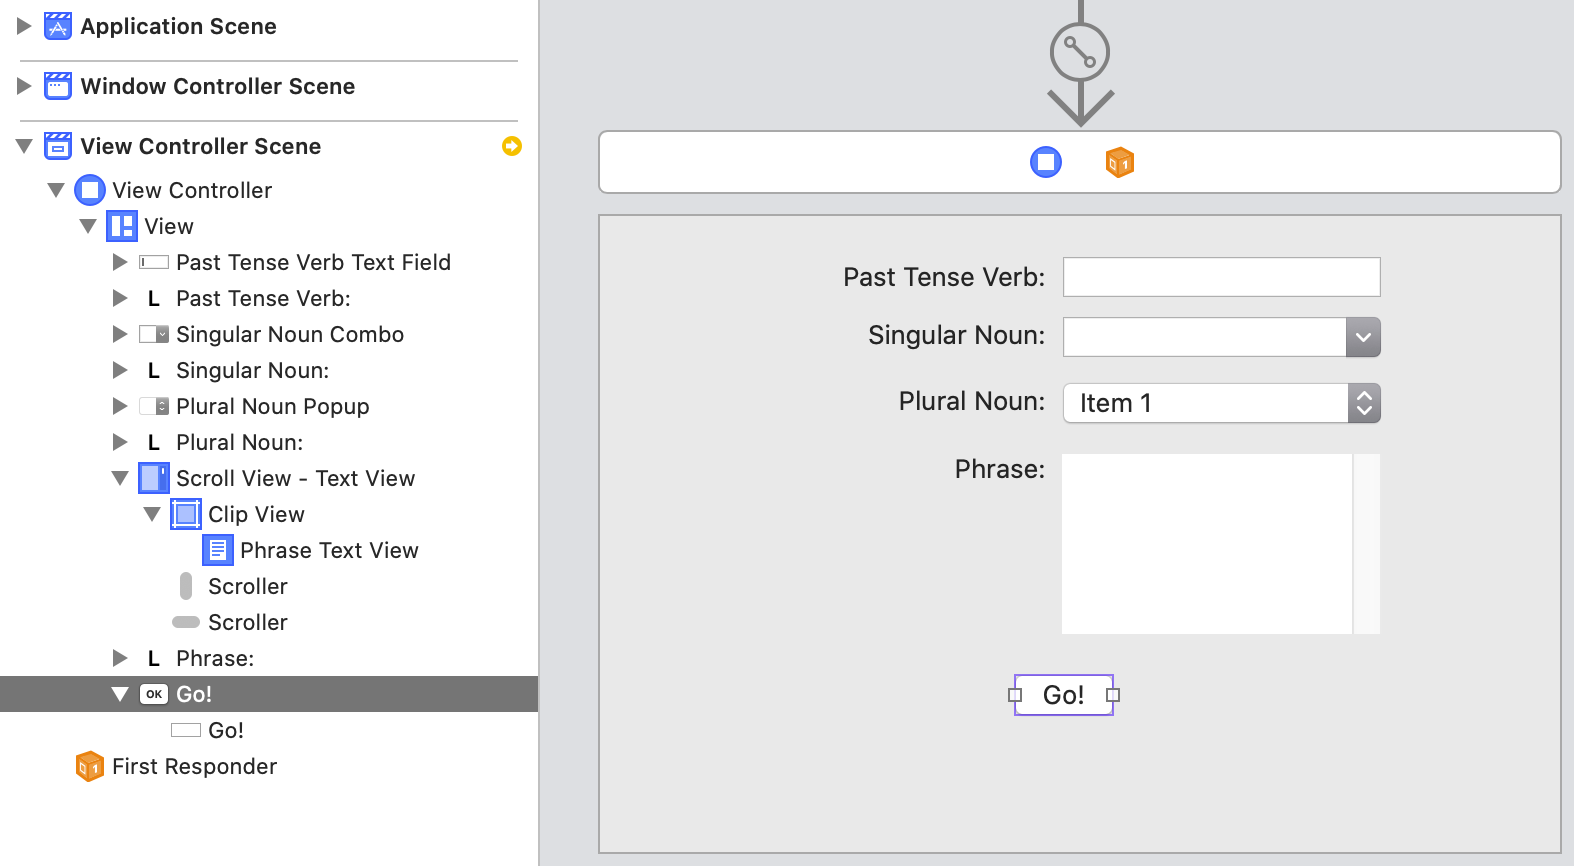
The Phrase that Pays – Adding a Text View
Looks like you have everything you need in order to add a text view to your Mad Libs application! This text view will allow the user to enter a multi-word phrase that will be used in the final rendered Mad Lib.
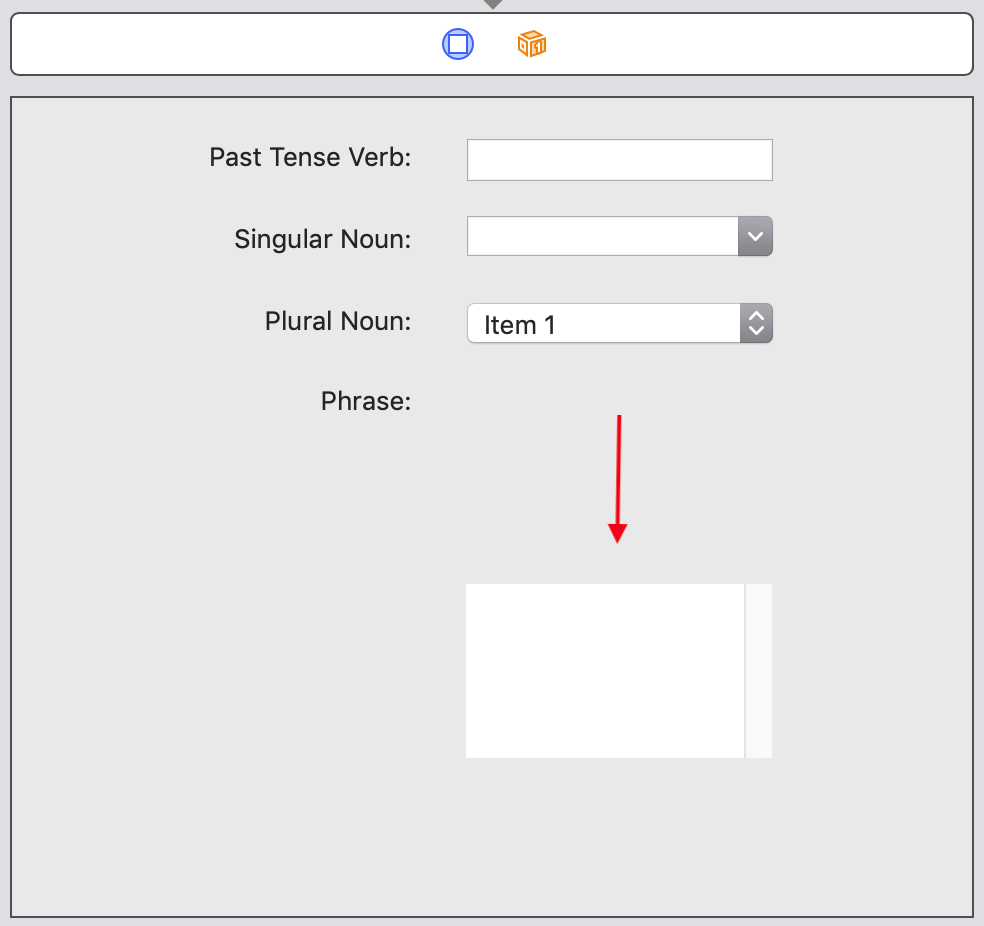
Open Main.storyboard and drag a label just below the Plural Noun label (or duplicate an existing label, as mentioned earlier). Change its alignment to Right and its title to Phrase:.
Next, locate the Text View control and drag it onto the window, placing it beside the label you just created.
Your window should now look like this:

Now, if you try to resize the view and make it taller, you’ll notice something quite particular. The text view moves along, and changes its position when you resize the window.
That’s because by default, Xcode adds Auto resizing constraints to the text view, so that it repositions itself when its parent view is resized. Since you want the text view to stay put, you’ll need to disable some of those.
Select the Scroll View – Text View from the Document Outline and go to the Size Inspector.
In the AutoResizing section, you’ll see a rectangle which has four red lines connected to the parent view. Each one of these red connectors represents an Auto resizing constraint. You just need to click on the Right and Bottom red connectors to disable those, the solid red lines will turn to broken lines with a faded red color as shown below:

Now, the text view stays put and aligned with the label even if you resize the window.
Next, add an NSTextView outlet to the view controller. Select the textview, open the Assistant editor and make sure ViewController.swift is selected. Ctrl-Drag from the text view to the ViewController class under the existing outlets.
Important: Text views are contained inside scroll views. It’s important you make sure you’ve actually selected the text view before creating the outlet. To do so, simply click three times on the text view or select it in the Document Outline.
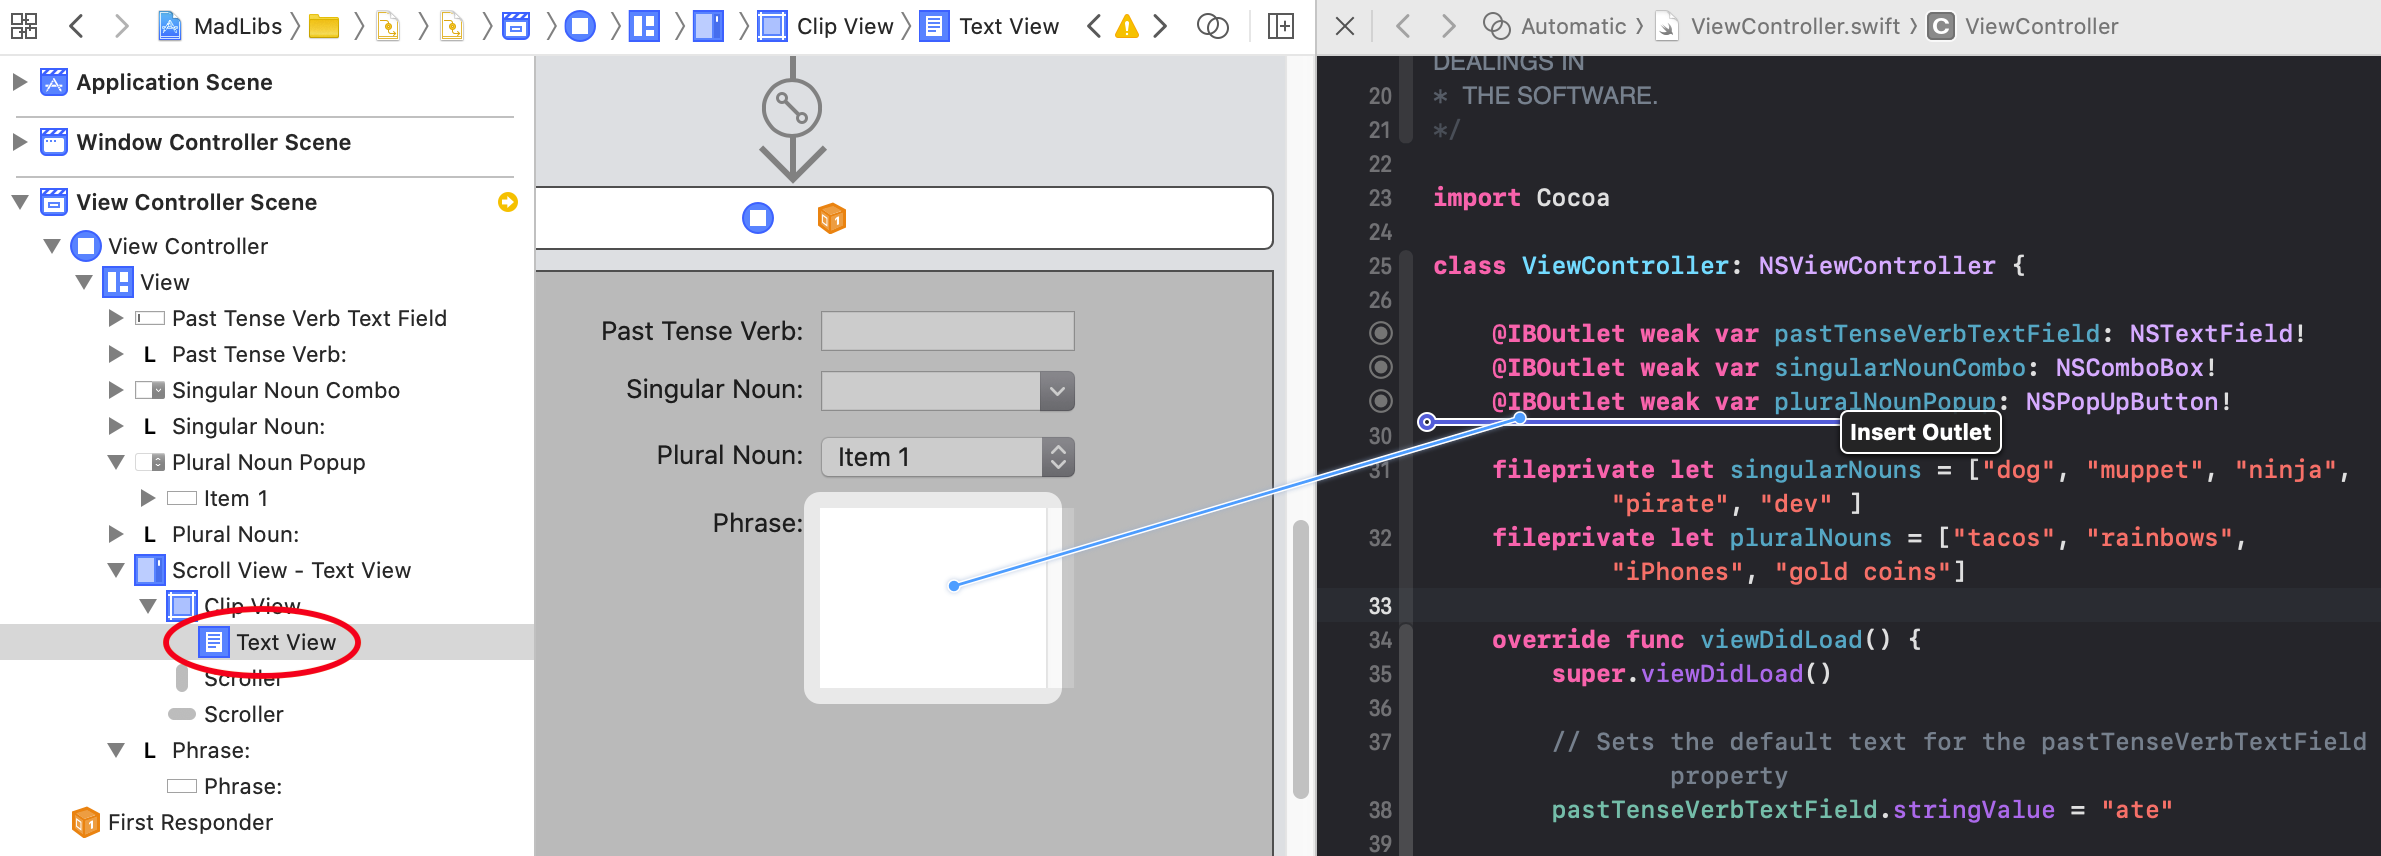
In the popup window, make sure the type is NSTextView, and name the outlet phraseTextView.

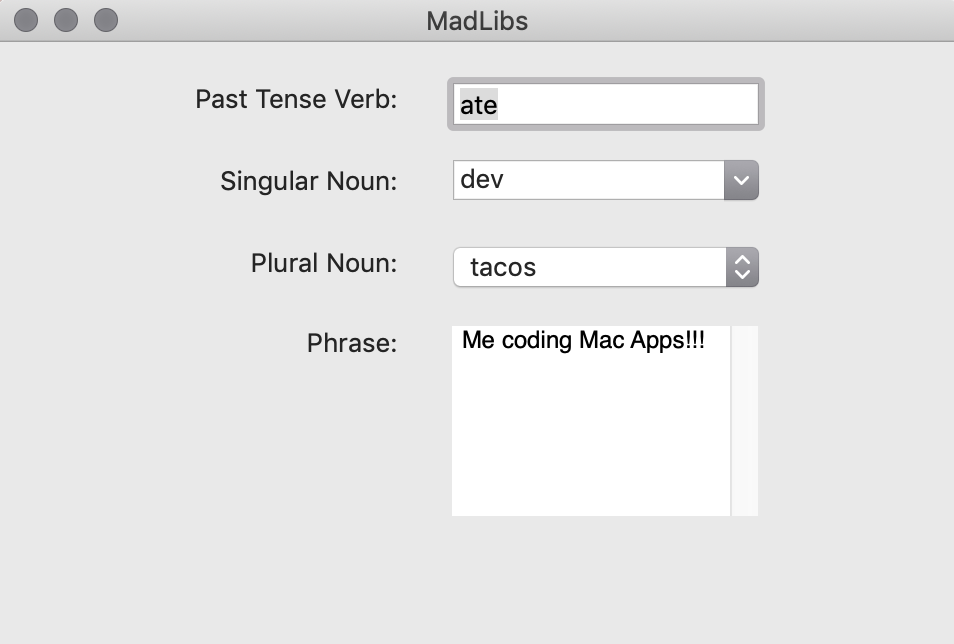
Now, add the following code to the end of viewDidLoad():
// Setup the default text to display in the text view
phraseTextView.string = "Me coding Mac Apps!!!"
Build and run the application to see the result:
Superb! The Mad Libs application is really starting to take shape now.
Pushing Your Buttons – NSButton
Buttons are macOS controls designed to send a message to the app whenever they’re clicked.
The control responsible for this on macOS is NSButton.
There are many different styles of buttons (you can view them in Interface Builder’s Object Library). They all work in much the same way, the only difference being their visual representation.

You should use the style of button that best suits your application’s design – refer to the macOS Human Interface Guidelines for advice and guidance on best design practices for your app.
Typically, when working with a button, you’ll simply need to associate an action with the button and set its title. However, there may be times when you need to disable the button, or change its appearance. The following methods allow you to perform those actions:
// disable a button
myButton.isEnabled = false

// enable a button
myButton.isEnabled = true

// getting & setting a button's title
let theTitle = myButton.title
myButton.title = theTitle

// getting & setting a button's image
let theImage = myButton.image
myButton.image = theImage
Looks fairly simple – adding a button to your app in the next section should be a breeze.
Buttoning Things Down – Adding a Button
Open Main.storyboard. Find the Push Button in the Object Library palette and drag it onto the content view. Double-click on it to change its title to Go! :
This time you don’t need to create an outlet for the button. However, you do need to create an action and associate it with the button, so that your app knows when the button has been clicked! :]
Open the Assistant Editor and Ctrl+Drag from the button to the ViewController implementation.
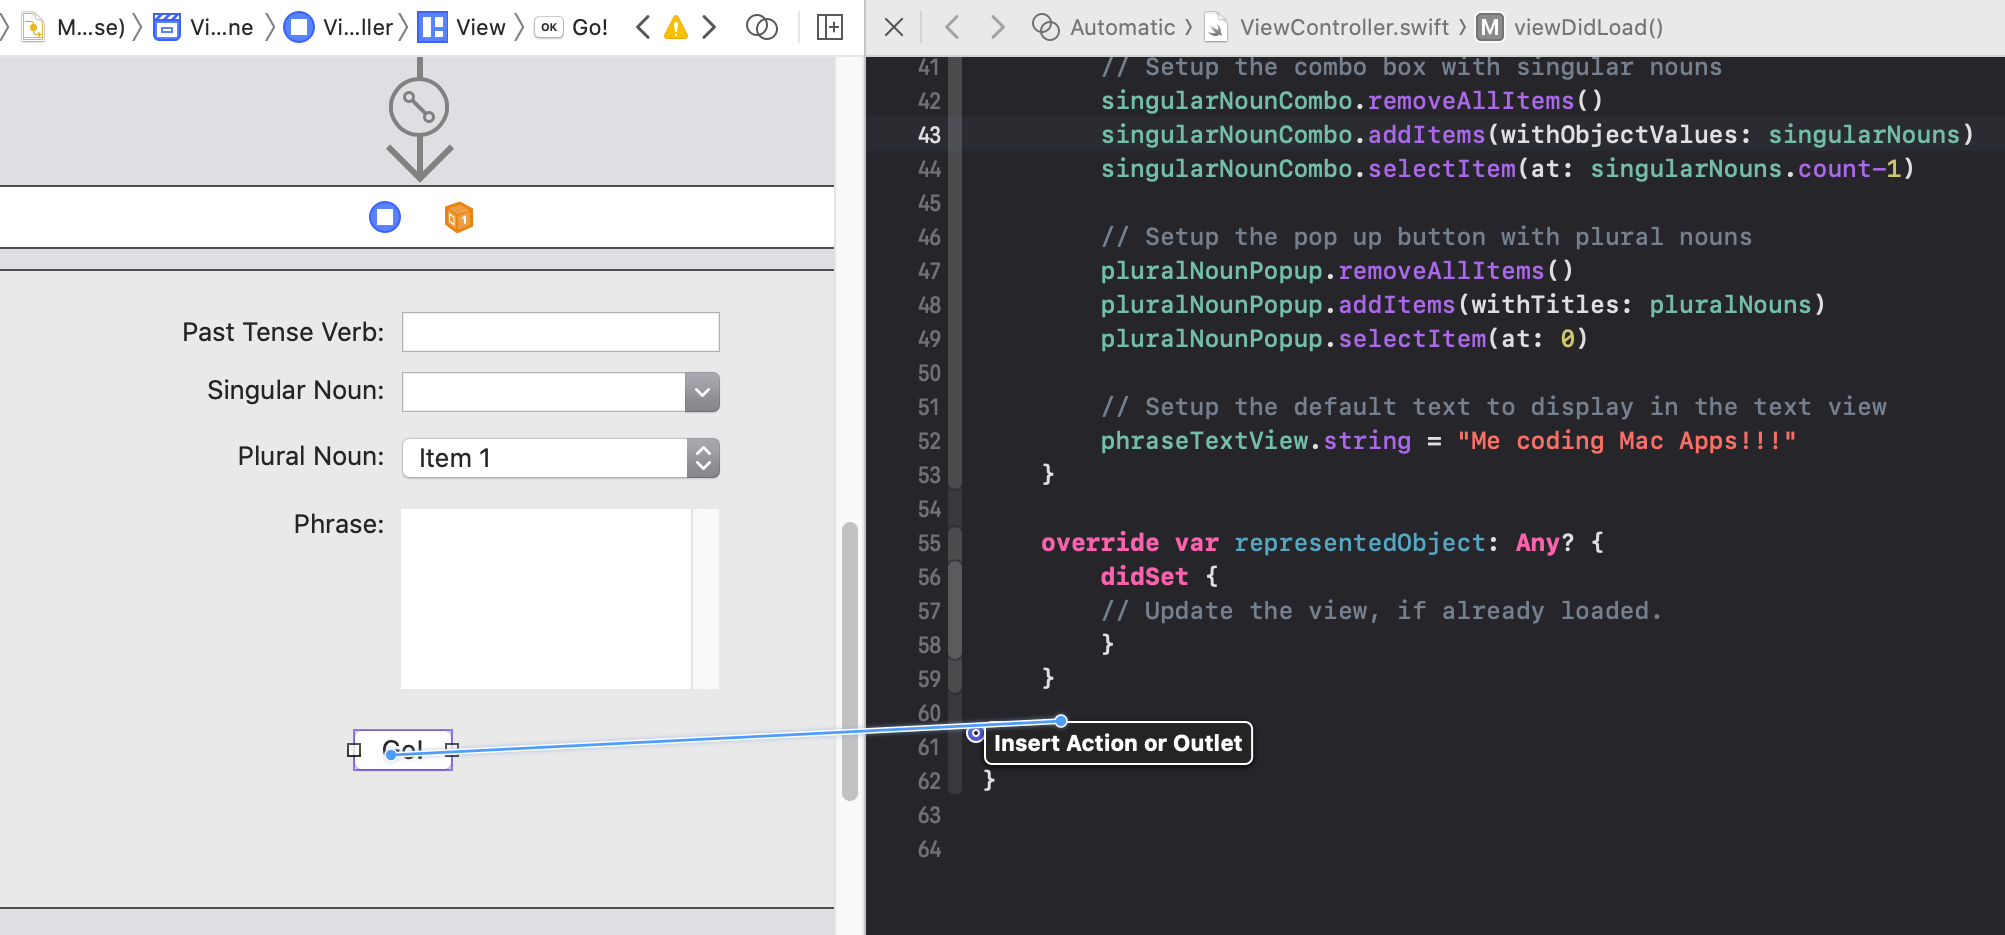
In the popup window that appears, make sure that the connection is set to Action. Name the action goButtonClicked.

Whenever the user clicks on the button the action method goButtonClicked() will be called. For now you’ll add some debug code, just to make sure everything’s working.
Open ViewController.swift and add the following code inside goButtonClicked():
let pastTenseVerb = pastTenseVerbTextField.stringValue
let singularNoun = singularNounCombo.stringValue
let pluralNoun = pluralNouns[pluralNounPopup.indexOfSelectedItem]
let phrase = phraseTextView.string

let madLibSentence = "A \(singularNoun) \(pastTenseVerb) \(pluralNoun) and said, \(phrase)!"

print("\(madLibSentence)")
This code gets the strings from the text field, the combo box, the popup button and the text view and forms the Mad Lib sentence.
That’s all the code you need for now – build and run your app.

Every time you click the button, you should see a short and silly sentence appear in Xcode’s console.
A dev ate tacos and said: Me coding Mac Apps!!!!
That’s great, but how could you make it even funnier?
How about making your computer read the sentence? Steve Jobs made the first Macintosh say hello to the world in its presentation. You can make your computer talk too… Let’s get at it!
Open ViewController.swift and add this code inside the ViewController implementation:
// 1
fileprivate enum VoiceRate: Int  {
  case slow
  case normal
  case fast

  var speed: Float {
    switch self {
    case .slow:
      return 60
    case .normal:
      return 175;
    case .fast:
      return 360;
    }
  }
}
//2
fileprivate let synth = NSSpeechSynthesizer()
First, you declare an enum to represent the voice rate. Then you create and instance of NSSpeechSynthesizer which is the class that will convert the text to speech.
Now, add this method inside the ViewController implementation:
fileprivate func readSentence(_ sentence: String, rate: VoiceRate ) {
  synth.rate = rate.speed
  synth.stopSpeaking()
  synth.startSpeaking(sentence)
}
This method starts the synth object speaking a string at the determined speed.
Time to call it! Add this code at the end of goButtonClicked() to read the Mad Libs sentence:
readSentence(madLibSentence, rate: .normal)
Build and run; click Go! and listen to your Mac saying your sentence out loud!