macOS Controls Tutorial: Part 1/2
Learn how to use common macOS UI controls like NSTextField, NSComboBox, NSButton, and more in this two-part series — updated for Xcode 11.3 and Swift 5! By Roberto Machorro.
Which Method To Use?
If your list of items is relatively small and you don’t expect it to change that often, adding items once to the internal list is probably the best choice. But if your list of items is large or dynamic, it can often be more efficient to handle it yourself using a data source. For this tutorial you’ll be using method 1.
Now that you’ve covered the fundamentals of the combo box, move on to implement one in your app! :]
The Singles Bar – A Singular Noun
In this section you’ll add a combo box to enter a singular noun. You can either choose from the list or enter your own.
First, add a label that describes what the control is for.
Open Main.storyboard. Locate the Label control in the the Object Library palette, and drag it onto the content view. Change its alignment to Right and its title to Singular Noun:.
Note: Alternatively as a shortcut, hold down the Option key and drag an existing label to duplicate it. This is handy so you can keep the same size and properties of an existing label.
Locate the Combo Box control and drag it onto the content view, placing it to the right of the label.

Now you need to add an NSComboBox outlet to the view controller. Use the same technique you used for the text field: select the Assistant Editor (making sure ViewController.swift is selected) and Ctrl-Drag the combo box to the ViewController class just below the NSTextField:

In the popup window that appears, name the outlet singularNounCombo.

Now the NSComboBox property is connected to the combo box control. Next you are going to add some data to populate the list.
Open ViewController.swift and add this code under the outlets:
fileprivate let singularNouns = ["dog", "muppet", "ninja", "pirate", "dev" ]
Now, add the following code at the end of viewDidLoad():
// Setup the combo box with singular nouns
singularNounCombo.removeAllItems()
singularNounCombo.addItems(withObjectValues: singularNouns)
singularNounCombo.selectItem(at: singularNouns.count-1)
The first line removes any items added by default. Next, it adds the names from singularNouns to the combo box using addItems(). Then, it selects the last item of the list.
Build and run the application to see your combo box in action!
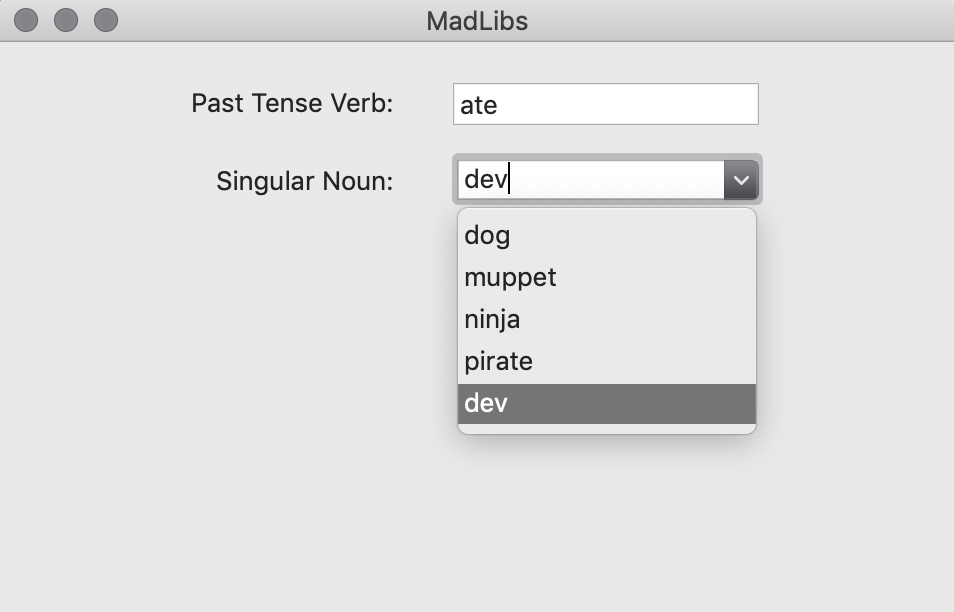
Great – it looks as though everything is working just right. If you click on the combo box, you can then view and select any of the other items.
Now, what if you wanted to present a list of choices, but not allow you to enter your own? Read on, there’s a control for that as well!
Pop Goes the Weasel – NSPopupButton
The pop up button allows the user to choose from an array of options, but without giving the user the option of entering their own value in the control. The macOS control responsible for this is NSPopupButton.
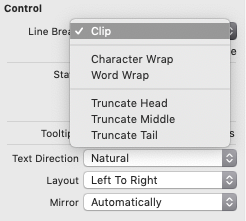
Pop up buttons are incredibly common in macOS, and you can find them in almost every application – including the one that you’re using right now: Xcode! :] You’re using the pop up button to set many of the properties on the macOS controls you’re using in this tutorial, as in the screenshot below:
Filling the Spaces – Adding Items To Pop Up Buttons
As you might expect, adding items to NSPopUpButton is similar to adding items to NSComboBox – except that NSPopUpButton doesn’t support using a data source for the content of the control. NSPopUpButton maintains an internal list of items and exposes several methods to manipulate it:
// Add an item to the list
myPopUpbutton.addItem(withTitle: "Pop up buttons rock")

// Add an array of items to the list
myPopUpbutton.addItems(withTitles: ["Item 1", "Item 2", "Item 3"])

// Remove all items from the list
myPopUpbutton.removeAllItems()

// Get the index of the currently selected item
let selectedIndex = myPopUpbutton.indexOfSelectedItem

// Select an item at a specific index
myPopUpbutton.selectItem(at: 1)
Pretty straightforward, isn’t it? That’s the beauty of macOS controls – there are a lot of similarities between them in terms of the methods used to manipulate the controls.
Time to implement a pop up button in your app! :]
The More the Merrier – A Plural Noun
You’ll now add a pop up button to your Mad Libs application to choose between different plural nouns to populate your comical sentence.
Open Main.storyboard. Drag a label just below the Singular Noun label.
Change the alignment to Right and the title to Plural Noun:. Next, locate the Pop Up Button control and drag it onto the window, placing it to the right of the label.
The content view should look like this:

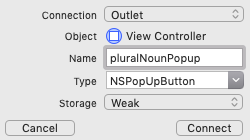
Now you need to add an outlet to the popup button, which should be fairly familiar by now: open the Assistant editor, make sure ViewController.swift is selected, and then Ctrl-Drag the pop up button to the ViewController class to create a new outlet:

In the popup window, name the outlet pluralNounPopup:
Now you just need some data to populate the control!
Open ViewController.swift and add this property inside the class implementation.
fileprivate let pluralNouns = ["tacos", "rainbows", "iPhones", "gold coins"]
Now, add the following code to the bottom of viewDidLoad():
// Setup the pop up button with plural nouns
pluralNounPopup.removeAllItems()
pluralNounPopup.addItems(withTitles: pluralNouns)
pluralNounPopup.selectItem(at: 0)
The first line removes any existing items from the pop up button. The second line adds the array of nouns to the pop up button using addItems(). Finally, it selects the first item in the list.
Build and run the application to see the result:

Once the app has launched, note that the pop up button shows the initial item, tacos, and if you click on the pop up button, you’ll see all the other items in the list.
Okay, so you now have two macOS controls that allow the user to select from lists, as well as a control that allows the user to enter a single line of text. But what if you need to type more than a few words in a text field?
Read on to learn about text views!