macOS Development for Beginners: Part 2
Learn how an app starts, how the UI is constructed, and all the way to handling user interaction in this macOS development tutorial for beginners! By Roberto Machorro.
Laying out the UI – Part 2
The second stack view contains the time remaining text and the image. Drag a Label into the View Controller, set its Title to 6:00 and its Alignment to center. The current system font (San Francisco) uses proportional spacing for digits which means that if you have a counter, the digits appear to leap around as they change — which is really annoying.
Switch the font to Helvetica Neue to avoid this and set the font size to 100. This will make the text too large to display, so expand the label field until you can see it.

To add the image, search the Object Library by typing “image” in the filter field. This will bring up several possibilities but the one you want is Image View. Drag this into the View Controller underneath the time remaining label.
Download the assets for this project (images and a sound file). Unzip the file and open the Egg Images folder. In Xcode, click in Assets.xcassets in the Project Navigator.
Drag the 6 image files into the Assets library. They will now be available to your app. Because the image file names included “@2x”, they have been automatically allocated to the 2x section for each image asset.

Go back to Main.storyboard, select the Image View you just added and click the Image popup in the Attributes Inspector. You can see the images you just added as well as the built-in images. Select stopped.
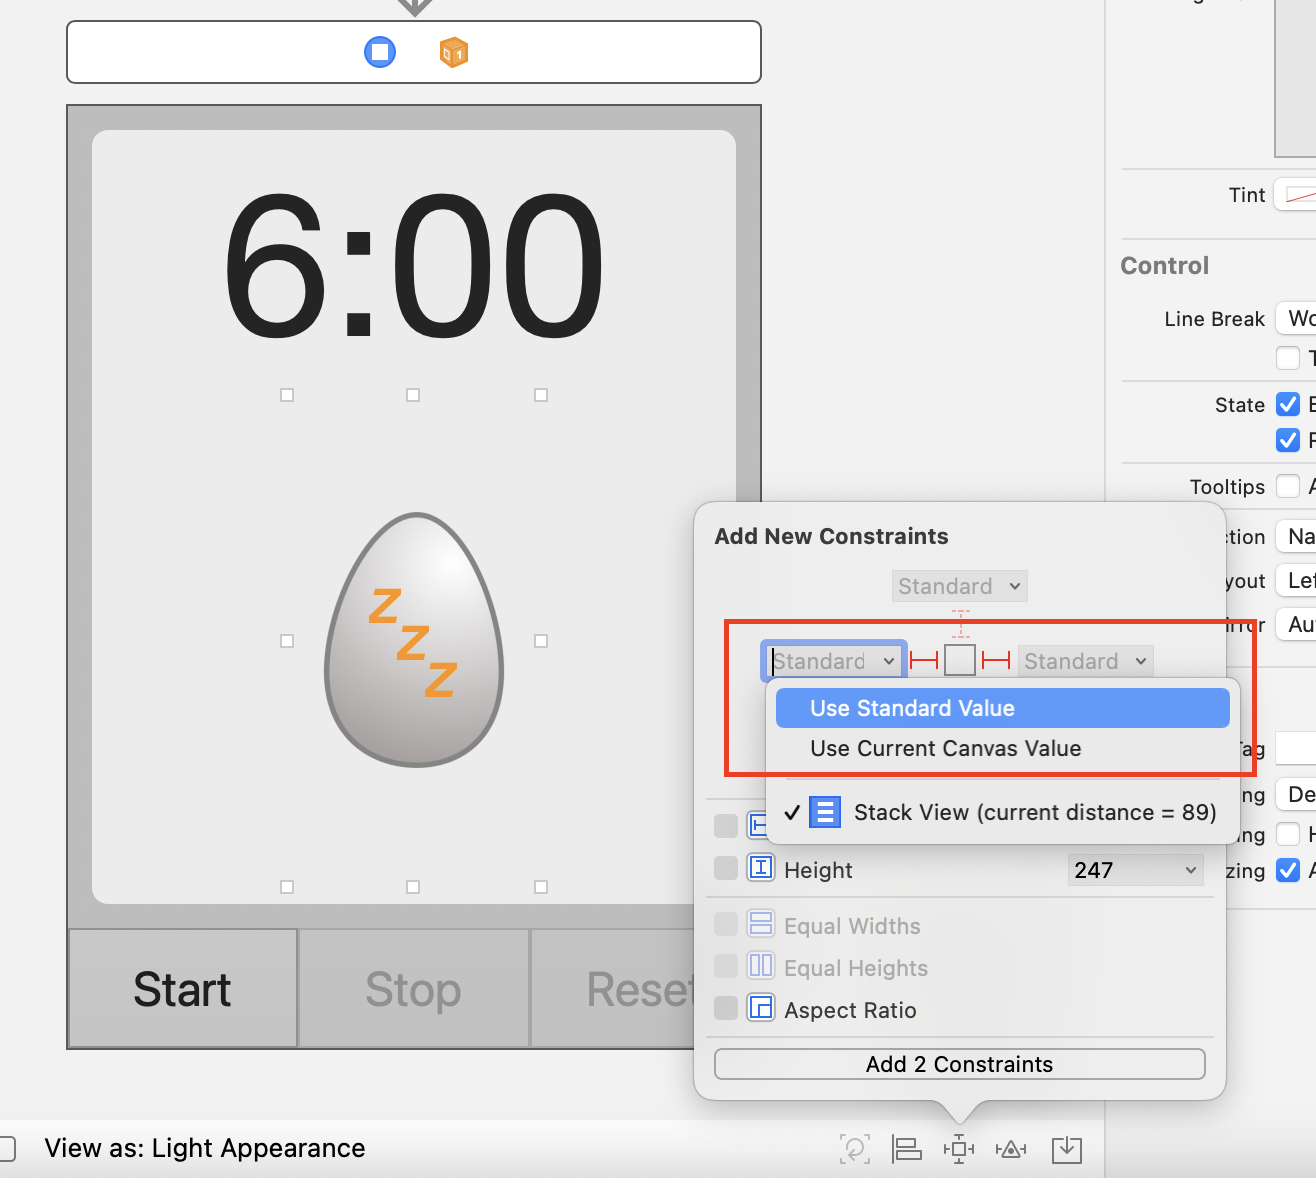
Make the second stack view: select the time remaining label and the image view. Choose Editor/Embed In/Stack View. Now you need to configure this stack view to fill the free space. Click the Add New Constraints button at the bottom of the Visual Editor and set these constraints:

The stack view has expanded as required, but the image view is still too small. Select the image view and set its left and right constraints to the Standard Value as shown.
In the Attributes Inspector, set Scaling to Proportionally Up or Down.
Build and run the app. Resize the window to check that all the UI elements are resizing and positioning as expected.

Connecting the UI to the code
As you learned in part 1 of this series, you need to set up @IBOutlets and @IBActions to connect your UI to your code. For this window, you need @IBOutlets for the following elements:
- Time remaining label
- Egg image view
- The 3 buttons
The 3 buttons also need @IBActions to trigger a function when a user clicks them. In the Project Navigator, select Main.storyboard. Option-click on ViewController.swift in the Project Navigator to open it in the Assistant Editor. If you are running out of space, use the buttons in the top right to hide the Utilities and Navigator panels.
Select the countdown timer label and Control-drag into the ViewController class, just as you did in part 1. Set the name of the label to timeLeftField. Repeat for the egg image view, setting its name to eggImageView. Set up outlets for the buttons naming them startButton, stopButton and resetButton.
The buttons also need @IBActions. Control-drag from the Start button but this time change the Connection popup to Action and set the name to startButtonClicked. Repeat for the other buttons creating actions called stopButtonClickedand resetButtonClicked.
The ViewController code should now look like this:
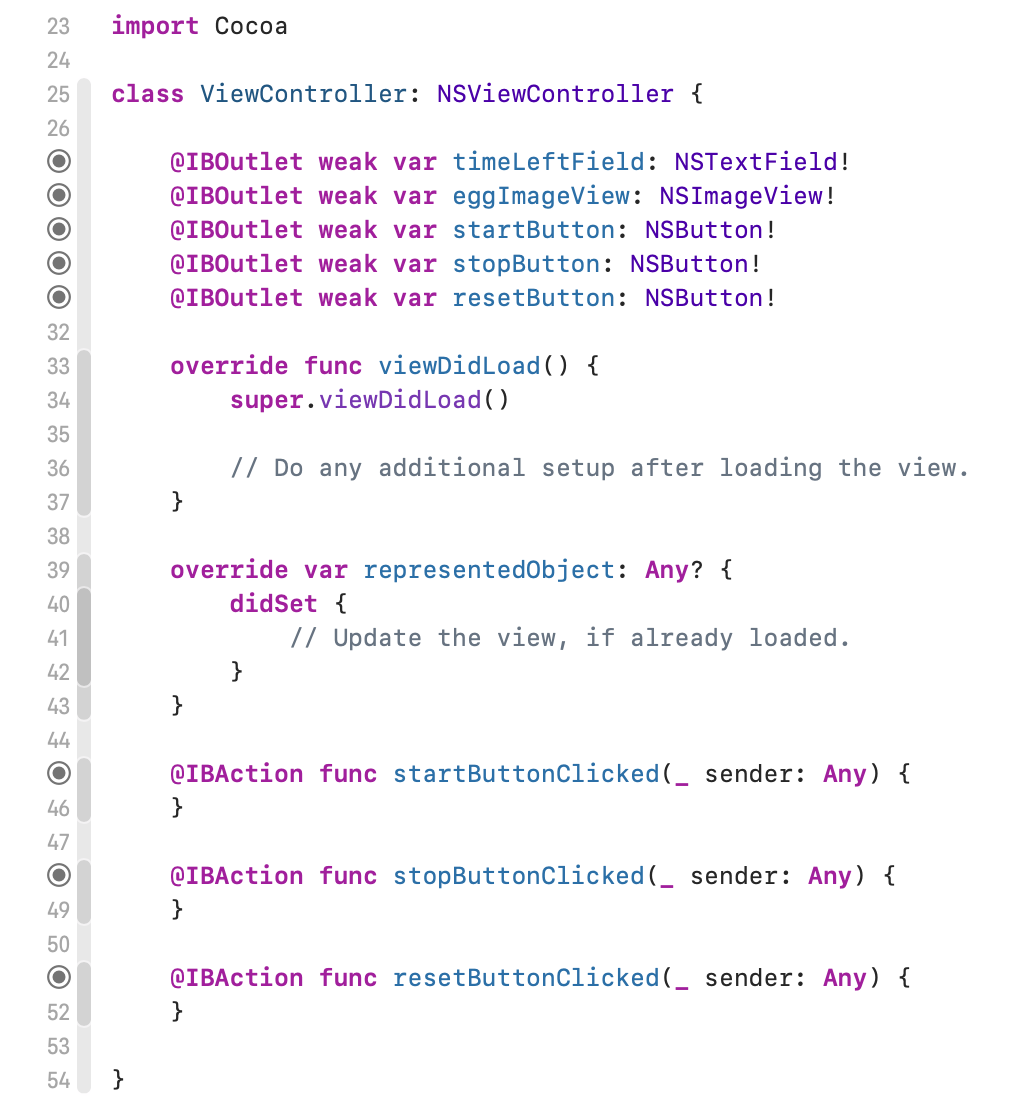
In Part 3 of this series, you will add the code to these functions to make them work. Close the Assistant Editor now and re-open the Navigator and Utilities panels if you had closed them.
Menus
In Main.storyboard, click on the menu bar or Application Scene to select it. The app template provides a default set of menus, but for this app, most of them are unnecessary. The easiest way to explore the menus is using the Document Outline. Use the disclosure triangles to display the View menu and its contents.

The structure of the menu bar is a series of nested menus and menu items. Switch to the Identity Inspector in the Utilities panel so that you can see what each entry in the list really is as you click on it. Main Menu is an instance of class NSMenu. It contains an array of NSMenuItems: View is one of these.
The View menu item contains a sub-menu (NSMenu) with its own NSMenuItems. Notice the Separator item which is just a specialized form of NSMenuItem.
The first thing to do is to delete the menus that you do not need for this app. Select the File menu in the Document Outline and press Delete to remove it. If you select it in the Visual Editor and delete, you will only have deleted the menu inside the File menu item, so you will be left with a space in the menu bar. If this happens, select the space and press Delete again to remove it.
Keep deleting menus until you only have EggTimer, Window and Help.

Now you are going to add a new menu which will mimic the operations of the 3 buttons. Search for “menu” in the Object Library. Remembering that each menu starts with a menu item, drag a Submenu Menu Item into the menu bar between EggTimer and Window.
Now drag two Menu Items into the new menu. If you find it difficult to target the menu, drag into the Document Outline instead, just under the new Item. The new menu now has three items.

With the menu selected (not the item), switch to the Attributes Inspector and change the title to Timer. This will allocate a name to your new menu. Select Item 1 and change its title to Start either by double-clicking and editing it in place or by using the Attributes Inspector.
Click in the Key Equivalent field in the Attributes Inspector and press Command-S to assign a keyboard shortcut. Normally Command-S means Save, but as you have deleted the File menu this isn’t a conflict, although it is not best practice to re-use common shortcuts for other purposes.
Use the same methods to set the title for the second item to Stop with a shortcut of Command-X and the third item’s title to Reset with Command-R as its shortcut.

You can see four buttons across the top of the menu bar in the Visual Editor. Switch to the Identity Inspector. Clicking on each of these in turn shows that they are links to the Application, the First Responder, the AppDelegate and the Font Manager. First Responder is usually the view controller that is currently frontmost, and it can receive actions from the menu items.
Option-click on ViewController.swift and add the following code below the @IBActions you have for the buttons:
// MARK: - IBActions - menus

@IBAction func startTimerMenuItemSelected(_ sender: Any) {
  startButtonClicked(sender)
}

@IBAction func stopTimerMenuItemSelected(_ sender: Any) {
  stopButtonClicked(sender)
}

@IBAction func resetTimerMenuItemSelected(_ sender: Any) {
  resetButtonClicked(sender)
}
These functions will be called by the menus and they will call the button action functions. You could have the menu items calling the button action functions directly, but I chose to do it this way to make the sequence of events more obvious when debugging. Save the file and close the Assistant Editor.
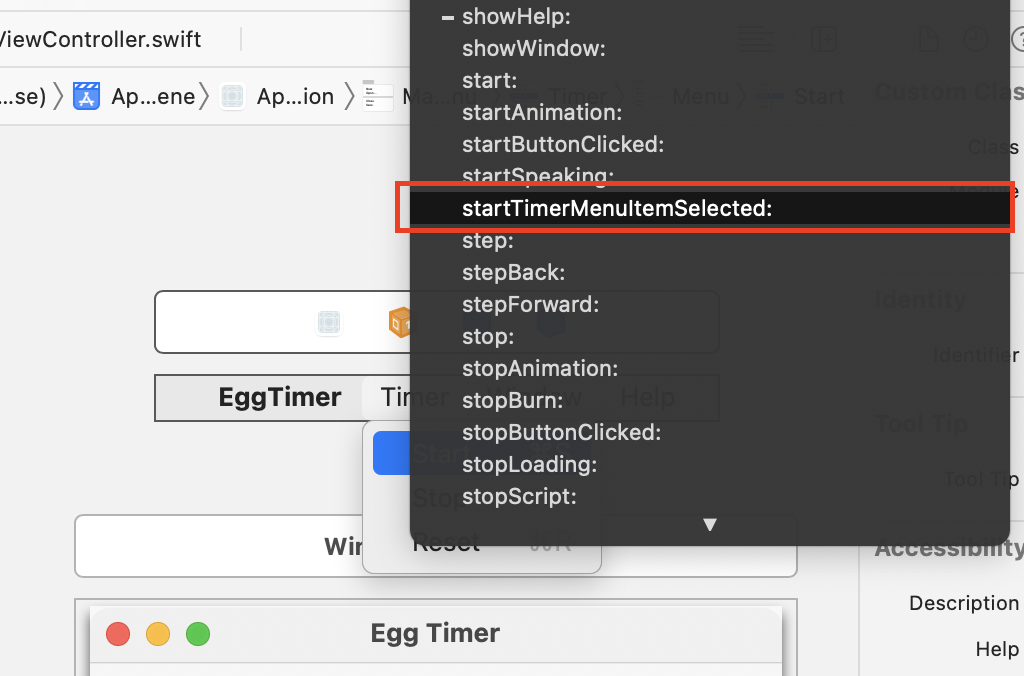
Control-drag from the Start menu item up to the orange block that indicates the First Responder. A popup will appear showing an enormous list of options. Type “sta” to scroll quickly to the correct section and select startTimerMenuItemSelected.
Connect the Stop menu item to stopTimerMenuItemSelected and the Reset menu item to resetTimerMenuItemSelected in the same way. Now when the EggTimer window is at the front, selecting the menu items will call these functions.
However the 3 buttons are not all going to be enabled at the same time, and the menu items need to reflect the status of the buttons. This cannot happen in the ViewController as it will not always be the First Responder, so the menu items will be controlled in the AppDelegate.
With the Main.storyboard open and the menus visible, option-click on AppDelegate.swift in the Project Navigator. Control-drag from the Start menu into the AppDelegate and assign an outlet name of startTimerMenuItem.
Do the same for the other items, assigning titles of stopTimerMenuItem and resetTimerMenuItem.

In Part 3 you will add code to enable and disable these menu items as required, but for now, you need to turn off the automatic enabling and disabling. Usually, the app will check to see if the current First Responder has an action for the menu item and disables it does not. For this app, you want to control this yourself. Select the Timer menu and uncheck Auto Enables Items in the Attributes Inspector.
