macOS View Controllers Tutorial
In this macOS view controllers tutorial you’ll discover the wide range of functionality that is baked into vanilla view controllers, along with learning how you can create your own view controller subclasses to build up your app in an easy-to-understand manner. By Jean-Pierre Distler.
Tab View Controllers
Now we’ll add the view controller used to display the product info: a Tab View Controller. A Tab View Controller is a view controller subclass (NSTabViewController); its view contains a tab view with two or more items and a container view. Behind every tab is another view controller whose content is used to fill the container view. Every time a new tab is selected, the Tab View Controller replaces the content with the view of the associated view controller.
Select a Tab View Controller and drag it on on the canvas.
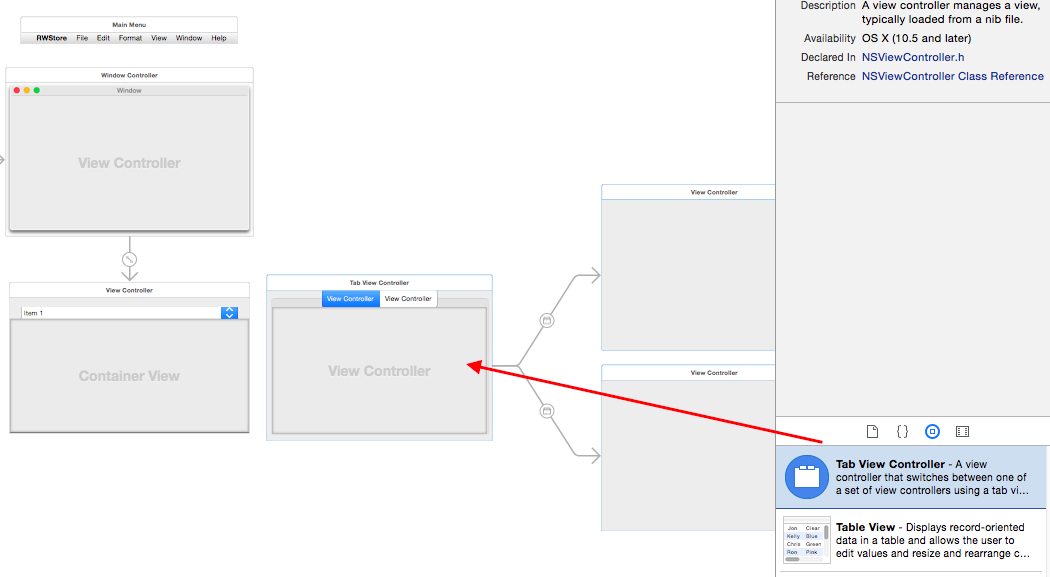
The tab controller is now on the storyboard, but it’s not used yet. Connect it to the container view using an embed segue; control-drag from the container view to the Tab View Controller.

Select embed in the menu that pops up.
![]()
With this change, when the app runs the area of the container view is replaced with the view of the Tab View Controller. Double-click on the left tab of the Tab View and rename it Overview. Repeat to rename the right tab Details.
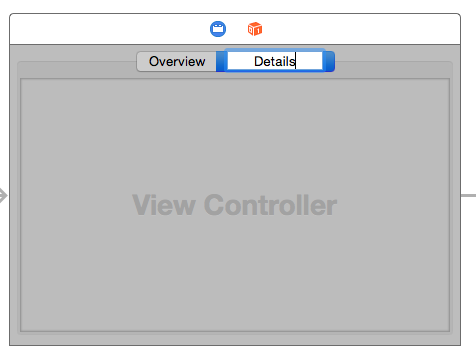
Build and run the app.
![]()
Now the tab view controller is shown, and you can select between the two view controllers using the tabs. This isn’t noticeable yet because the two views are exactly the same, but internally the tab view controller is replacing them when you select a tab.
Overview View Controller
Next up you need to create the view controller for the Overview tab.
Go to File/New/File…, choose the macOS/Source/Cocoa Class, and click Next. Name the class OverviewController, make it a subclass of NSViewController, and make sure Also Create XIB for user interface is not selected. Click Next and save.

Return to Main.storyboard and select Overview Scene. Click the blue circle on the view and change the class to OverviewController in the Identity Inspector on the right.

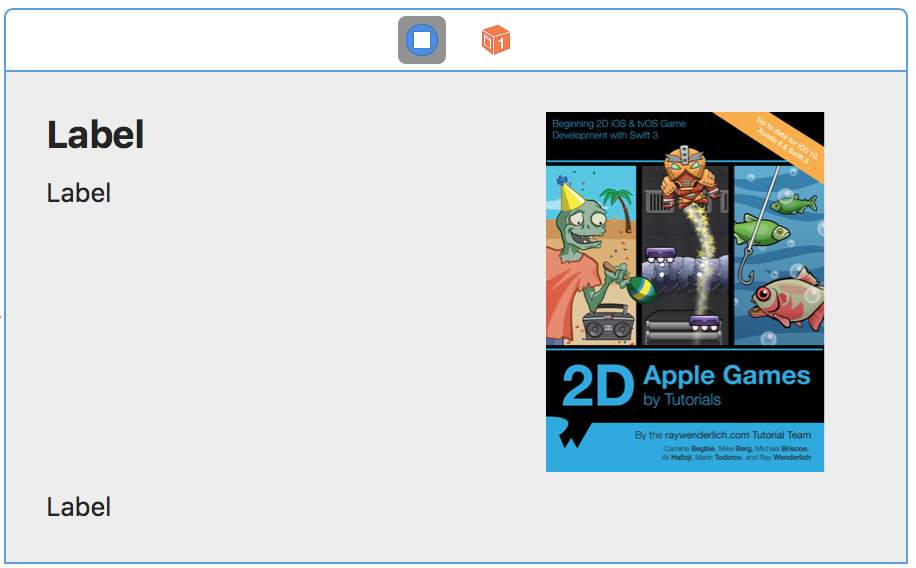
Drag three labels onto the OverviewController’s view. Place the labels on the top left side of the view, one below each other. Add an image view on the top right corner of the view.
Note: By default, the image view has no borders and can be a bit difficult to find in the view. To help during the layout process, you can set an image. With the image view selected, open the Attributes Inspector and select 2d_games in the Image field. This image will be replaced in runtime with the proper product image in the tutorial code
Select the top label. In the Attributes Inspector, change the font to System Bold and the size to 19. You will need to resize the label now to see all the text.
The view should now look like this:

It’s time to use the superpowers of auto layout to make this view look great.
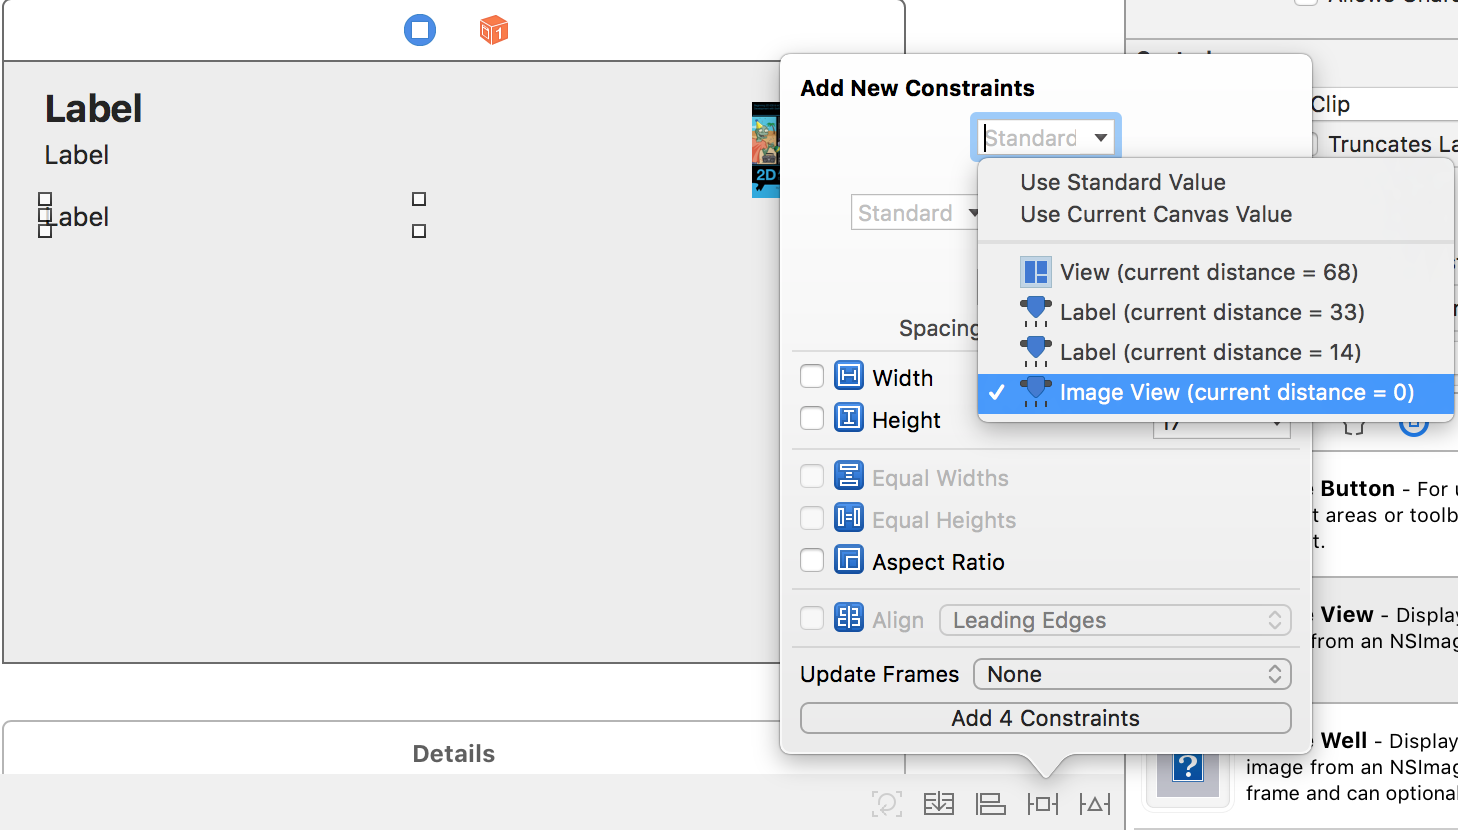
Select the image view and click the Add New Constraints button on the bottom. Add constraints for top and trailing with the standard value, and constraints for width and height with a value of 180.

Select the top label and add bottom, top, leading, and trailing constraints using the standard value.

Select the label below and add constraints for trailing and leading using the standard value.

Widen the last label so it goes under the image, then add constraints for leading, trailing and bottom, using the standard value. For the top constraint, make sure that the image view is selected (so that the top is aligned to the image view), and use the standard value.
Select the view and click on the Update Frames button in the bottom bar. Your view should look like this:
After all your hard work on the interface, it’s finally time to see the result, so build and run.

Click on the tabs and see how the tab view controller shows the appropriate view controller. It works right out of the box and without a single line of code!
Add Some Code
It’s time to get your hands dirty adding some code to show the products details in the view. In order to refer to the labels and image view from code you need to add an IBOutlet for each of them.
First, open the Assistant Editor and make sure OverviewViewController.swift is selected. Control-drag from the top label into OverviewController.swift and add an outlet named titleLabel. Ensure the type is NSTextField.

Repeat the process with the other two labels and the image view to create the rest of the outlets with the following names:
-
priceLabelfor the label in the middle. -
descriptionLabelfor the bottom label. -
productImageViewfor the image view.
Like most UI elements, labels and image views are built of multiple subviews, so make sure that you have the correct view selected. You can see this when you look at the class for the outlet: for the image view it must be NSImageView, not NSImageCell. For the labels, it must be NSTextField, not NSTextFieldCell.
To show the product information in the overview tab, open OverviewController.swift and add the following code inside the class implementation:
//1
let numberFormatter = NumberFormatter()
//2
var selectedProduct: Product? {
  didSet {
    updateUI()
  }
}
Taking this code bit-by-bit:
-
numberFormatteris anNumberFormatterobject used to show the value of the price, formatted as currency. -
selectedProductholds the currently selected product. Every time the value changes,didSetis executed, and with itupdateUI.
Now add the updateUI method to OverviewController.swift.
private func updateUI() {
  //1
  if isViewLoaded {
    //2
    if let product = selectedProduct {
      productImageView.image = product.image
      titleLabel.stringValue = product.title
      priceLabel.stringValue = numberFormatter.string(from: product.price) ?? "n/a"
      descriptionLabel.stringValue = product.descriptionText
    }
  }
}
- Checks to see if the view is loaded.
isViewLoadedis a property ofNSViewController, and it’s true if the view is loaded into memory. If the view is loaded, it’s safe to access all view-related properties, like the labels. - Unwraps
selectedProductto see if there is a product. After that, the labels and image are updated to show the appropriate values.
This method is already called when the product changes, but also needs to be called as the view is ready to be displayed.