2D Skeletal Animation with Spine Tutorial
Learn how to make an animated elf for your games in this 2D skeletal animation with Spine tutorial. By .
Attaching the Bones to the Body
Now you’ve got images that are pieced together to look like an elf and a skeleton that can fit inside the elf, but they’re not actually attached to each other. You don’t believe me? Select the Rotate tool and then click on any of the skeleton’s bones.

Click anywhere on the stage and drag. The bones rotate, but the elf doesn’t move. D’oh!

Hit Ctrl+Z or Cmd+Z to undo the bone rotation and look at the Tree window. You’ll see that the images and bones are in different lists—that’s why they’re not paired.
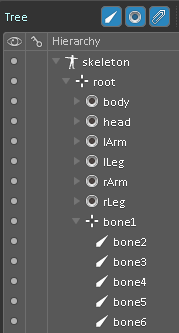
To pair them, you’ll have to—you guessed it: drag and drop! Click on the body image in the Tree window and drag it down to bone1.

Notice how body is now listed under bone1? The body bone and the body image are now married and can function as one. Awww!

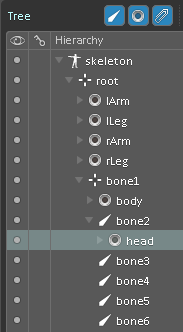
Drag the head image down to bone2 to attach the head bone to the elf’s head.
If you’re ever confused by the hierarchy structure in the Tree window, an easy way to tell if the body parts have been properly attached is to test them. Select the rotate tool like you did before and then select the skeleton bone. Click and drag on the stage to see if the image moves when you move the skeleton. You can always undo any mistakes by hitting Ctrl+Z or Cmd+Z.

Drag and drop the following:
- lArm to bone3
- rArm to bone4
- lLeg to bone5
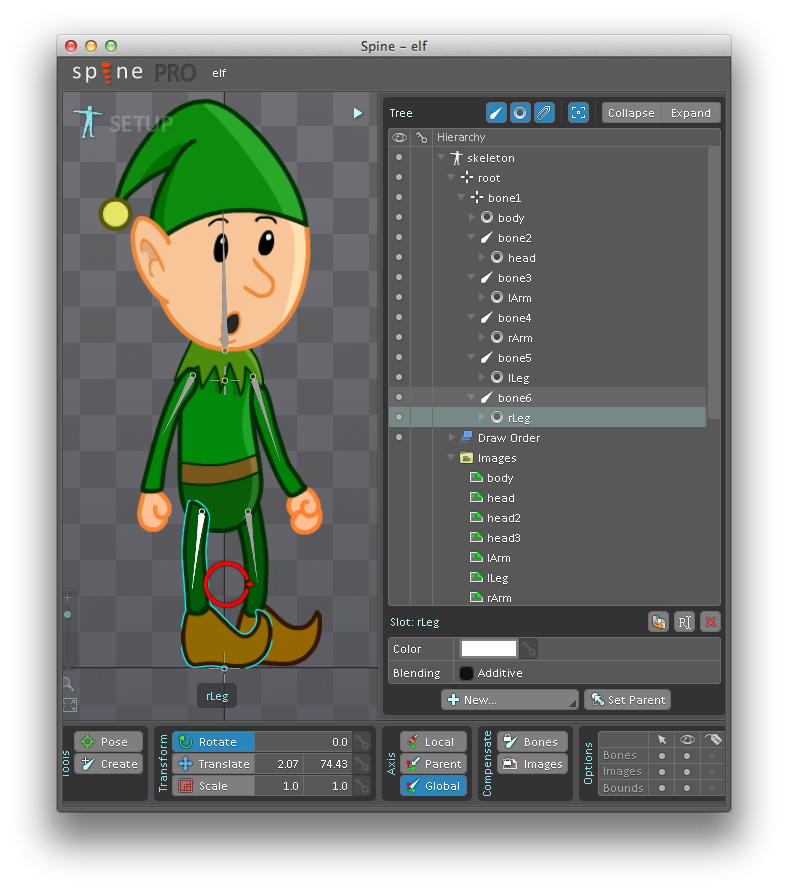
- rLeg to bone6
Your elf now has a fully functioning skeleton! And just think—all you’ve done so far is drag and drop. Next you’re going to move onto animating your elf. This simply requires more dragging and dropping. Who would have guessed?
A Standing Animation
The first animation you’ll create is one of the elf standing. You might be asking yourself, “Isn’t he already standing? That doesn’t require animation!”
True, Santa’s little helper is already standing, but he’s not doing anything. That makes him a pretty boring subject, but you can give him some subtle movements while he’s standing in place. That will make for a more interesting game.
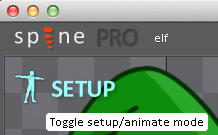
To switch to the Animate mode, click the word SETUP in the upper-left of Spine. This brings up a timeline at the bottom of the screen.

In the Tree window, click on Animations and then on New Animation.

Name the new animation standing.


Assuming you’re using the trial version of Spine, you have access to advanced features that are available in the Professional version that aren’t included in the Essential version—including the Dopesheet and Auto Keying.
Using the Dopesheet and Auto Keying
Think of the Dopesheet as a more advanced timeline on which your animation will play. And Auto Key lets Spine set the keyframes for you when you animate your character. But what are keyframes, you ask?
Keyframes are an animation’s most important frames. If you wanted to animate a ball rolling from the left to the right, you’d need one keyframe for the ball on the left and one keyframe for the ball on the right. The frames between the keyframes are called in-betweens, also referred to as “tweens”. Spine creates the in-betweens for you and Auto Key will help you set the keyframes. Pretty sweet!
Click on the Dopesheet and Auto Key buttons at the bottom of Spine.

Hold down the Cmd or Ctrl key and click on the left arm, right arm and head bones of the elf’s skeleton.

In the Transform window, there are three green key icons. Click on each key once to turn it red.


This simply sets the initial keyframes for the elf’s arms and head, which you will see in the Dopesheet.

You won’t need to set keyframes on the elf’s legs in this animation, since he’ll be standing still. Also, since you’ve enabled Auto Key, that was the last time you’ll have to click on the key icons. Spine will do it automatically for the rest of the standing animation.
Select the Rotate tool if it’s not already selected, and then click on the elf’s head bone in the skeleton.

On the timeline in the Dopesheet, click on the mark for frame 5. To keep things simple, you’ll animate everything by increments of 5.

Now click and drag on the stage to move the elf’s head forward slightly. Subtlety is key here, unless you want him to look very cartoony. Since you’ve enabled Auto Key, Spine makes a new keyframe for you on the 5th frame.


You can also change his facial expression here. In the Tree window, navigate to the head image under bone2 and expand the list by clicking the corresponding arrow icon.

Click on the dot underneath the eye icon next to head to display the image of the elf smiling.

If you see a red dot next to the head listing under the key icon, you’re good to go. But if you see a yellow dot instead, this is to show you that you’ve made an uncommitted change. Click the yellow dot to turn it red, which sets a keyframe for the image swap.


Click on frame 10 in the Dopesheet timeline and move the elf’s head slightly forward again by clicking and dragging on the stage.

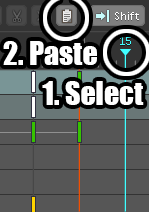
To speed up the animating process, you can also copy and paste keyframes. With the head bone still selected, look in the timeline and click on the white rectangle on frame 5 in the standing row. Then click the copy button.

Click on frame 15 and then click the paste button.
Now select frame 0, click copy, select frame 20 and then click paste.
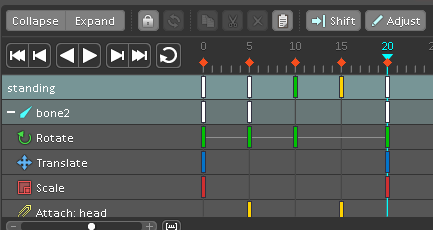
In the playback controls, click the loop button and then play. Your elf is now bobbing his head back and forth.
![]()
Note: If you want to experiment further, try changing the elf’s head on different keyframes. Remember to select the frame you want, pick the different head image in the Tree window and then click the yellow dot to turn it red to set the keyframe.