Make Your First Android App: Part 2/3
Learn to enhance the app you created in the first part on how to make your first Android app and to add new UI controls to add new functionality. By Matt Luedke.
Buttons and Listeners
It’s time to build on your TextView and get more interactive! Next up is a Button.
Add a Button to activity_main.xml, directly after your TextView:
<!-- Set OnClickListener to trigger results when pressed -->
<Button
    android:id="@+id/main_button"
    android:layout_width="wrap_content"
    android:layout_height="wrap_content"
    android:layout_marginTop="20dp"
    android:layout_marginLeft="20dp"
    android:text="@string/button" />
Notice there’s an XML comment above the Button, a reminder of how to trigger results.
The layout_margin attributes simply add 20 density-independent pixels of space above and to the left of the Button to keep your layout from looking cramped. Remember that the value of 20 will be scaled by the screen density of the device to get an actual pixel value.
Then there’s text, for which you need to add a line in strings.xml such as the following:
<string name="button">Update The TextView</string>
Note: Till you add the matching resource ID to strings.xml, Android Studio will keep warning you that the resource ID in activity_main.xml is invalid by displaying it in red.
Next, open MainActivity.java and add the following right below the previous line you added for a TextView variable:
Button mainButton;
Make sure you Option-Enter to import any missing classes.
Now add the following code to the end of onCreate, after the code you added earlier:
		// 2. Access the Button defined in layout XML
		// and listen for it here
		mainButton = (Button) findViewById(R.id.main_button);
		mainButton.setOnClickListener(this);
Again, you see the same three steps as when you added code to access the TextView:
- You add an
idto theViewin XML. Or, in this case, you add a view with anidattribute. - You access that
Viewin code by using theid. - You call methods on that
View.
This time, the method you called on the Button is setOnClickListener. What you put in the parentheses of that method becomes the answer to this question: Which Object is going to respond when this Button gets pressed?
To answer that question with simply the word this seems a little curt and unspecific, but Java knows that it means MainActivity itself is your intended listener.
This means that MainActivity has to implement the View.OnClickListener interface. If that sentence doesn’t make much sense to you, I suggest finding an intro on what an interface is and how to create one, like this one.
If have an iOS/Objective-C background, an interface is comparable to a protocol. In fact, in object oriented programming the words protocol and interface are used interchangeably.
Android Studio is smart and can help you do the implementation. Simply single-click on this, which is underlined in red, indicating an issue (in this case the fact that MainActivity currently does not support the necessary interface). Then, when a red light bulb appears at the beginning of the line, click on it and select Make ‘MainActivity’ implement ‘android.view.View.OnClickListener’.

Simply click OK on the next dialog, which lets you know which method(s) Studio will automatically create for you.
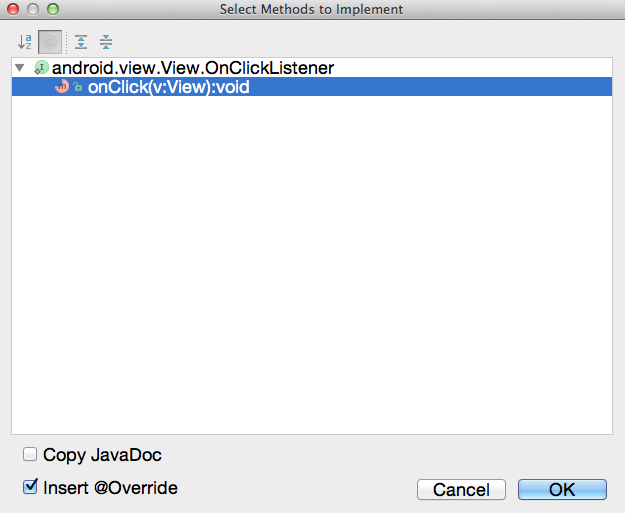
Studio then generates the code necessary to make your MainActivity qualify as a union-certified OnClickListener.
First, it added a bit to the class declaration indicating that the Activity implements a specific interface:
public class MainActivity extends Activity implements View.OnClickListener
Second, Studio added a stub for a method you need to implement in order to get your OnClickListener license (other interfaces may require more than one method to be implemented): onClick. This method fires when your Button gets pressed.
The method currently does nothing. So add the following code to onClick to make it do something:
		// Test the Button
		mainTextView.setText("Button pressed!");
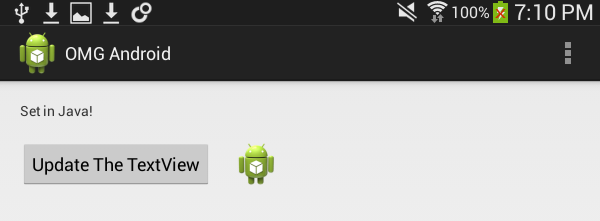
Can you tell from the code what should happen? Run your app and see if you’re right…

The app now changes the text in the TextView when you press the Button. Cool! You’ll be putting this Button to even better use later — to submit input.
Adding a Visual
It’s always fun to include images in your UI. So how about adding an ImageView to show a little icon? Along the way, you’ll also get to see how a nested LinearLayout works.
First off, what image will you show? Well, it’s easiest to start with the image you’re given by default. It’s already in your project and here’s where to find it.
Use the Project Navigator to expand the src/main/res directory:

You can see several directories within res, including values, which you dealt with when you edited strings.xml. Notice that several are named drawable, plus some letters that look like screen density abbreviations.
Indeed, those abbreviations correspond to the pixel density buckets used to classify Android devices in dots per inch (dpi):
-
mdpi:medium -
hdpi:high -
xhdpi:extra high
There are now xxhdpi and xxxhdpi buckets with even higher densities. Personally, I think they should use Roman numerals for the next level up and call it xlhdpi, but on second thought that would probably be a terribly confusing way to go…
Look inside the drawable directories. You’ll see a file named ic_launcher.png. This is simply the default launch image you’re given, at several different sizes for different screens. The Android system will pick the right one for the device.
Now head back to activity_main.xml and replace the following section:
<!-- Set OnClickListener to trigger results when pressed -->
<Button
    android:id="@+id/main_button"
    android:layout_width="wrap_content"
    android:layout_height="wrap_content"
    android:layout_marginTop="20dp"
    android:layout_marginLeft="20dp"
    android:text="@string/button" />
With this:
<!-- This nested layout contains views of its own -->
<LinearLayout
    android:layout_width="wrap_content"
    android:layout_height="wrap_content"
    android:orientation="horizontal">
    <!-- Set OnClickListener to trigger results when pressed -->
    <Button
        android:id="@+id/main_button"
        android:layout_width="wrap_content"
        android:layout_height="wrap_content"
        android:layout_marginTop="20dp"
        android:layout_marginLeft="20dp"
        android:text="@string/button" />
    <!-- Shows an image from your drawable resources -->
    <ImageView
        android:layout_width="wrap_content"
        android:layout_height="wrap_content"
        android:layout_marginTop="20dp"
        android:layout_marginLeft="20dp"
        android:src="@drawable/ic_launcher" />
    <!-- Closing tag for the horizontal nested layout -->
</LinearLayout>
You added a new LinearLayout inside the existing root layout, directly underneath the TextView as its new sibling. You also moved the existing Button into the nested layout and added a new ImageView, as well.
By wrapping your Button in a second, horizontal LinearLayout, you are able to place a Button and an ImageView side-by-side horizontally, even as the root layout has a vertical orientation.
As for the ImageView itself, the important attribute is src, to which you give your drawable image resource. Note the format you use to reference the drawable image.
Run the app, and you’ll see the new image right beside the button!