Make Your First Android App: Part 2/3
Learn to enhance the app you created in the first part on how to make your first Android app and to add new UI controls to add new functionality. By Matt Luedke.
Relative Layouts
The layouts in iOS apps used to be in purely absolute terms, like: “Place View X at pixels (x,y)”, but now iOS developers have AutoLayout. Android developers have always needed to keep device screen sizes in mind. Layout files are very well-suited for this consideration.
The default project Studio created for you sets you up with a useful layout: a RelativeLayout. It is currently the parent layout and the TextView element is its child.
A RelativeLayout is an intuitive and powerful thing. It holds a bunch of child views and positions them in relation to each other. Here are three examples of what you can easily do with a RelativeLayout:
Example 1: Use layout_alignParentBottom and the similar attributes for top, left and right to line up a view’s edge with the corresponding edge of the RelativeLayout, which may or may not also be the edge of the screen.

Example 2: You can use layout_toRightOf and the analogous attributes for left, above and below to position one View relative to another.
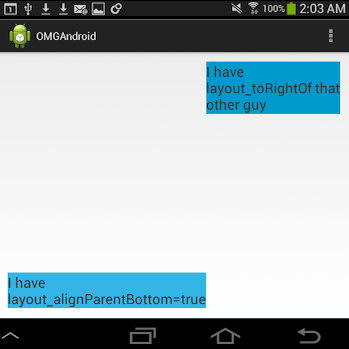
Example 3: You can use layout_alignRight and the analogous attributes to align a side of one View with another.

You can see how that could be useful! For now, though, let’s move on to the layout type you’ll be using for this tutorial.
Linear Layouts
A LinearLayout needs to have an orientation specified, either horizontal or vertical. Then it lines up its children in that orientation, in the order in which they are specified in your XML.
The children of LinearLayouts don’t respond to attributes like layout_toRightOf, but they do respond to two other attributes: layout_weight and layout_gravity.
Specifying a layout_weight expands the view to a proportion of its parent so that the parent weight is the sum of all child view weights.
The layout_weight of View X
———————————————————————-
The sum of all weights of View X and its siblings
Confused? Perhaps the following image might help explain it better.

Notice how the full height of the parent view is split up between the child views based on the layout weight assigned to each child view.
Assigning a layout_gravity to a view sets its horizontal and vertical positions within its parent LinearLayout. For example, a view might have a layout_gravity attribute with a value like left, right, and center_vertical. The previous values can also be combined, like this: top|center_horizontal.
Then, there’s gravity, not to be confused with layout_gravity. layout_gravity is about where you place the view itself. The gravity attribute defines how you place the content of a view within itself. If you want your text to be left or center justified, use gravity.
The following example shows how layout_gravity and gravity work in a vertical LinearLayout. Note that the top three have a layout_width of wrap_content while for the bottom three it’s set to match_parent:

One handy trick, which you’ll see in just a bit, is that you can nest layouts inside each other. Cue the theme music from Inception!
You don’t want your layouts to be as multi-layered as a Christopher Nolan movie, though. So, if you start to see your nested LinearLayouts scheme getting out of hand, consider switching to a RelativeLayout.
Now, modern devices won’t have any trouble rendering your basic layouts. But if you were to make an indefinitely long ListView — for instance, one full of cells making copious use of nested LinearLayouts and layout_weights — all those extra tiny calculations could add up.
Views — to do a tiny calculation to put the view together.
Before you move on to the next section, open res/layout/activity_main.xml and change the root node from a RelativeLayout — what Android Studio gave you as a default — to a LinearLayout.
To do that, you should replace these lines:
<RelativeLayout xmlns:android="http://schemas.android.com/apk/res/android"
    android:layout_width="match_parent"
    android:layout_height="match_parent"
    android:orientation="vertical">
And this one at the very end of the file:
</RelativeLayout>
With This:
<LinearLayout xmlns:android="http://schemas.android.com/apk/res/android"
	android:layout_width="match_parent"
	android:layout_height="match_parent"
	android:orientation="vertical">
And this:
</LinearLayout>
Accessing Views From Within Java
Layouts are primarily the domain of your XML. But there are plenty of visual elements you will want to create, destroy, change, and trigger from within your Java code!
So first, edit the TextView in activity_main.xml to match the following:
<TextView
    android:id="@+id/main_textview"
    android:layout_width="wrap_content"
    android:layout_height="wrap_content"
    android:layout_marginLeft="20dp"
    android:layout_marginTop="20dp"
    android:text="@string/hello_world"/>
Notice the addition of the id attribute. Using this tag (or attribute, if you prefer) allows you to access that specific View from within your code, so you can thereafter manipulate the View via code.
There’s also a change to make in the text tag. The name of the string resource hello_world is a bit outdated now, don’t you think? Right-click on the @string/hello_world part of the line and then choose Refactor > Rename.

Then, type in textview and click Refactor.

This not only changes the name of the resource ID in your layout file, it also changes the original resource ID in your strings.xml file. It also renames the resource ID wherever else it might be used in the project. This is a useful trick to remember when renaming something that appears all over your project!
Now open MainActivity.java and add the following line above onCreate:
TextView mainTextView;
Android Studio might throw an error at you. The TextView class hasn’t been imported into MainActivity.java yet. Android Studio can quickly auto-import files for you. Just tap Option-Enter on your keyboard to automatically import TextView.
Next, add the following code to onCreate after the two existing lines of code:
		// 1. Access the TextView defined in layout XML
		// and then set its text
		mainTextView = (TextView) findViewById(R.id.main_textview);
		mainTextView.setText("Set in Java!");
Finally, run your app and look at the results!
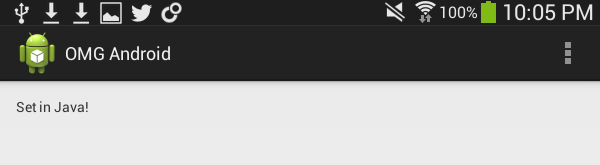
The text set via Java code now appears on screen. What are the steps you just took to make that happen?
- You added an
idattribute to theViewin XML. - You used the
idto access theViewvia your code. - You called a method on the
Viewto change its text value.
Note: You added the code to access and set the text of your TextView in the onCreate method of your Activity, meaning that the app runs all the code in that block right away when it first creates the Activity.