Sketch Tutorial for iOS Developers
In this Sketch tutorial for iOS developers, you’ll get a quick tour of how to use Sketch to create iOS app mockups, icons, and more! By Robert Chen.
Round Profile Avatars
The RWDevCon mockup has round profile pictures of each speaker. To achieve this effect, you’ll use the Mask feature, which is very similar to Subtract. But rather than cutting a hole, Mask trims the outside of a shape like the crust off of a peanut butter and jelly sandwich.
Let’s create an avatar:
- Expand the Greg Before Artboard in the Layer List.
- Inside this Artboard, create a circle big enough to cover his face.
- Select both the greg layer and the oval layer you just created.
- Make sure the mask layer (in this case, the oval) is on the bottom.
- Click the Mask button.
- Expand the newly combined greg layer and select the Mask layer.
- Add a Border, and use the arrow keys to adjust the position.

Make sure the masking layer is on the bottom. This is the opposite of Subtract, where the hole goes on top.
Image Export
You can export a single layer by clicking Make Exportable near the bottom right of the screen.
If you want to export multiple layers, there are a couple ways to do this:
- Group: When layers are grouped together, you can export the Group as a single image.
- Artboard: All the layers inside the Artboard are exported as a single image. The image size is based on the Artboard frame.
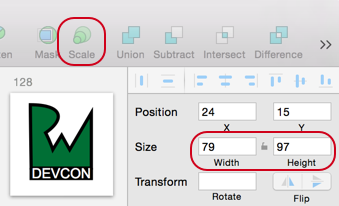
Before you export, check the Width and Height in the Inspector. These dimensions determine the @1x size of your image export.
Pro tip: Rather than resizing shapes using the bottom-right corner, use the Scale button. Scale ensures style properties like border width and corner radius remain proportional after resizing.
PNG
Sketch makes it easy to export images in different densities:
- On the bottom right, click on Make Exportable.
- Click the Plus button to add a @2x copy.
- Click the Plus button again to add a @3x copy.
- Click the Export button to save the PNG files to disk.
You’re probably used to creating @2x and @3x versions of every image, but Sketch is vector-based, so take advantage of that. Xcode accepts vector images in PDF format, which is like SVG but with size information.
- Click on Make Exportable.
- Keep the size at 1x.
- Select PDF as the Format, and click Export.

You can import this single PDF icon into the Asset Catalog.
- Within Xcode, open Images.xcassets.
- Create a New Image Set.
- In the Attributes Inspector, change Scale Factors from Multiple to Single Vector.
- Drop your PDF icon into the All image slot.

Xcode will generate the appropriate @2x and @3x PNG files for you at build time. You still end up with PNGs, so the benefit is managing fewer image files.
Where To Go From Here?
And that’s our intro to Sketch! You can download the Sketch project file here.
Sketch is powerful, with a lot of great features beyond what’s covered in this tutorial. To learn more, check out the official documentation. There are also blogs and videos for learning tips and tricks.
Finally, you can also download Sketch files that contain icon sets and vector images of iOS devices.
We hope you enjoyed this tutorial, and if you have any questions or comments, please join the discussion below!