Sketch Tutorial for iOS Developers
In this Sketch tutorial for iOS developers, you’ll get a quick tour of how to use Sketch to create iOS app mockups, icons, and more! By Robert Chen.
Creating Custom Icons
When coming up with a logo idea, it’s easiest to prototype with pencil and paper or use an online image as a starting point. Then you can trace the picture using the Vector Tool.
In this example, you will be recreating the Ray Wenderlich logo.
- Rip a low-res version of the Ray Wenderlich logo right off the internet.
- Drag and drop the logo into Sketch.
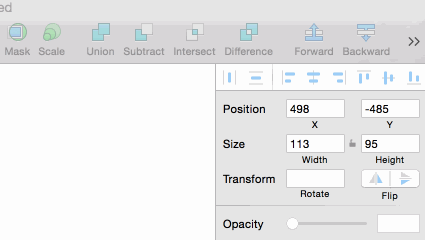
- With the image selected, use the inspector to reduce the Opacity to 20% so it’s easier to trace.
- Lock the layer using Command-Shift-L so you don’t accidentally drag it around. You should see a lock icon next to the layer name.
- Type V to activate the Vector Tool.
- Click on all the corners of the logo. You don’t need to click on the curve of the “R,” but do click the first corner again at the end to close the vector path.
- Double-click anywhere along the path to Edit.
- Reposition any points that are off the mark. You can pinch to zoom-in to get it pixel perfect.
![]()
To create the curve of the “R,” you’re going to put all your knowledge of vector point Modes to good use.
- Double-click the top-left corner, and it will turn from Straight to Mirrored.
- Change it to Disconnected.
- Stretch the curved-facing handle out toward the right.
- Tuck the other handle into the vector point.
- Find the vector point on the other end of the “R” curve and double-click it.
- Again, change it to Disconnected and drag the handles around. You might have to switch back and forth between both points of the curve before you get it right.
![]()
Luckily, the RW logo only has a single curve. You can still use this approach for more complex logos — you just have more curves to deal with. The project you’ll download later includes a rough attempt at the Swift bird logo. I’m using Tab to cycle through each vector point to show the handle positions.

Combining Shapes
Have you ever played that game Tangoes where you combine plastic triangles to form a rabbit shape? Previously, we covered creating icons using the Vector Tool, but another approach is to combine basic shapes.
In programming, you have Logical Operators AND, OR, and XOR. Sketch has something similar called Boolean Operators, but uses different terminology like Union, Subtract, Intersect, and Difference.
Union
Union adds shapes together. Let’s use this to combine a pill and circle shape to form a cloud.
- Create a pill shape by maxing out the Radius on a rectangle.
- Create a circle.
- Move the circle so that it overlaps the pill.
- Select both images, and click the Union button.
Notice how the outlines of the two shapes meld together. Voila! A cloud :]
Subtract
Subtract uses one shape to cut a hole out of another, like a cookie cutter.
The map marker from our previous example looks OK, but all the cool kids nowadays put a donut hole inside their map markers. You can do the same using the Subtract button:
- Create a map marker icon, but this time make sure Border is unchecked.
- Create a small circle and drag it onto the map marker.
- In the Layer List, drag the circle layer onto the map marker layer to combine the shapes.
- Expand the disclosure triangle on the newly combined shape.
- Make sure the hole layer is above the map marker layer.
- Click the boolean-operator icon to the right of the layer name to reveal a pop-up menu.
- Select Subtract from the menu.
- Select the donut hole sublayer and use the arrow keys to fine-tune its position.

Whew! Subtraction sure is complicated. But there are a few important concepts to take from this example:
- You can drop layers on top of others within the Layer List to combine them. How cool is that?
- When you combine the shapes, Sketch makes an educated guess about which operator you intended to use. If you see the None option selected, Sketch is picking one automatically.
- For subtraction, order matters. Make sure the hole layer is always on top. If your shapes disappear, try rearranging the sublayers in the Layer List.
Fill vs. Outline
For this part of the tutorial, you’ll need a starter Sketch file I’ve prepared for you and double click it to open it. You should see the following:

This starter file includes a one-page mockup and custom vector icons – feel free to review them to see how they were made. There are also some before-and-after Artboards, including a few for tab bar icons which you’ll use in this section.
Tab Bar icons change color based on the selected state, but some icons have a lot of empty space, so the color change is too subtle. In these situations, the Apple Human Interface Guidelines recommend using a separate filled version of the icon as the selectedImage. The mockup of the RWDevCon app has both a filled and outline version of each Tab Bar icon.

In the Sketch project file you downloaded earlier, there’s an Artboard called Calendar Starter which contains several building blocks that you’ll combine into a calendar icon. These building blocks are just rectangles and pills, which you already know how to make.
To create the filled calendar icon:
- Open the Sketch file and expand the Calendar Starter Artboard in the Layer List.
- Select the Calendar Body and Separator sublayers.
- Press Subtract.
- Shift-select the Right Hole layer and Subtract it from the above shape.
- Also Subtract the Left Hole layer.
- Shift-select the Right Ring layer and click Union.
- Add the Left Ring layer using Union.

You should end up with a single shape that contains all the sublayers of the calendar-fill icon. Everything should be green except for the subtracted areas, which should be clear. If you run into any issues, use the Calendar Fill Artboard directly beneath for comparison.
Now that you have a filled icon, it’s time to create an outline version by resizing one of the sublayers.
- Find the Calendar Fill Artboard on the canvas.
- Expand the Calendar Fill Artboard in the Layer List.
- Expand the Calendar Body layer and select the Separator layer.
- Increase the Separator height to 35.

All it took to create the outline version of the calendar icon was to turn the separator line into a square. If Sketch doesn’t let you drag to the exact height, you can just type the number into the Inspector instead.