Splash Screen Tutorial for Android
Learn how to implement splash screen in new and existing Android apps, using the SplashScreen API introduced in Android 12. By Jemma Slater.
Splash Screens Over the Years
Splash screens were once viewed as an anti-pattern. They were often misused as a heavy-handed approach to embedding branding into apps, intentionally delaying users from reaching the content for a few seconds. But as Android evolved and app requirements grew, the time taken to launch apps began to increase. The Material Design guidelines started recommending a launch screen instead of the blank loading screen. Developers had a couple of ways to add the splash, but neither requirements nor libraries existed to aid with consistency across codebases.
Fast forward to Android 12, which added the SplashScreen API. From Android 12 onward, all apps show a default splash screen, and developers can customize it according to their requirements.
Creating a Simple Splash Screen
The SplashScreen API makes it easier to update existing splash implementations. Before you migrate, learn how the new splash screen is built.
Adding the Dependency
Add the SplashScreen API as a dependency to your project, using the compat library that wraps the API and provides back support for older versions of Android.
In the starter project, open build.gradle file present in the app module. In the dependencies block, replace the TODO with:
implementation 'androidx.core:core-splashscreen:1.0.0-beta01'
Changing build.gradle requires a project sync. Press the Sync Now button in the banner at the top of the file.

Customizable Elements
Splash screens have an icon and background you can customize. Android 12 takes those from the app icon. Even if you’re happy with the default behavior, defining it explicitly means it can be backported to older versions.

Adding the Adaptive Icon
The icon can be any vector drawable, but should be recognizable and distinct to your app. This is an opportunity to strengthen your brand connection with users. The icon needs to follow the same rules as the Adaptive Icon (introduced in Android 8) and fit within a circle, otherwise you risk the corners of your icon being cropped.
In the starter project, open styles.xml. Replace the TODO with:
<style name="Theme.App.Starting" parent="Theme.SplashScreen">
</style>
This creates a style that will define your splash screen. It needs to have the parent Theme.SplashScreen to inherit the common splash screen attributes from the library.
Inside your new style block, add:
<item name="windowSplashScreenAnimatedIcon">@drawable/ic_launcher_foreground</item>
<item name="postSplashScreenTheme">@style/AppTheme</item>
Here, you define the icon attribute as the app icon. Despite the name, windowSplashScreenAnimatedIcon replaces the icon in the center of the screen and doesn’t need to be animated. Android 12 supports animated icons, which will be covered later in this tutorial.
The attribute postSplashScreenTheme sets the theme that applies after the splash screen has dismissed. This is also the theme set in the launcher activity in AndroidManifest.xml.
Changing the Background
The splash screen is full screen with a single color background. Inside your style block, add:
<item name="windowSplashScreenBackground">@color/ic_launcher_background</item>
Here you set the background color from your app icon, but this can be any color you want. Your styles.xml should look like this:

Setting the Style
Now you have created the style for your splash screen, you need to tell your app to use it. Open AndroidManifest.xml to where MainActivity is declared. Inside the declaration, add:
android:theme="@style/Theme.App.Starting"
It should look like this:
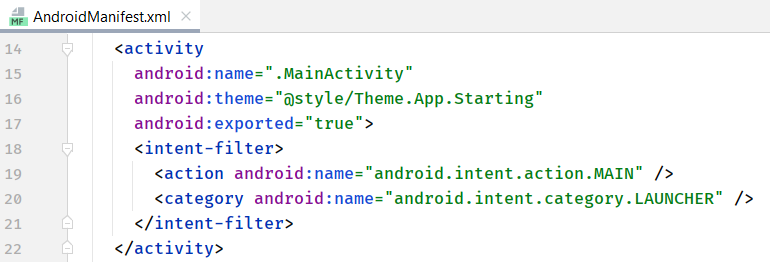
This sets your splash screen theme as the theme for the MainActivity, which is the launching activity for this app.
Installing the Splash Screen
Install the splash screen in the launching activity. Open MainActivity.kt and add the import:
import androidx.core.splashscreen.SplashScreen.Companion.installSplashScreen
In onCreate(), replace TODO: Install Splash Screen with:
val splashScreen = installSplashScreen()
This calls the installSplashScreen(), imported from the SplashScreen compat library. It handles the splash screen transition and returns an instance of the splash screen. This is assigned to a val to use later for added customization. It’s important you call this function before calling super.onCreate(savedInstanceState).
Your file should look like this:

Build and run the app, first on API 29 then on API 31. Force close then relaunch the app from the launcher. You’ll see the splash screen is now shown consistently on both pre-Android 12 and Android 12.

Adding More Customization
So far, you’ve created a simple splash screen for your app and used the SplashScreen compat library to backport it to earlier versions of Android. However, you can customize the screen in many more ways.
Adding an Icon Background
You can add a background color to the icon. This displays a circle of solid color behind the icon, extending slightly beyond it. This step can increase contrast between the background and icon, or add extra brand colors.
To enable the icon background, your splash theme needs a different parent. Open styles.xml where you declared your splash theme. Replace the parent with:
Theme.SplashScreen.IconBackground
Add the background color as an item in the style:
<item name="windowSplashScreenIconBackgroundColor">@color/yellow6</item>
This adds a yellow circle behind the icon. Use any color here. Build, run and relaunch the app on either emulator. The icon now has a background on the splash screen.

Creating a New Style for Android 12
Android 12 or higher is required for some features of the SplashScreen API. Create a new resource directory with the API 31 qualifier, which tells the system those values apply only when the device runs a valid version of Android.
In Android Studio, right click on the res folder then choose New -> Android Resource Directory.

That move opens the New Resource Directory window. Select version from the list of Available qualifiers and enter 31 as the Platform API level.

Press OK to confirm. You’ll see a new directory appear in the Project panel called values-v31. Any values you want to have accessible on devices running Android 12 or higher only should go in this folder. Right-click the new folder and select New -> Values Resource File to create a styles file.

Call the file styles.xml.

This creates an empty resources file: values-v31/styles.xml. Add a copy of the theme you declared for your splash screen.
<!-- Splash Screen Theme (Android 12+) -->
<style name="Theme.App.Starting" parent="Theme.SplashScreen.IconBackground">
 <item name="windowSplashScreenBackground">@color/ic_launcher_background</item>
 <item name="windowSplashScreenAnimatedIcon">@drawable/ic_launcher_foreground</item>
 <item name="windowSplashScreenIconBackgroundColor">@color/yellow6</item>
 <item name="postSplashScreenTheme">@style/AppTheme</item>
</style>
Two styles called Theme.App.Starting are declared in your codebase. One in values/styles.xml, and the other in values-v31/styles.xml. You have previously set this theme for the MainActivity in the AndroidManifest.xml. When the app is launched, the system will first check which version of Android the device is running, and take the style from values-v31/styles.xml if it applies, before falling back to values/styles.xml if it does not. This is why it’s important that both files use the same name to declare the splash screen theme.