Advanced MapKit Tutorial: Custom MapKit Tiles
In this custom MapKit tiles tutorial, you’ll learn to modify the default MapKit tiles by adding cool, custom tiles to an adventure game. By Adam Rush.
Customizing Appearances
The next step is to use the base image as a starting point for customization. Open the tile in your favorite image editor. For example, this is what it looks like in Pixelmator:
![]()
Now, you can use the brush or pencil tools to draw roads, paths, or interesting features.

If your tool supports layers, drawing different features on separate layers will allow you to adjust them to give the best look. Using layers makes drawing a little more forgiving, as you can use other features to cover up messy lines.


Now, repeat this process for all the tiles in the set, and you’re good to go. As you can see, this will take a bit of time.
You can make the process a little easier:
- Combine all the tiles for a whole layer first.
- Draw the custom map.
- Split the map back into tiles.

Placing the Tiles
After you create your new tiles, put them back in the tiles/zoom-level/x-coordinate/y-coordinate folder structure in the project. This keeps things organized and easily accessible.
That also means you can access them easily, as you did in the code you added for url(forTilePath:).
let tilePath = Bundle.main.url(
    forResource: "\(path.y)",
    withExtension: "png",
    subdirectory: "tiles/\(path.z)/\(path.x)",
    localization: nil)
That’s it. You’re ready to go forth and draw some beautiful maps!
Fancifying the Map
The map looks great and fits the aesthetic of the game. But there’s so much more to customize!
Your hero is not well represented by a blue dot, which is why you’ll replace the current location annotation with some custom art.
Replacing the User Annotation
Start replacing your hero’s icon by opening MapViewController.swift and adding the following method to the MKMapViewDelegate extension:
func mapView(
  _ mapView: MKMapView,
  viewFor annotation: MKAnnotation
) -> MKAnnotationView? {
  switch annotation {
  // 1
  case let user as MKUserLocation:
    // 2
    if let existingView = mapView
      .dequeueReusableAnnotationView(withIdentifier: "user") {
      return existingView
    } else {
      // 3
      let view = MKAnnotationView(annotation: user, reuseIdentifier: "user")
      view.image = #imageLiteral(resourceName: "user")
      return view
    }
  default:
    return nil
  }
}
This code creates a custom view for the user annotation. Here’s how:
- If MapKit is requesting a
MKUserLocation, you’ll return a custom annotation. - Map views maintain a pool of reusable annotation views to improve performance. You first try to find a view to reuse and return it if there is one.
- Otherwise, you create a new view. Here, you use a standard
MKAnnotationViewwhich is pretty flexible. Here, you only use it to represent the adventurer with an image.
Build and run. Instead of the blue dot, you’ll now see a little stick figure wandering around.

Not the most heroic-looking of heroes, but a hero none the less! :]
Annotations for Specific Locations
MKMapView also allows you to mark up your own locations of interest. MapQuest plays along with the NYC subway, treating the subway system as a great big warp network, letting you teleport from one station to another.
To make this clear to your players, you’ll add some markers to the map for nearby subway stations. Open MapViewController.swift and add the following line at the end of viewDidLoad():
mapView.addAnnotations(Game.shared.warps)
Build and run. A selection of subway stations now have pins representing them.

Like the blue dot that used to show the user location, these standard pins don’t match the game’s aesthetic. Custom annotations come to the rescue.
In mapView(_:viewFor:), add the following case to switch, above the default case:
case let warp as WarpZone:
  if let existingView = mapView.dequeueReusableAnnotationView(
    withIdentifier: WarpAnnotationView.identifier) {
    existingView.annotation = annotation
    return existingView
  } else {
    return WarpAnnotationView(
      annotation: warp,
      reuseIdentifier: WarpAnnotationView.identifier)
  }
Use the same pattern you did earlier to make the annotation. If there’s an existing one, return that one, otherwise, create a new one. Build and run again.
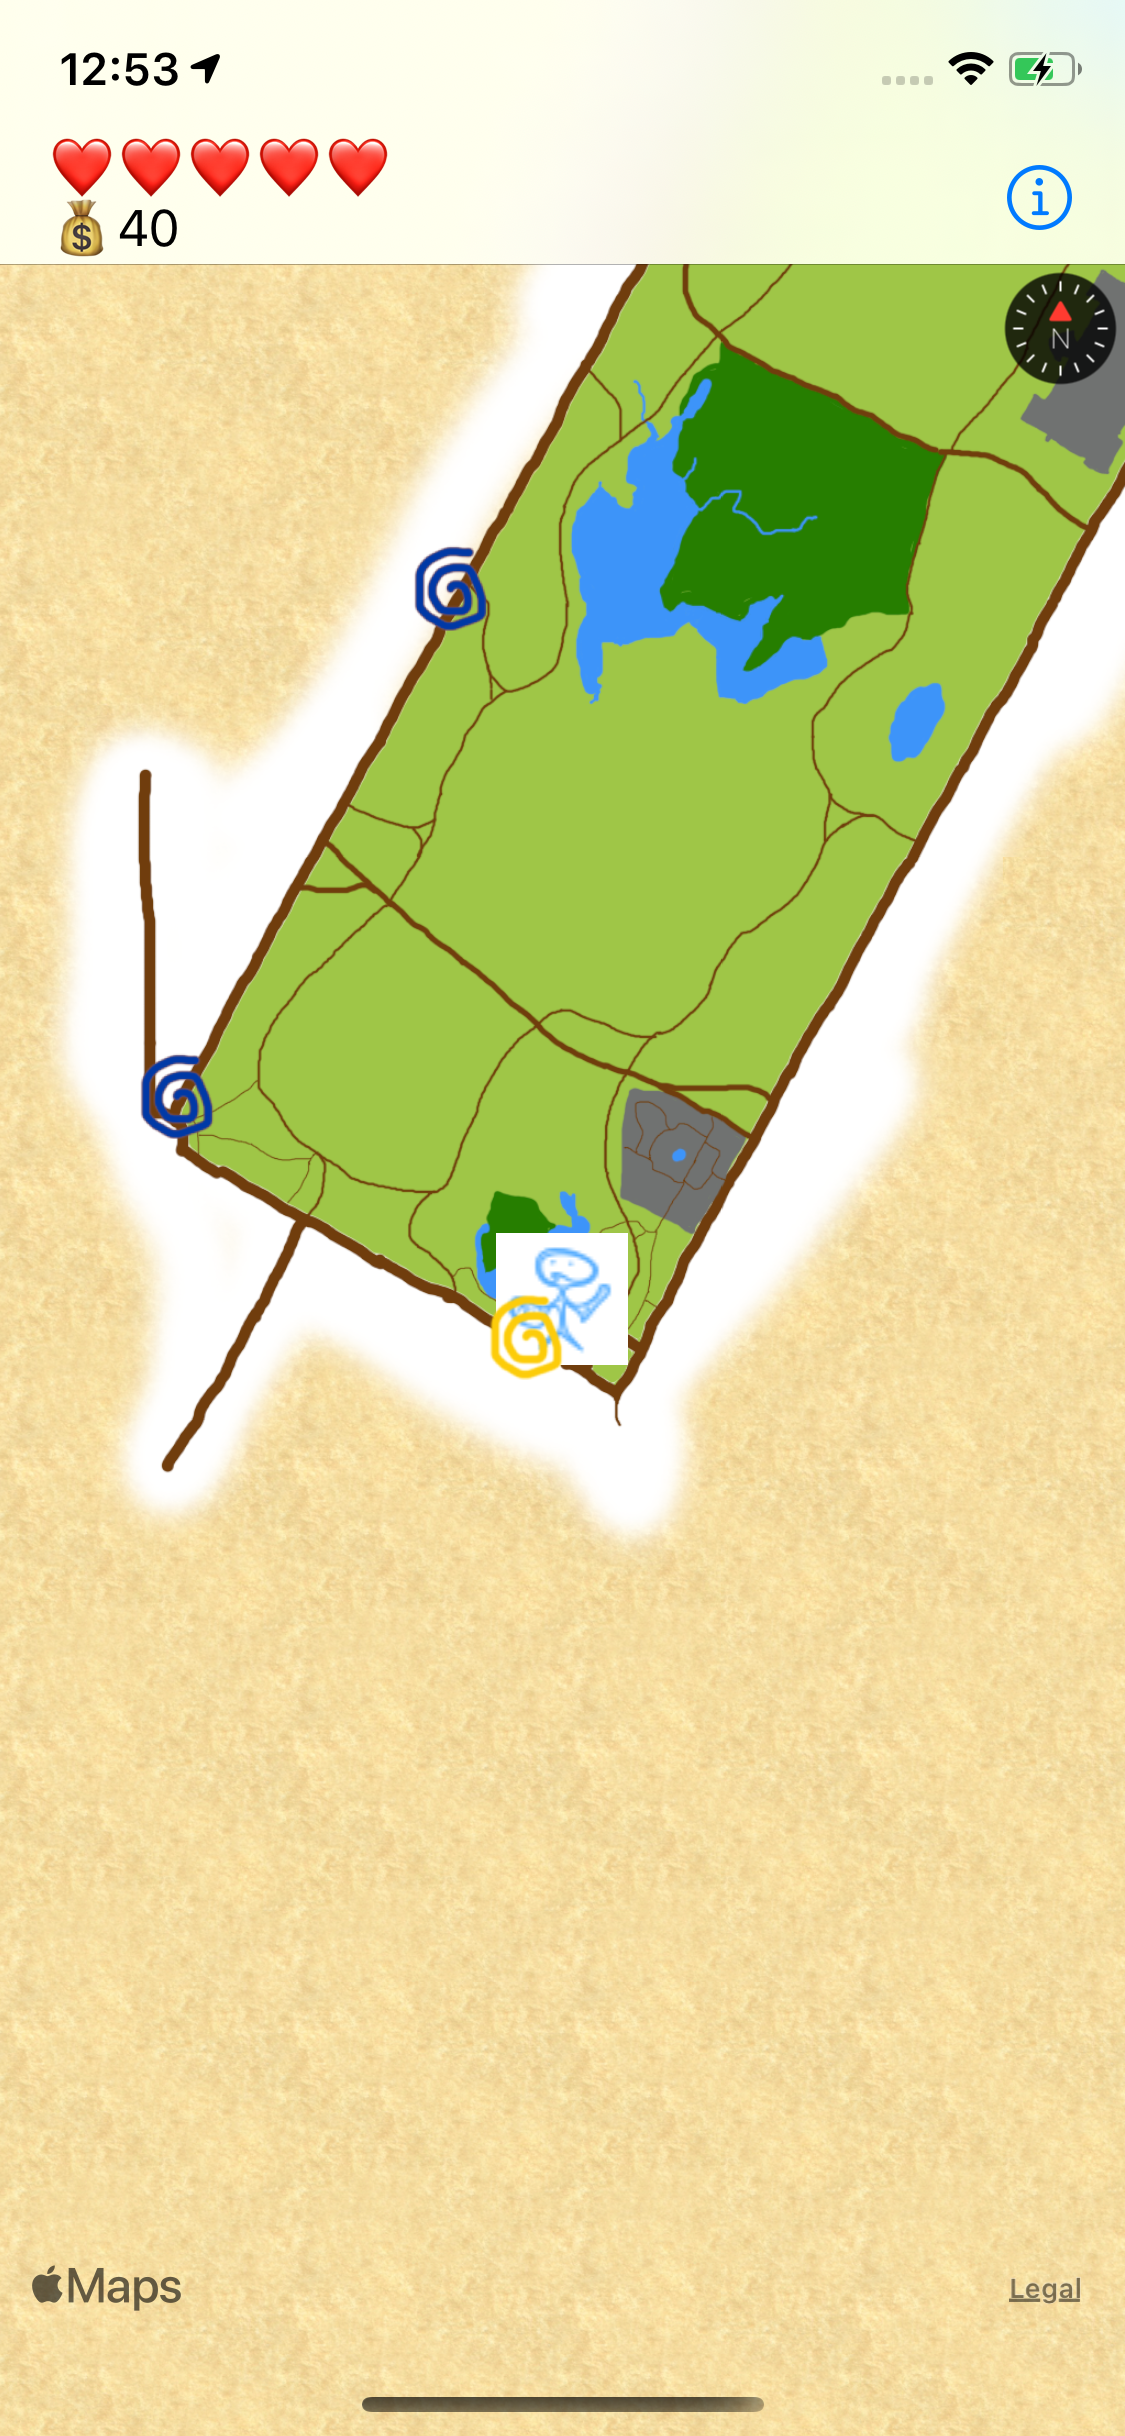
The custom annotation view now uses a template image and color for the specific subway line. If only the subway were an instantaneous warp in real life!
Using Custom Overlay Rendering
MapKit has many ways to spruce up the map for the game. For your next step, you’ll take advantage of one of these by using an MKPolygonRenderer to draw a gradient-based shimmer effect on the reservoir.
Start by replacing setupLakeOverlay() in MapViewController.swift with:
private func setupLakeOverlay() {
  // 1
  let lake = MKPolygon(
    coordinates: &Game.shared.reservoir,
    count: Game.shared.reservoir.count)
  mapView.addOverlay(lake)
  // 2
  shimmerRenderer = ShimmerRenderer(overlay: lake)
  shimmerRenderer.fillColor = #colorLiteral(
    red: 0.2431372549,
    green: 0.5803921569,
    blue: 0.9764705882,
    alpha: 1)
  // 3
  Timer.scheduledTimer(withTimeInterval: 0.1, repeats: true) { [weak self] _ in
    self?.shimmerRenderer.updateLocations()
    self?.shimmerRenderer.setNeedsDisplay()
  }
}
This sets up a new overlay by:
- Creating an
MKPolygonthat’s the same shape as the reservoir. These coordinates are pre-programmed in Game.swift. - Setting up a custom renderer to draw the polygon with the special effect.
ShimmerRendereruses Core Graphics to draw a polygon and a gradient on top of the polygon. - Since overlay renderers are not meant to be animated, this sets up a 100ms timer to update the overlay. Each time the overlay is updated, the gradient will shift a bit, producing a shimmering effect.
Next, replace mapView(_:rendererFor:) with:
func mapView(
  _ mapView: MKMapView,
  rendererFor overlay: MKOverlay
) -> MKOverlayRenderer {
  if overlay is AdventureMapOverlay {
    return tileRenderer
  } else {
    return shimmerRenderer
  }
}
This selects the right renderer for each of the two overlays.
Build and run, then pan over the reservoir to see the Shimmering Sea!

Congratulations! You’ve now seen how to use MapKit to make custom maps for your apps.
Where to Go From Here?
Download the completed project files by clicking the Download Materials button at the top or bottom of the tutorial.
Creating hand-drawn custom MapKit tiles is time-consuming, but they give your apps a distinct, immersive feel. And while creating the assets takes some effort, using them is pretty straightforward.
In addition to the basic tiles, OpenStreetMap has a list of specialized tile providers for things like cycling and terrain. OpenStreetMap also provides data to use if you want to design your own tiles programmatically.
If you want a custom but realistic map appearance without hand-drawing everything, take a look at third-party tools such as MapBox, which allows you to customize the appearance of a map with good tools at a modest price.
Finally, if you want to fancify your MapKit views even further, take a look at MapKit Tutorial: Overlay Views.
If you have any questions or comments on this tutorial, feel free to join in the discussion below!
OpenStreetMap data and images are © OpenStreetMap contributors. The map data is available under the Open Database License and the cartography tile data are licensed as CC BY-SA.