CareKit Tutorial for iOS: Part 2
In the second part of our CareKit tutorial, you’ll learn how to use Insights and Connect to build an iOS app that helps users manage and understand their personal health. By Jeff Rames.
Connect
The final UI module in our series is Connect, which allows you to contact your friends, supporters and care team about your health. You’re even able to share things like the bar chart you just created directly with your team.
OCKContact is the model class used for contacts. As you may recall, it doesn’t reside in the Care Plan Store.
For simplicity, you’ll add it to your CarePlanData class where all of the other data for this app is seeded. Open CarePlanData.swift and paste the following at the bottom of CarePlanData‘s existing properties:
let contacts =
  [OCKContact(contactType: .personal,
    name: "Shaun Riley",
    relation: "Friend",
    tintColor: nil,
    phoneNumber: CNPhoneNumber(stringValue: "888-555-5512"),
    messageNumber: CNPhoneNumber(stringValue: "888-555-5512"),
    emailAddress: "shaunofthedead@example.com",
    monogram: "SR",
    image: UIImage(named: "shaun-avatar")),
   OCKContact(contactType: .careTeam,
    name: "Columbus Ohio",
    relation: "Therapist",
    tintColor: nil,
    phoneNumber: CNPhoneNumber(stringValue: "888-555-5235"),
    messageNumber: CNPhoneNumber(stringValue: "888-555-5235"),
    emailAddress: "columbus@example.com",
    monogram: "CO",
    image: UIImage(named: "columbus-avatar")),
   OCKContact(contactType: .careTeam,
    name: "Dr Hershel Greene",
    relation: "Veterinarian",
    tintColor: nil,
    phoneNumber: CNPhoneNumber(stringValue: "888-555-2351"),
    messageNumber: CNPhoneNumber(stringValue: "888-555-2351"),
    emailAddress: "dr.hershel@example.com",
    monogram: "HG",
    image: UIImage(named: "hershel-avatar"))]
Most of these are self-explanatory for a contact. A few things to note:
-
contactType: Takes a value from the
OCKContactTypeenum that identifies someone as apersonalorcareTeamcontact for display grouping. - relation: A string used to identify the user’s relation to the contact.
- monogram: The contact’s initials, to be displayed in place of an avatar if no image is provided.
- image: An image used as an avatar on both a summary cell and detail view. The starter project included some zombified contacts in Assets.xcassets for use here.
Head back to TabBarViewController.swift and find createConnectStack(). Replace:
let viewController = UIViewController()
with:
let viewController = OCKConnectViewController(contacts: carePlanData.contacts)
This allocates a OCKConnectViewController and passes it the array of contacts you just defined.
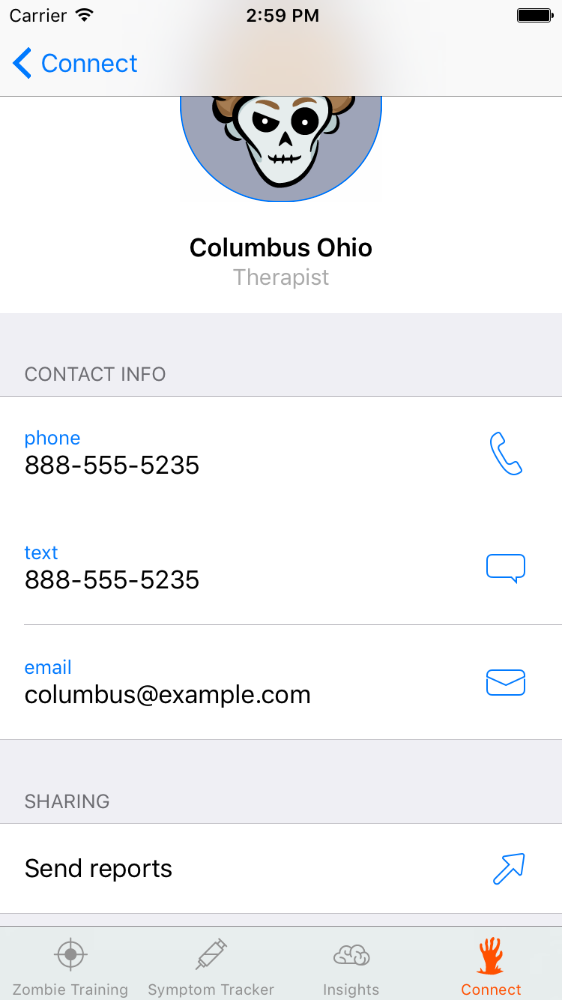
Build and run, then check out the Connect tab. You can see all of your contacts grouped by type, and you’ll be able to drill through to details. On the detail view you can email, call or text depending on your device capabilities.
The real power of Connect is the ability to share your data with contacts. For instance, it would be great to share the chart you created with Dr. Hershel Greene for some clinical feedback.
First, cache the most current OCKBarChart created for Insights. Still in TabBarViewController, add the following property with the others up top:
fileprivate var insightChart: OCKBarChart? = nil
You’ll use this to hang onto the chart. Go to your CarePlanStoreManagerDelegate extension and add the following to the top of carePlanStore(_:didUpdateInsights:):
if let trainingPlan = (insights.filter { $0.title == "Zombie Training Plan" }.first) {
  insightChart = trainingPlan as? OCKBarChart
}
This filters your OCKInsightItem array by title in a lightweight attempt to identify the chart. Because there should be only one, you grab the first, cast it and point your property to it.
You need to put the chart into an OCKDocument before it can be shared. Open CarePlanData.swift and add the following extension to the bottom of the file:
extension CarePlanData {
  func generateDocumentWith(chart: OCKChart?) -> OCKDocument {
    let intro = OCKDocumentElementParagraph(content: "I've been tracking my efforts to avoid becoming a Zombie with ZombieKit. Please check the attached report to see if you're safe around me.")

    var documentElements: [OCKDocumentElement] = [intro]
    if let chart = chart {
      documentElements.append(OCKDocumentElementChart(chart: chart))
    }

    let document = OCKDocument(title: "Re: Your Brains", elements: documentElements)
    document.pageHeader = "ZombieKit: Weekly Report"

    return document
  }
}
documentElements is an array of OCKDocumentElement objects, which all components of an OCKDocument must be. You initialze the array with an OCKDocumentElementParagraph containing some introductory text, then add an OCKDocumentElementChart with the passed chart. This is used to create an OCKDocument that also has a title and page header.
Open TabBarViewController.swift and add the following extension to the bottom of the file:
// MARK: - OCKConnectViewControllerDelegate
extension TabBarViewController: OCKConnectViewControllerDelegate {

  func connectViewController(_ connectViewController: OCKConnectViewController,
                             didSelectShareButtonFor contact: OCKContact,
                             presentationSourceView sourceView: UIView) {
    let document = carePlanData.generateDocumentWith(chart: insightChart)
    let activityViewController = UIActivityViewController(activityItems: [document.htmlContent],
                                                          applicationActivities: nil)

    present(activityViewController, animated: true, completion: nil)
  }
}
Here you create a UIActivityViewController, pass it an HTML version of your latest insight bar chart and present it.
The presence of a delegate conforming to OCKConnectViewControllerDelegate causes a cell to appear on the contact detail screen called Send reports. When this cell is selected, connectViewController(_:didSelectShareButtonFor:presentationSourceView:) will be called.
To connect the delegate, go to createConnectStack() and add the following just below where your OCKConnectViewController is allocated.
viewController.delegate = self
Build and run. In the Connect tab, select a contact and then the Send reports cell at the bottom.
Doing so creates an activity sheet that will send your document to the selected service. Select Mail, and you’ll see your report in the email body!

Note: There is currently an issue in iOS 10 impacting rendering of the OCKBarChart—it may turn up completely blank. An issue is open for this in the CareKit repository, and this tutorial will be updated when resolved. The above screenshot was generated on an iOS 9 device.
Where to Go From Here?
Download the final project for this CareKit tutorial series here. If you want to enable HealthKit, remember to follow the HealthKit Integration instructions in part one.
For a deeper dive into the framework, check out Apple’s official CareKit documentation as well as the API Reference. You can also keep on top of the latest changes to the framework, and even contribute some of your own, on GitHub.
We hope you enjoyed this CareKit tutorial series and have a good grasp on what CareKit can do. Apple has provided the hardware and software to do amazing things for personal health, but it’s up to people like you to employ them to help others stay healthy and non-zombiefied. Please join the discussion about this CareKit tutorial series, CareKit, and your plans to improve lives below!