AudioKit Tutorial: Getting Started
Learn the basic physics of sound and computer audio on a fun and gentle journey and experiment with sound synthesis and sampling in this AudioKit Tutorial. By Colin Eberhardt.
Polyphony
The 1970s saw a shift away from modular synthesis, which uses separate oscillators, envelopes and filters, to the use of microprocessors. Rather than using analogue circuitry, sounds were instead synthesized digitally. This resulted in far cheaper and more portable sound synthesizers, with brands such as Yamaha becoming widely used by professionals and amateurs alike.

The 1983 Yamaha DX7 – public domain image.
All of your playgrounds so far have been limited a single note at a time. With many instruments, musicians are able to play more than one note simultaneously. These instruments are called polyphonic, whereas those that can only play a single note, just like your examples, are called monophonic.
In order to create polyphonic sound, you could create multiple oscillators, each playing a different note, and feed them through a mixer node. However, there is a much easier way to create the same effect: using AudioKit’s oscillator banks.
Ctrl-click your playground, select New Playground Page and create a new page named Polyphony. Replace the generated content with the following:
import AudioKitPlaygrounds
import AudioKit
import PlaygroundSupport

let bank = AKOscillatorBank()
AudioKit.output = bank
AudioKit.start()
This simply creates the oscillator bank and sets it as the AudioKit output. If you Command-click the AKOscillatorBank class to navigate to its definition, you will find that it subclasses AKPolyphonicNode. If you follow this to its definition, you’ll find that it subclasses AKNode and adopts the AKPolyphonic protocol.
As a result, this oscillator bank is just like any other AudioKit node in that its output can be processed by mixers, envelopes and any other filters and effects. The AKPolyphonic protocol describes how you play notes on this polyphonic node, as you’ll see shortly.
In order to test this oscillator you need a way to play multiple notes in unison. That sounds a bit complicated doesn’t it?
Add the following to the end of your playground, and ensure the live view is visible:
class PlaygroundView: AKPlaygroundView {
  override func setup() {
    let keyboard = AKKeyboardView(width: 440, height: 100)
    addSubview(keyboard)
  }
}

PlaygroundPage.current.liveView = PlaygroundView()
PlaygroundPage.current.needsIndefiniteExecution = true
Once the playground has compiled you’ll see the following:
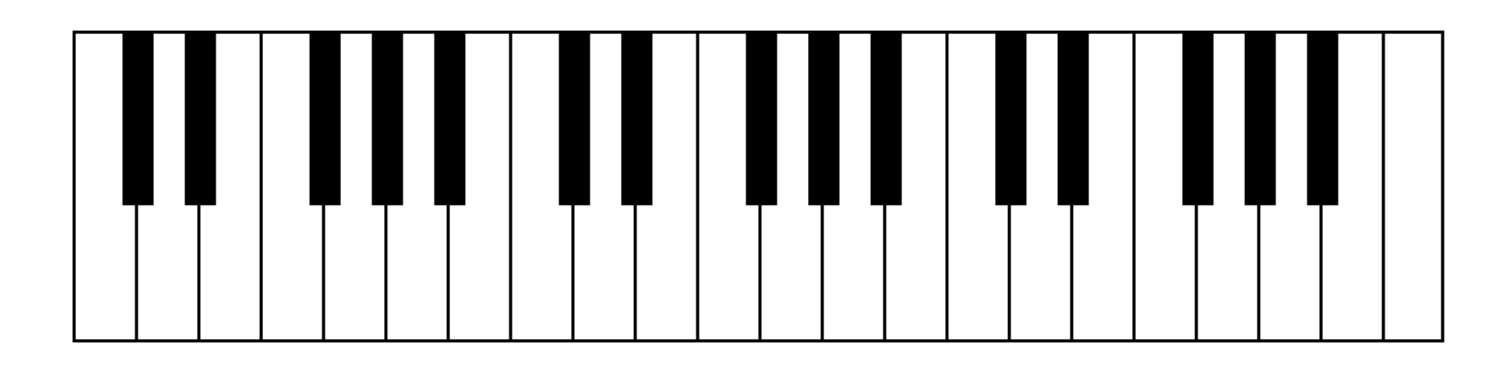
How cool is that? A playground that renders a musical keyboard!
The AKKeyboardView is another AudioKit utility that makes it really easy to ‘play’ with the framework and explore its capabilities. Click on the keys of the keyboard, and you’ll find it doesn’t make a sound.
Time for a bit more wiring-up.
Update setUp of your PlaygroundView to the following:
let keyboard = AKKeyboardView(width: 440, height: 100)
keyboard.delegate = self
addSubview(keyboard)
This sets the keyboard view’s delegate to the PlaygroundView class. The delegate allows you to respond to these keypresses.
Update the class definition accordingly:
class PlaygroundView: AKPlaygroundView, AKKeyboardDelegate
This adopts the AKKeyboardDelegate protocol. Finally add the following methods to the class, just after setup:
func noteOn(note: MIDINoteNumber) {
  bank.play(noteNumber: note, velocity: 80)
}

func noteOff(note: MIDINoteNumber) {
  bank.stop(noteNumber: note)
}
Each time you press a key, the keyboard invokes noteOn of the delegate. The implementation of this method is quite straightforward; it simply invokes play on the oscillator bank. noteOff, invokes the corresponding stop method.
Click and slide across the keyboard, and you’ll find it plays a beautiful crescendo. This oscillator bank already has ADSR capabilities built in. As a result, the decay from one note mixes with the attack, release and sustain of the next, creating quite a pleasing sound.
You’ll notice that the note supplied by the keyboard is not defined as a frequency. Instead, it uses the MIDINoteNumber type. If you Command-click to view its definition, you’ll see that it is simply an integer:
public typealias MIDINoteNumber = Int
MIDI stands for Musical Instrument Digital Interface, which is a widely adopted communication format between musical instruments. The note numbers correspond to notes on a standard keyboard. The second parameter in the play method is velocity, another standard MIDI property which details how hard a note is struck. Lower values indicate a softer strike which result in a quieter sound.
The final step is to set the keyboard to polyphonic mode. Add the following to the end of the setup method:
keyboard.polyphonicMode = true
You will find you can now play multiple notes simultaneously, just like the following:

…which is, incidentally, C-major.
AudioKit has a long history with its foundations in the early microprocessor era. The project uses Soundpipe, and code from Csound, an MIT project that started in 1985. It’s fascinating to think that audio code you can run in a playground and add to your iPhone apps started life over 30 years ago!
Sampling
The sound synthesis techniques you have explored so far all try to construct realistic sounds from quite basic building blocks: oscillators, filters and mixers. In the early 1970s, the increase in computer processing power and storage gave rise to a completely different approach — sound sampling — where the aim is to create a digital copy of the sound.
Sampling is a relatively simple concept and shares the same principles as digital photography. Natural sounds are smooth waveforms; the process of sampling simply records the amplitude of the soundwave at regularly spaced intervals:

There are two important factors that affect how faithfully a sound is captured:
- Bit depth: Describes the number of discrete amplitude levels a sampler can reproduce.
- Sample rate: Describes how often an amplitude measurement is taken, measured in hertz.
You’ll explore these properties with your next playground.
Right-click your playground, select New Playground Page and create a new page named Samples. Replace the generated content with the following:
import AudioKitPlaygrounds
import AudioKit
import PlaygroundSupport

let file = try AKAudioFile(readFileName: "climax-disco-part2.wav", baseDir: .resources)
let player = try AKAudioPlayer(file: file)
player.looping = true
The above loads a sound sample, creates an audio player and sets it to repeatedly loop the sample.
The WAV file for this AudioKit tutorial is available within this zip file. Unzip the contents, then drag the WAV files into the resources folder of your playground:
Finally, add the following to the end of your playground:
AudioKit.output = player
AudioKit.start()

player.play()

PlaygroundPage.current.needsIndefiniteExecution = true
This wires up your audio player to the AudioKit engine and starts it playing. Turn up the volume and enjoy!
This brief sampled loop comprises a wide variety of sounds that would be a real challenge with the basic building blocks of oscillators.
The MP3 sound you’re using has a high bit depth and sample rate, giving it a crisp and clear sound. In order to experiment with these parameters, add the following code to your playground, just after you create your audio player:
let bitcrusher = AKBitCrusher(player)
bitcrusher.bitDepth = 16
bitcrusher.sampleRate = 40000
And update the AudioKit output:
AudioKit.output = bitcrusher
The output of the playground is now very different; it’s clearly the same sample, but it now sounds very tinny.
AKBitCrusher is an AudioKit effect that simulates a reduction of bit depth and sample rate. As a result, you can produce an audio output that is similar to the early samples produced by computers such as the ZX Spectrum or BBC Micro, which only had a few kilobytes of memory and processors that are millions of times slower than today’s!
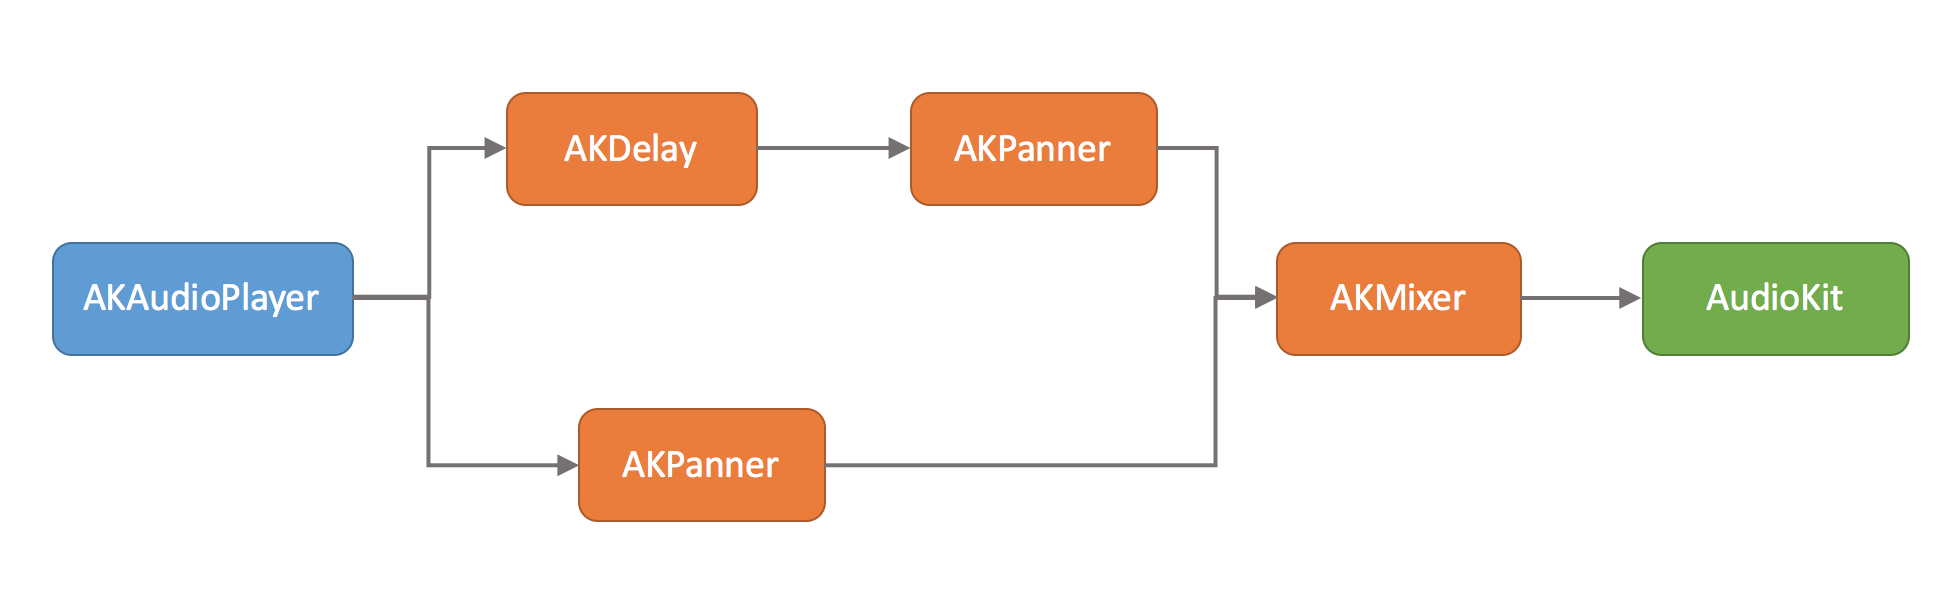
For your final experiment, you’re going to assemble a number of nodes together to create a stereo delay effect. To start, remove the three lines of code that create and configure the bit crusher.
Next, add the following:
let delay = AKDelay(player)
delay.time = 0.1
delay.dryWetMix = 1
This creates a delay effect of 0.1 seconds using your sample loop as an input. The wet/dry mix value lets you mix the delayed and non-delayed audio, in this case, a value of 1 ensures only the delayed audio is output by this node.
Next, add the following:
let leftPan = AKPanner(player, pan: -1)
let rightPan = AKPanner(delay, pan: 1)
The AKPanner node lets you pan audio to the left, to the right, or somewhere in between. The above pans the delayed audio to the left, and the non-delayed to the right.
The final step is to mix the two together, and configure the AudioKit output by adding the following two lines to replace the old line that configured the AudioKit to use bitcrusher:
let mix = AKMixer(leftPan, rightPan)
AudioKit.output = mix
This will play the same sound sample, but with a very short delay between the left and right speaker.