AudioKit Tutorial: Getting Started
Learn the basic physics of sound and computer audio on a fun and gentle journey and experiment with sound synthesis and sampling in this AudioKit Tutorial. By Colin Eberhardt.
Sound Envelopes
When a musical instrument plays a note, the amplitude (or loudness) varies over time, and is different from instrument to instrument. A model that can be used to simulate this effect is an Attack-Decay-Sustain-Release (ADSR) Envelope:

The component parts of this envelope are:
- Attack: The time taken to ramp up to full volume
- Decay: The time taken to ramp down to the sustain level
- Sustain: The level maintained after the decay has finished and before release has begun
- Release: The time taken to ramp the volume down to zero
A piano, where strings are hit with a hammer, has a very brief attack and a rapid decay. A violin can have a longer attack, decay and sustain as the musician continues to bow the string.
One of the first electronic instruments that used an ADSR envelope was the Novachord. This instrument, built in 1939, contained 163 vacuum tubes and over 1,000 custom capacitors, and weighed in at 500 pounds (230 kg). Unfortunately, only one thousand Novachords were made and it was not a commercial success.
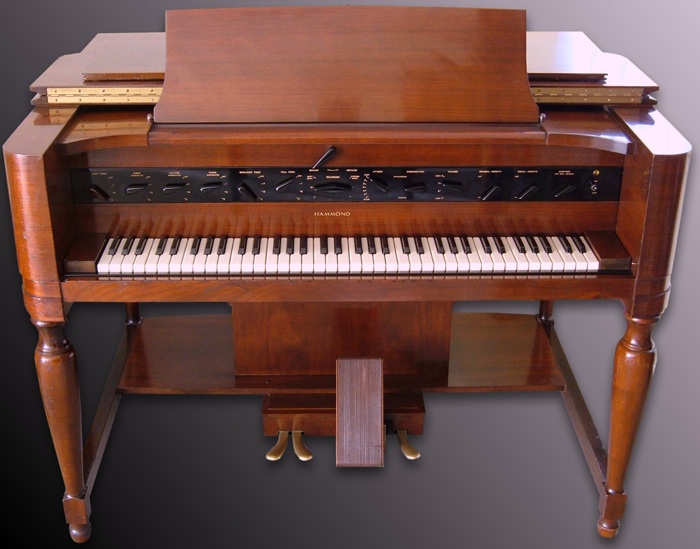
Image courtesy of Hollow Sun – CC attribution license.
Control-click the top element in your playground, Journey, select New Playground Page and create a new page named ADSR. Replace the generated content with the following:
import AudioKitPlaygrounds
import AudioKit
import PlaygroundSupport

let oscillator = AKOscillator()
This create the oscillator that you are already familiar with. Next add the following code to the end of your playground:
let envelope = AKAmplitudeEnvelope(oscillator)
envelope.attackDuration = 0.01
envelope.decayDuration = 0.1
envelope.sustainLevel = 0.1
envelope.releaseDuration = 0.3
This creates an AKAmplitudeEnvelope which defines an ADSR envelope. The duration parameters are specified in seconds and the level is an amplitude with a range of 0 – 1.
AKAmplitudeEnvelope subclasses the AKNode, just like AKOscillator. In the above code, you can see that the oscillator is passed to the envelope’s initializer, connecting the two nodes together.
Next add the following:
AudioKit.output = envelope
AudioKit.start()

oscillator.start()
This starts the AudioKit engine, this time taking the output from the ADSR envelope, and starts the oscillator.

In order to hear the effect of the envelope you need to repeatedly start then stop the node. That’s the final piece to add to your playground:
AKPlaygroundLoop(every: 0.5) {
  if (envelope.isStarted) {
    envelope.stop()
  } else {
    envelope.start()
  }
}

PlaygroundPage.current.needsIndefiniteExecution = true
You will now hear the same note played repeatedly, but this time with a sound envelope that sounds a little bit like a piano.
The loop executes two times per second, with each iteration either starting or stopping the ADSR. When the loop starts, the rapid attack to full volume will take just 0.01 seconds, followed by a 0.1-second decay to the sustain level. This is held for 0.5 seconds, then released with a final decay of 0.3 seconds.
Play around with the ADSR values to try and create some other sounds. How about a violin?
The sounds you have explored so far have been based on sine waves produced by AKOscillator. While you can play musical notes with this oscillator, and use an ADSR to soften its sharp tones, you wouldn’t exactly call it musical!
In the next section you’ll learn how to create a richer sound.
Additive Sound Synthesis
Each musical instrument has a distinctive sound quality, known as its timbre. This is what makes a piano sound quite different from a violin, even though they’re playing exactly the same note. An important property of timbre is the sound spectrum that an instrument produces; this describes the range of frequencies that combine to produce a single note. Your current playgrounds used oscillators that emit a single frequency, which sounds quite artificial.
You can create a realistic synthesis of an instrument by adding together the output of a bank of oscillators to play a single note. This is known as additive synthesis, and is the subject of your next playground.
Right click your playground, select New Playground Page and create a new page named Additive Synthesis. Replace the generated content with the following:
import AudioKitPlaygrounds
import AudioKit
import PlaygroundSupport

func createAndStartOscillator(frequency: Double) -> AKOscillator {
  let oscillator = AKOscillator()
  oscillator.frequency = frequency
  oscillator.start()
  return oscillator
}
For additive synthesis, you need multiple oscillators. createAndStartOscillator is a convenient way to create them.
Next add the following:
let frequencies = (1...5).map { $0 * 261.63 }
This uses the Range Operator to create a range with the numbers from 1 to 5. You then map this range by multiplying each entry by 261.53. There is a reason for this magic number: It’s the frequency of middle C on a standard keyboard. The other frequencies are multiples of this value, which are known as harmonics.
Next add the following:
let oscillators = frequencies.map {
  createAndStartOscillator(frequency: $0)
}
This performs a further map operation to create your oscillators.
The next step is to combine them together. Add the following:
let mixer = AKMixer()
oscillators.forEach { mixer.connect($0) }
The AKMixer class is another AudioKit node; it takes the output of one or more nodes and combines them together.
Next add the following:
let envelope = AKAmplitudeEnvelope(mixer)
envelope.attackDuration = 0.01
envelope.decayDuration = 0.1
envelope.sustainLevel = 0.1
envelope.releaseDuration = 0.3

AudioKit.output = envelope
AudioKit.start()

AKPlaygroundLoop(every: 0.5) {
  if (envelope.isStarted) {
    envelope.stop()
  } else {
    envelope.start()
  }
}
The above code should be quite familiar to you; it adds an ADSR to the output of the mixer, provides it to the AudioKit engine, then periodically starts and stops it.
To really learn how additive synthesis works, it would be nice if you could play around with the various combinations of these frequencies. The playground live-view is an ideal tool for this!
Add the following code:
class PlaygroundView: AKPlaygroundView {

  override func setup() {
    addTitle("Harmonics")

    oscillators.forEach {
      oscillator in
      let harmonicSlider = AKPropertySlider(
        property: "\(oscillator.frequency) Hz",
        value: oscillator.amplitude
      ) { amplitude in
        oscillator.amplitude = amplitude
      }
      addSubview(harmonicSlider)
    }

  }
}

PlaygroundPage.current.needsIndefiniteExecution = true
PlaygroundPage.current.liveView = PlaygroundView()
AudioKit has a number of classes that make it easy for you to create interactive playgrounds; you’re using several of them here.
The Playground class subclasses AKPlaygoundView, which constructs a vertical stack of subviews. Within the setup method, you iterate over the oscillators, and create an AKPropertySlider for each. The sliders are initialized with the frequency and amplitude of each oscillator and invoke a callback when you interact with the slider. The trailing closure that provides this callback updates the amplitude of the respective oscillator. This is a very simple method to making your playground interactive.
In order to see the results of the above code, you need to ensure the live view is visible. Click the button with the linked circles icon in the top right corner to show the assistant view. Also ensure that the live view is set to the correct playground output.
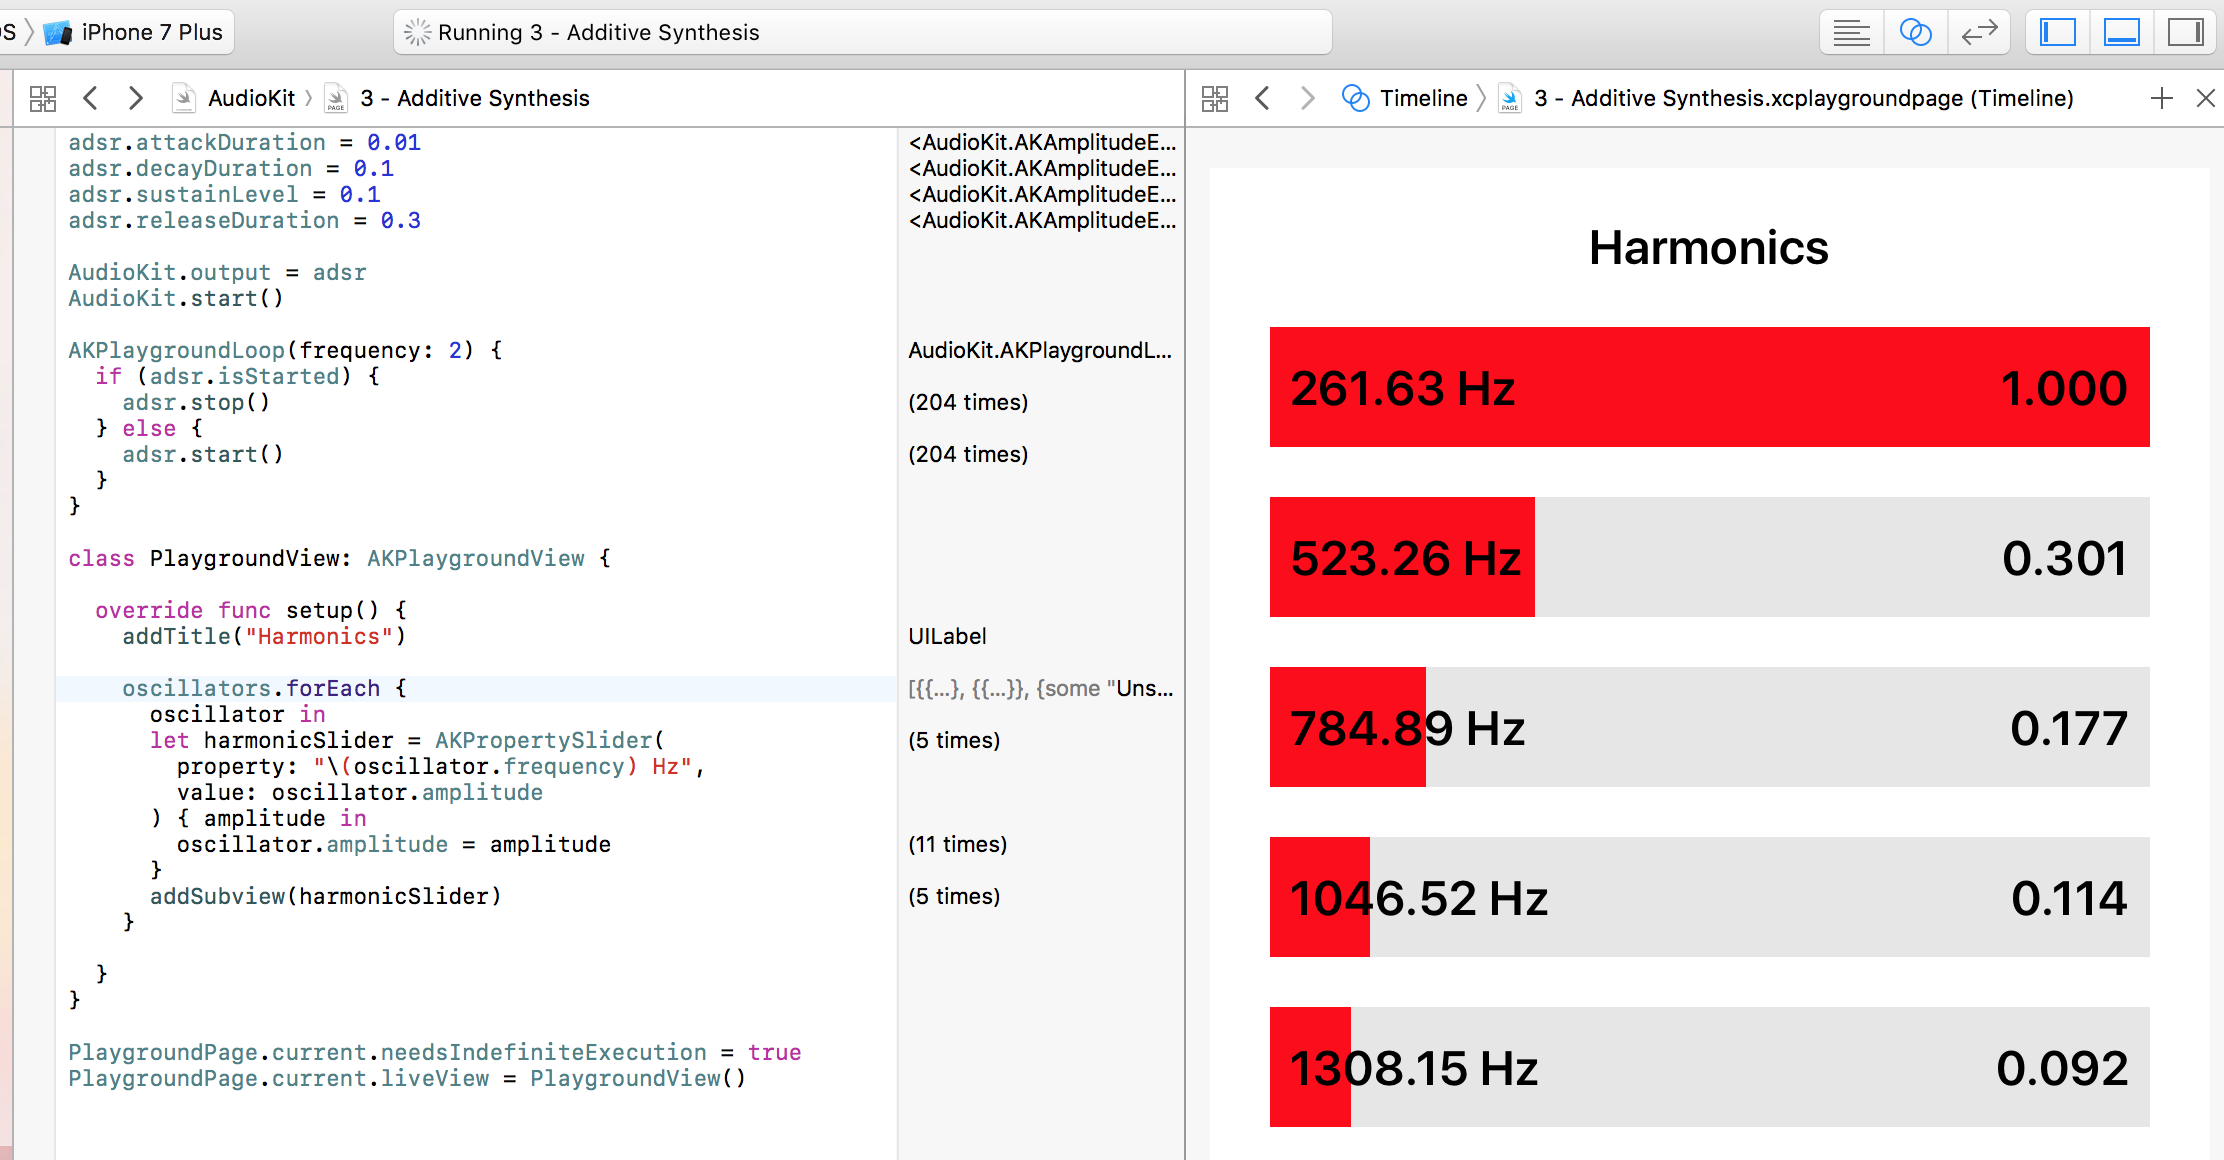
You can alter the amplitude of each slider to change the timbre of your instrument. For a more natural sound quality, I’d suggest a configuration similar to the one pictured above.
One of the earliest synthesizers to employ additive synthesis was the 200 ton (!) Teleharmonium. The immense size and weight of this instrument were almost certainly responsible for its demise. The more successful Hammond organ used a similar tonewheel technique, albeit in a smaller package, to achieve the same additive synthesis which was part of its distinctive sound. Invented in 1935, the Hammond is still well-known and was a popular instrument in the progressive rock era.

The C3 Hammond – public domain image.
Tonewheels are physical spinning disks with a number of smooth bumps on their rim, which rotate next to a pickup assembly. The Hammond organ has a whole bank of these tonewheels spinning at various different speeds. The musician uses drawbars to determine the exact mix of tones used to generate a musical note. This rather crude sounding way of creating sound is, strictly speaking, electromechanical rather than electronic!
There are a number of other techniques that can be used to create a more realistic sound spectrum, including Frequency Modulation (FM) and Pulse Width Modulation (PWM), both of which are available in AudioKit via the AKFMOscillator and AKPWMOscillator classes. I’d certainly encourage you to play around with both of these. Why not swap out the AKOscillator you are using in your current playgrounds for one of these?