Unity 2D Techniques: Build a 2D Pinball Game
In this tutorial, you’ll learn how to use Unity’s 2D techniques to build an old-school pinball game using sorting groups, the mesh editor and more. By Ben MacKinnon.
Sign up/Sign in
With a free Kodeco account you can download source code, track your progress, bookmark, personalise your learner profile and more!
Create accountAlready a member of Kodeco? Sign in
Sign up/Sign in
With a free Kodeco account you can download source code, track your progress, bookmark, personalise your learner profile and more!
Create accountAlready a member of Kodeco? Sign in
Contents
Unity 2D Techniques: Build a 2D Pinball Game
30 mins
- Getting Started
- Exploring the Starter Project
- Adjusting Your Sorting Layers
- Getting the Ball Rolling
- Scrolling Trees
- Scripting the Animation
- Adding the Billboard
- Placing the Billboard
- Adding the Score
- Adding the Ping!
- Adding the Plunger
- Adding the Anchor
- Adding the Spring Joint
- Adding the Plunger Script
- Test Your Work
- Adding the Flippers
- The Hinge Joints
- Adding a Script to Flip
- Road Tunnel Zone
- Force Field With Area Effector 2D
- A Guided Path With Surface Effector 2D
- Mesh Editing in Unity
- Blocking With Platform Effector 2D
- Float Piece Area
- Code the Float
- Implementing the Float Area
- Triangle Bumpers
- Adding More Bumpers
- Where to Go From Here?
Placing the Billboard
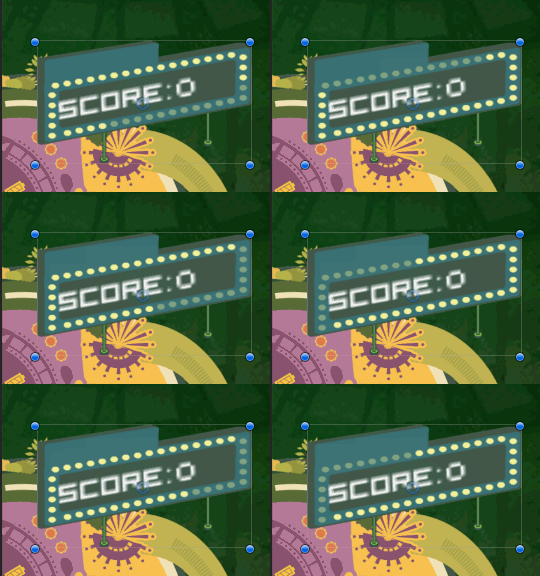
Now, you need to place the billboard onto your pinball machine.
Go to AniBillboard in the Hierarchy, set its Transform values for Position to (X:1.5, Y:4.3, Z:0) and change its Scale to (X:-3.5, Y:2, Z:1).

Uh… it’s a bit big, isn’t it? To fix that, set the Draw Mode in Sprite Renderer to Tiled and Size to Width:1 Height:1. In the Tile Mode drop-down, select Adaptive.

Much better!
Adding the Score
Add the score to your billboard by going to Assets/RW/Prefabs, dragging scoreText into Billboard in the Hierarchy and changing its Scale to (X:0.41, Y:0.4, Z:1).
Click Play to preview your pinball game with its swanky new animated billboard!

Adding the Ping!
With the “bling” in place, it’s time to add the “ping” to the playfield! In other words, you need to add the colliders that make the game interesting.
Start by going to the Hierarchy and moving BumperRamps and CurveRamp from Static Colliders into Interactive Parts.
Adding the Plunger
The first thing you need to play pinball is a plunger so you can shoot a ball out of the barrel and start the game!
In the real world, the player pulls back the plunger, which engages the spring coils. Upon release, the spring coils propel the ball into the playfield. You want the same feeling in your app.
To implement those mechanics, select Plunger in the Hierarchy. In the Inspector, add a Rendering ▸ Sprite Renderer component.
Select the Sprite Renderer Component, click the circle icon beside the Sprite field and assign the cam asset to it. Set Sorting Layer to Top and the Transform Position to (X:2.66, Y:-4.6, Z:0).

Now, think about the plunger’s physics. It’s a spring with two elements at work:
- The anchor: Anchors the moving part of the joint, which builds the tension.
- The spring joint: The moving part of the joint, which creates the force.
Next, you’ll need to implement the physics that will make the plunger behave as expected.
Adding the Anchor
Go to Assets/RW/Prefabs and drag plungerAnchor into Plunger in the Hierarchy to create a child instance. In the Inspector, add Physics 2D ▸ Rigidbody 2D and set its Body Type to Kinematic to fix its position.

Adding the Spring Joint
Now that you’ve created the anchor, it’s time to create the spring joint. This acts like a spring to pull back and launch the plunger.
To do this, click the arrow sign beside plungerAnchor in the Hierarchy to show its nested contents. Select the Plunger-springjoint and add a Spring Joint 2D to it via the Inspector.

Make sure you select the 2D Spring joint option!
In Rigidbody 2D, set Body Type to Dynamic and Mass to 2.
Expand the Constraints section and enable Freeze Position for X and Freeze Rotation for Z.

In Spring Joint 2D, check Enable Collision. Disable Auto Configure Distance. Set Distance to 1 and Frequency to 10.
Set Connected Anchor to (X:0, Y:-1) and assign plungerAnchor as the component’s Connected Rigid Body.

In the Hierarchy, drag Assets/RW/Prefabs/plungerEffects into the Plunger object. This creates a child object instance.
Adding the Plunger Script
Finally, it’s time to control the physics you added to the plunger and spring joint.
In the Inspector, with Plunger-springjoint still selected, click Add Component and select Scripts ▸ Launcher. Double-click to launch it in the code editor.
Declare the following variables below the existing ones:
private SpringJoint2D springJoint;
private Rigidbody2D rb;
private float force = 0f;          // current force generated
public float maxForce = 90f;
Then, at the end of Start, add the following:
springJoint = GetComponent<SpringJoint2D>();
springJoint.distance = 1f;
rb = GetComponent<Rigidbody2D>();
After // #1 in Update, add the following line:
// calculates current force of exertion
force = powerIndex * maxForce;
Finally, add the following FixedUpdate at the end of the class:
private void FixedUpdate()
{
    // When force is not 0
    if (force != 0)
    {
        // release springJoint and power up
        springJoint.distance = 1f;
        rb.AddForce(Vector3.up * force);
        force = 0;
    }

    // When the plunger is held down
    if (pressTime != 0)
    {
        // retract the springJoint distance and reduce the power
        springJoint.distance = 0.8f;
        rb.AddForce(Vector3.down * 400);
    }
}
Save the file and return to Unity.
Assign plungerEfxZoom and plungerEfxLight from the plungerEffects instance to the component’s fields. Set Max Force to 200.

Test Your Work
You’re now ready to test your newly-working pinball plunger.
Drag a Assets/RW/Prefabs/ball into the Hierarchy to create an instance. Set its Transform Position to (X:2.84, Y:-1.08, Z:0). Click Play and test your plunger by pressing and releasing the space bar.
Now you’re rolling!
Adding the Flippers
Right now, the ball shoots out from the barrel into the game zone, then drops off the bottom and into space.
Time to add flippers — the main weapons for pinball victory! You’ll start with the left flipper.
In the Hierarchy, right-click Flippers and select Create Empty. Rename the GameObject FlipLeft-hingejoint. In the Inspector, set Transform Position to (X:-1.26, Y:-3.8, Z:0) and Scale to (X:1.05, Y:1.05, Z:1).
For the right flipper, duplicate the left one and rename it FlipRight-hingejoint. Set its position to (X:0.46, Y:-3.8, Z:0).
Again, think about how the flippers will work. It’s like the plunger, only this time you need to rotate the flipper using the following components:
- Hinge joints: Anchor a movable part at its point of rotation.
- Flipper: The movable, flipper-y part.
Next, go to Assets/RW/Prefabs and drag the flipperLeft prefab into FlipLeft-hingejoint and the flipperRight prefab into FlipRight-hingejoint.

The Hinge Joints
Select FlipLeft-hingejoint in the Hierarchy. Go to the Inspector and add a Hinge Joint 2D. Set the Rigidbody’s Body Type to Kinematic. This makes this joint the fixed point of rotation for the flipper.
In Hinge Joint 2D, assign the flipperLeft instance as its Connected Rigid Body.
Enable Use Limits, then set Angle Limits to -30 for Lower and 30 for Upper.

Pop Quiz! Since the rotation limit for the Left HingeJoint is between -30 to 30 degrees, what do you think the rotation limit for the Right HingeJoint should be?
[spoiler title=”Steps for Right Flipper”]
Create a new Hinge Joint 2D component for FlipRight-hingejoint. Set its Rigidbody 2D Body Type to Kinematic.
The Angle Limits for the Right HingeJoint are Lower: 30 and Upper: -30.
Remember to assign the flipperRight instance as its Connected Rigid Body.

[/spoiler]


