How To Make A Game Like Color Switch with SpriteKit and Swift
Learn how to make a game like Color Switch using SpriteKit and Swift. By Brian Broom.
Getting Through the Obstacle
The player node happens to pass harmlessly through the obstacle node. You only want the player to pass through if its color matches the section of the obstacle it crosses. This is a different type of interaction than collisions, which SpriteKit calls contact.
To make this work, you first need to add physics bodies to the circle sections. Add the following to the for loop section of obstacleByDuplicatingPath(_:clockwise), just before the container.addChild(section) line:
let sectionBody = SKPhysicsBody(polygonFrom: path.cgPath)
sectionBody.categoryBitMask = PhysicsCategory.Obstacle
sectionBody.collisionBitMask = 0
sectionBody.contactTestBitMask = PhysicsCategory.Player
sectionBody.affectedByGravity = false
section.physicsBody = sectionBody
This creates a physics body with the same shape as the section node, reusing the same path. The categoryBitMask defines this is as a different type of object from the other physics bodies in the game. The collisionBitMask set to 0 means this body should not collide with any other bodies, since you want the player to be able to pass through.
Don’t forget to turn off gravity for these objects, or they will fall to the bottom of the screen.
The main new part here is the contactTestBitMask, which says that you want to be notified when an object with category PhysicsCategory.Player is in contact with this section of the obstacle. SpriteKit allows you to set a delegate that will receive these notifications.
First, add a method to call when the player makes contact with a section of the wrong color:
func dieAndRestart() {
  print("boom")
  player.physicsBody?.velocity.dy = 0
  player.removeFromParent()

  // TODO: Remove obstacles

  setupPlayerAndObstacles()
}
This will simply reset the player’s velocity, remove it from the scene and recreate the game objects. You’ll add more later.
Next, add the following extension to make GameScene conform to the SKPhysicsContactDelegate protocol, at the very bottom of GameScene.swift, outside of the closing brace for the class:
extension GameScene: SKPhysicsContactDelegate {

  func didBegin(_ contact: SKPhysicsContact) {

    if let nodeA = contact.bodyA.node as? SKShapeNode, let nodeB = contact.bodyB.node as? SKShapeNode {
      if nodeA.fillColor != nodeB.fillColor {
        dieAndRestart()
      }
    }
  }
}
Finally, add this line to the end of didMove(to:)
physicsWorld.contactDelegate = self
Since you set GameScene as the contactDelegate of the physicsWorld, didBegin(_:) will be called whenever the player node is overlapping one of the obstacle sections. The if let line checks to make sure both physics bodies have an attached SKShapeNode. You then check the fillColor of the two nodes. If the colors don’t match, you remove the player and reset it to the starting position.
Build and run and give it a shot. Can you get past the obstacle?
Note that when the game restarts, the circle obstacle does not get removed and a new one is stacked on top. You’ll fix this soon.
Matching colors pass through

Add More Obstacles
It’s time to add some more obstacles. There are a couple of changes needed to make this happen. Add two more properties to the top of GameScene.swift:
var obstacles: [SKNode] = []
let obstacleSpacing: CGFloat = 800
Note that the array doesn’t hold SKShapeNodes; instead, it holds SKNodes as these are the container nodes for the obstacles.
Next, find the line in addCircleObstacle() that sets the position of the obstacle node and replace it with:
obstacles.append(obstacle)
obstacle.position = CGPoint(x: size.width/2, y: obstacleSpacing * CGFloat(obstacles.count))
Here you add the newly created obstacle node to the obstacles tracking array, and use the count of obstacles to set the position of the container for the new obstacle.
The current obstacles need to be removed when the player dies, so replace the // TODO: Remove obstacles line in dieAndRestart() with:
for node in obstacles {
  node.removeFromParent()
}

obstacles.removeAll()
These two parts may seem redundant, but clearing the obstacles array doesn’t stop displaying the existing obstacle nodes. Removing the nodes from their parent — the scene — clears them from the screen.
Finally, add this to the end of setupPlayerAndObstacles():
addObstacle()
addObstacle()
There should now be three calls to addObstacle(). Build and run the project. Even though there are three obstacles, you can only see two of them on the screen. Adjusting the view as the player moves up the screen is your next task.
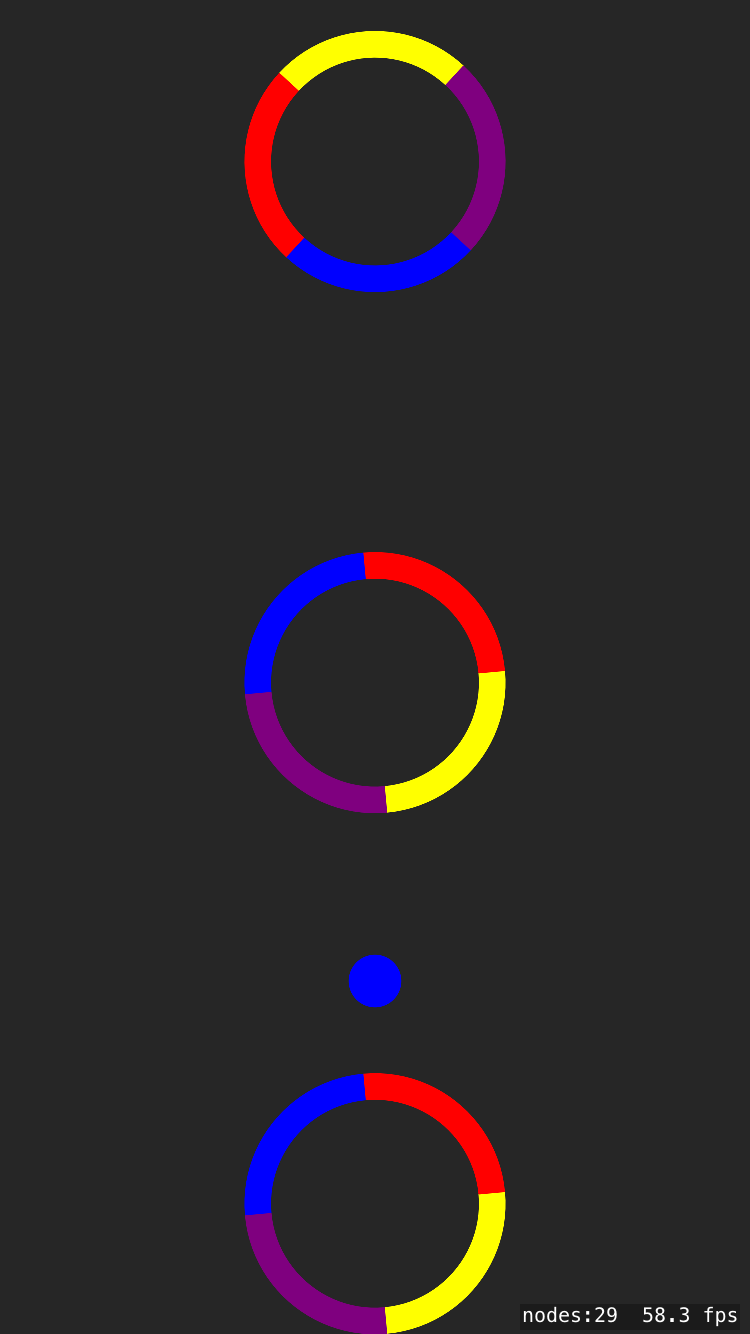
Circles for everyone!

Scrolling the Screen
SpriteKit provides a built-in solution to deal with scrolling a scene that doesn’t fit on a single screen — an SKCameraNode. By setting the position of the camera, the other nodes in the scene are moved automatically. Add a property to the top of GameScene.swift:
let cameraNode = SKCameraNode()
Then, add this to the end of didMove(to:):
addChild(cameraNode)
camera = cameraNode
cameraNode.position = CGPoint(x: size.width/2, y: size.height/2)
This creates an instance of SKCameraNode, positions it in the center of the screen, and sets it as the camera property for the scene. Now, changing the position of the camera will move everything else in the opposite direction. To actually adjust the camera position, you need to periodically check on the player’s position. Add the following method after touchesBegan(_:with):
override func update(_ currentTime: TimeInterval) {

  if player.position.y > obstacleSpacing * CGFloat(obstacles.count - 2) {
    print("score")
    // TODO: Update score
    addObstacle()
  }

  let playerPositionInCamera = cameraNode.convert(player.position, from: self)
  if playerPositionInCamera.y > 0 && !cameraNode.hasActions() {
    cameraNode.position.y = player.position.y
  }

  if playerPositionInCamera.y < -size.height/2 {
    dieAndRestart()
  }
}
SpriteKit calls update(_:) each frame of the game, so it is a nice place to put code that needs to continually check for certain conditions. In this case, there are three things you are looking for.
First, if the player advances past an obstacle, you need to add a new obstacle to the scene. You check against obstacles.count - 2, because you start with three obstacles: one just above the player, one at the top of the screen, and one more offscreen above that.
Each time the player passes an obstacle, a new one will be created, so there will always be three obstacles already added to the scene above the player. The extra obstacle offscreen is so that the new obstacle does not suddenly appear when the camera position changes.
The second condition is to see if the player node is in the top half of the screen. You convert the player position into the coordinates of the camera node, and the zero point of a node is in its center. When the player moves into the top half of the screen, you move the camera up.
Finally, the player dies if they drop the screen on the bottom. This can't happen at the beginning because of the ledge you added, but can happen once you start scrolling up.
To reset the camera, add the following line to the end of dieAndRestart():
cameraNode.position = CGPoint(x: size.width/2, y: size.height/2)
Build and run the project. You should have an endless series of circle obstacles to navigate.
Scrolling the camera.