Carthage Tutorial: Getting Started
In this Carthage tutorial, you’ll learn what Carthage is, how to install it and how to use it to declare, install and integrate your dependencies. By Felipe Laso-Marsetti.
Building Artifacts
When you use CocoaPods, it makes several changes to your Xcode project and binds the result, along with a special Pods project, into an Xcode workspace.
Carthage is a little different. It checks the code for your dependencies and builds the result into binary frameworks. It’s then up to you to integrate the frameworks into your project.
This sounds like extra work, but it’s beneficial. It only takes a few steps, and you’re more aware of the changes to your project as a result.
When you run carthage update, Carthage creates a couple of files and directories for you:

- Cartfile.resolved: This file serves as a companion to the Cartfile. It defines exactly which versions of your dependencies Carthage selected for installation. It’s strongly recommended to commit this file to your version control repository. Its presence ensures that other developers can get started quickly by using the exact same dependency versions.
-
Carthage directory, containing two subdirectories:
- Build: This contains the built framework for each dependency. You can integrate these into your project, and you’ll do so shortly. Carthage either builds each framework from source or downloads it from the project’s Releases page on GitHub.
- Checkouts: This is where Carthage checks out the source code for each dependency that’s ready to build into frameworks. Carthage maintains its own internal cache of dependency repositories, so it doesn’t have to clone the same source multiple times for different projects.
Avoiding Problems With Your Artifacts
Whether you commit the Build and Checkouts directories to your version control repository is up to you. It’s not required, but doing so means that anybody who clones your repository will have the binaries and source for each dependency available.
Having this backup can be a useful insurance policy if GitHub is unavailable or a source repository is removed.
Don’t change any code inside the Checkouts folder because a future carthage update or carthage checkout command may overwrite its contents at any time. Your hard work would be gone in the twinkling of an eye.
If you must modify your dependencies, run carthage update using the --use-submodules option.
With this option, Carthage adds each dependency in the Checkouts folder to your Git repository as a submodule, meaning you can change the dependencies’ source, and commit and push those changes elsewhere, without fear of an overwrite.
The bootstrap command downloads and builds the exact versions of your dependencies specified in Cartfile.resolved. carthage update would update the project to use the newest compatible versions of each dependency, which may not be desirable.
Now, how about actually using these build artifacts you worked so hard to create? You’ll do this in the next section.
Adding Frameworks to Your Project
Back in Xcode, click the DuckDuckDefine project in Project navigator. Select the DuckDuckDefine target. Choose the General tab at the top then scroll to the Frameworks, Libraries, and Embedded Content section at the bottom.
In the Carthage Finder window, navigate to Build/iOS. Drag both Alamofire.framework and AlamofireImage.framework into the Linked Frameworks and Libraries section in Xcode:
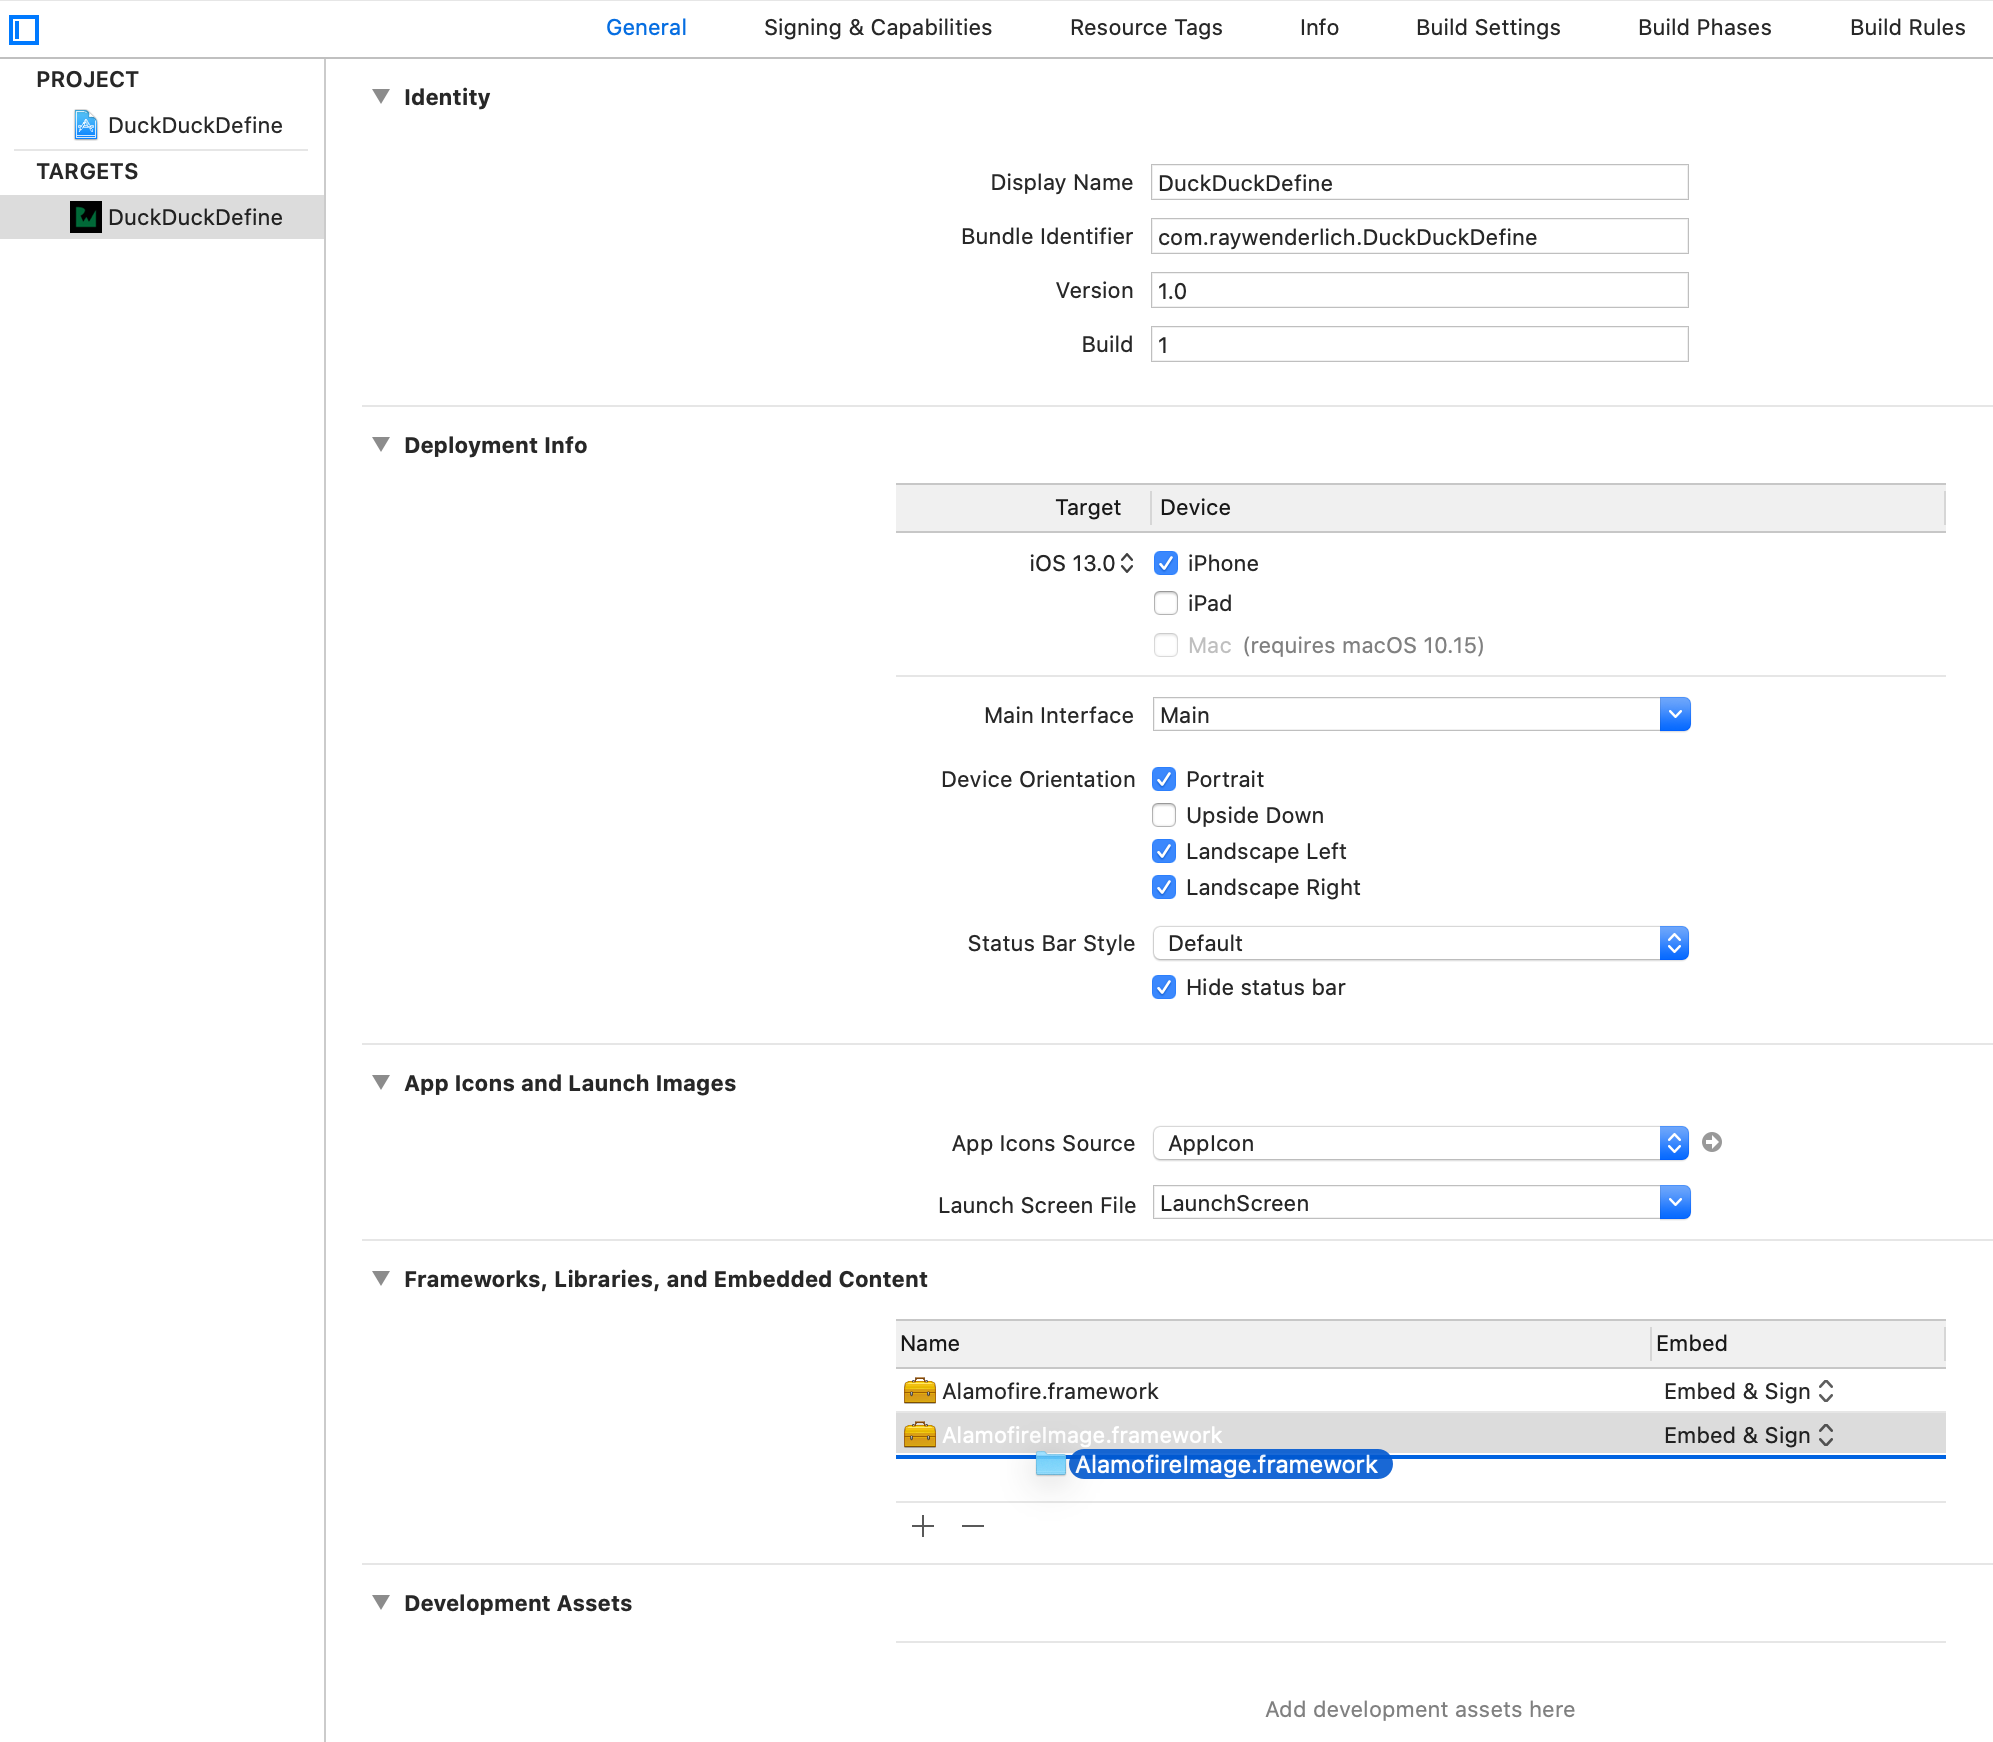
This tells Xcode to link your app to these frameworks, allowing you to make use of them in your code.
Next, switch to Build Phases. Click the + icon in the top-left of the editor and select New Run Script Phase. Add the following command to the block of code under Run Script:
/usr/local/bin/carthage copy-frameworks
Click the + icon under Input Files and add an entry for each framework:
$(SRCROOT)/Carthage/Build/iOS/Alamofire.framework
$(SRCROOT)/Carthage/Build/iOS/AlamofireImage.framework
The result looks like this:

Strictly speaking, this build phase isn’t required for your project to run. However, it’s a slick workaround for an App Store submission bug where apps with frameworks that contain binary images for the iOS simulator are automatically rejected.
The carthage copy-frameworks command strips out these extra architectures. WOOt!
Although there won’t be anything new to see yet, build and run to ensure everything’s working as expected. When the app launches, you’ll see the search view controller.

OK, great. Everything looks good. Next, you’ll work on upgrading dependencies.
Upgrading Frameworks
I have a confession to make.
Remember when you created your Cartfile earlier and I told you which versions of Alamofire and AlamofireImage to install? Well… I gave you bad information. I told you to use an old version of Alamofire.
Don’t be mad though! I did it with the best of intentions. Look at this as an opportunity to learn how to upgrade a dependency.
Open your Cartfile again. From your project’s directory in Terminal, run:
open -a Xcode Cartfile
Change the Alamofire line to:
github "Alamofire/Alamofire" ~> 4.9.0
As you saw earlier, this code instructs Carthage to use any version of Alamofire that’s compatible with 4.9.0. This includes any version up to but not including a future 5.0 version.
When adding dependencies with Carthage, you want to consider compatibility and limit the version you target. That way, you know the exact state of its API and functionality.
For example, version 5.0 of a dependency might include app-breaking API changes. You wouldn’t want to automatically upgrade to that version if you built your project against 4.9.0.
Save and close the Cartfile and return to the terminal. Perform another update:
carthage update --platform iOS
This tells Carthage to look for newer versions of each of your dependencies. It will then check them out and build them, if necessary. In this case, it fetches the latest version of Alamofire.
Because your project already contains a reference to the built .framework for Alamofire, and Carthage rebuilds the new version in the same location on disk, you can sit back and let Carthage do the work. Your project will automatically use the latest version of Alamofire!