Google Maps iOS SDK Tutorial: Getting Started
In this tutorial, you’ll learn how to use the Google Maps iOS SDK to make an app that searches for nearby places to eat, drink or shop for groceries. By Ron Kliffer.
Adding a Refresh Map Option
Open Main.storyboard and drag a UIBarButtonItem from the Object Library to the left side of the MapViewController‘s navigation bar. Change the button’s System Item to Refresh, as shown below:

Bring up Assistant Editor and Control-drag from the Refresh button to MapViewController.swift. Choose Action and name the method refreshPlaces. Insert the following code into the newly-added method:
fetchPlaces(near: mapView.camera.target)
Build and run and you’ll see location pins popping up around the map. Change the search types in the TypesTableViewController and see how the results change.
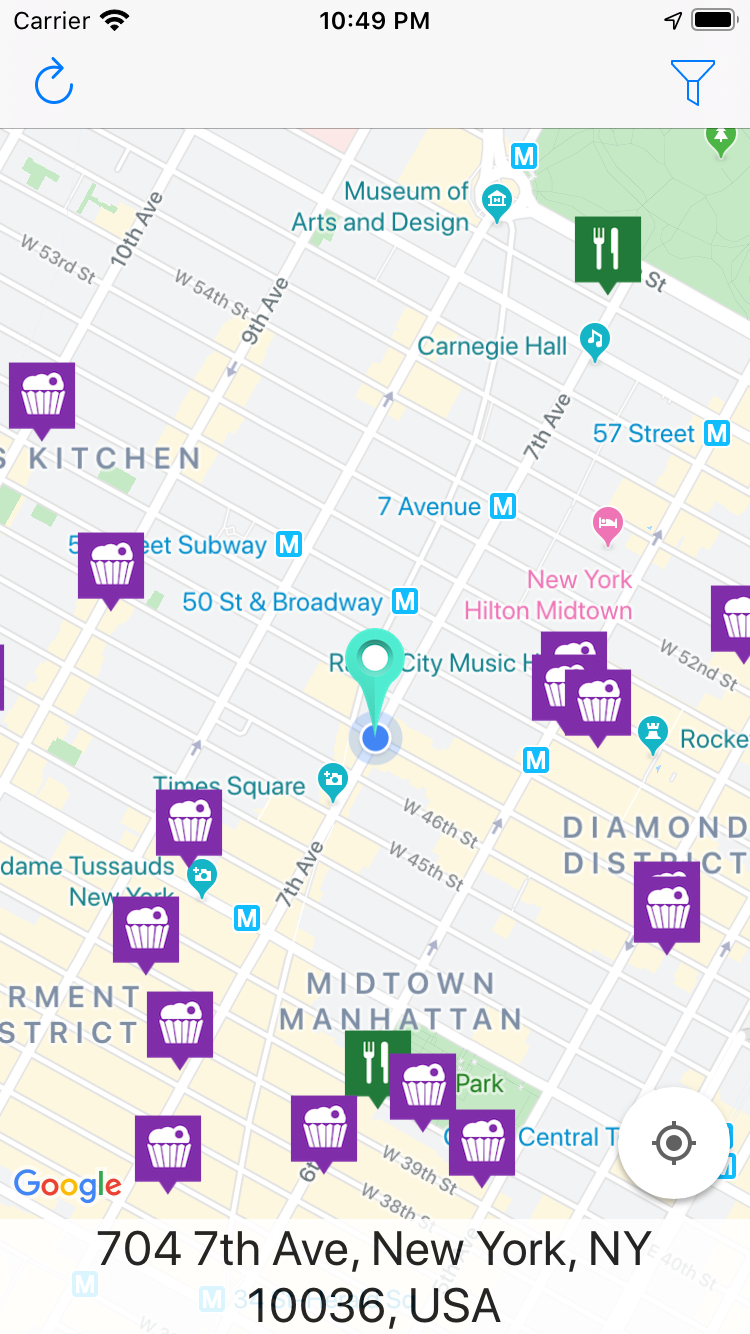
These markers sure add some color to the map, but they’re not much use without additional data to give the user details about the pinned locations.
Showing Additional Place Information
Add the following method to the GMSMapViewDelegate extension in MapViewController.swift:
func mapView(
  _ mapView: GMSMapView,
  markerInfoContents marker: GMSMarker
) -> UIView? {
  // 1
  guard let placeMarker = marker as? PlaceMarker else {
    return nil
  }

  // 2
  guard let infoView = UIView.viewFromNibName("MarkerInfoView") as? MarkerInfoView
    else {
      return nil
  }

  // 3
  infoView.nameLabel.text = placeMarker.place.name
  infoView.addressLabel.text = placeMarker.place.address

  return infoView
}
Each tap on a marker calls this method. If you return a view, it appears above the marker. If you return nil, the button tap does nothing.
Here’s what you’re doing to create this behavior:
- You first cast the tapped marker to a
PlaceMarker. - Next, you create a
MarkerInfoViewfrom its nib.MarkerInfoViewis aUIViewsubclass that comes with the starter project for this tutorial. - Then you apply the place name to
nameLabeland the place address toaddressLabel.
Everything’s working nicely, but you have one more step to make sure that the UI looks right before finishing your app.
Tidying up the UI
You need to make sure the location pin doesn’t cover the info window. To do this, add the following method to the GMSMapViewDelegate extension:
func mapView(_ mapView: GMSMapView, didTap marker: GMSMarker) -> Bool {
  mapCenterPinImage.fadeOut(0.25)
  return false
}
This method hides the location pin when the user taps a marker. The method returns false to indicate that you don’t want to override the default behavior of centering the map around the marker when tapping it.
But the pin needs to re-appear at some point. So add the following to the end of mapView(_:willMove:):
if gesture {
  mapCenterPinImage.fadeIn(0.25)
  mapView.selectedMarker = nil
}
This checks if the movement originated from a user gesture. If so, it unhides the location pin using fadeIn(_:). It also sets the map’s selectedMarker to nil to remove the currently-presented infoView.
Finally, add the following method to the GMSMapViewDelegate extension:
func didTapMyLocationButton(for mapView: GMSMapView) -> Bool {
  mapCenterPinImage.fadeIn(0.25)
  mapView.selectedMarker = nil
  return false
}
This method runs when the user taps the Locate button, causing the map to center on the user’s location. It also returns false so that it doesn’t override the button’s default behavior.
Build and run. Select a marker and you’ll see the location pin fade out. Scroll the map and notice that the infoView closes and brings the pin back:

That’s it, you’ve done it! You now have a fully functioning Google Maps app. :]
Google Maps Versus Apple MapKit
As you consider building your own map-based app, you may wonder if you should use MapKit instead. Here are some of the advantages of each SDK to help you decide which to use in your situation:
Advantages of Google Maps iOS SDK
- Frequent updates to the SDK.
- Uniform experience for cross-platform (iOS and Android) apps.
- Greater map detail than MapKit, especially outside the United States.

Advantages of Apple’s MapKit
- Native to iOS. MapKit always syncs with iOS and works with Swift out of the box.
- Greater stability.
- Better integration with CoreLocation and CoreAnimation.
Where to Go From Here?
Download the completed version of the project using the Download Materials button at the top or bottom of this tutorial.
The Google Maps SDK is too large to include in this download, so be sure to run pod install before running a build. Also, insert your API key as you did at the beginning of this tutorial.
This tutorial only showed you the basics of what the Google Maps SDK can do. There’s much more to learn; you should definitely check out the full documentation for other great features this SDK has to offer.
For example, the Google Maps iOS SDK can also show directions, indoor maps, overlays, tile layers and Street View. For extra credit, try to use some of these features to enhance the Feed Me app.
If you’d like to learn more about Apple’s MapKit, check out our MapKit Tutorial: Getting Started.
We hope you enjoyed this tutorial. If you have any questions, tips or just wanna show off your cool mapping app, feel free to post about it in the discussion below!