Bond Tutorial: Bindings in Swift
Bond is a simple, powerful, type-safe binding framework for Swift. Learn how to use it with the popular MVVM architectural pattern in this Bond tutorial. By Tom Elliott.
A Peek Under the Hood
Before building a more meaningful app, take a quick look at how Bond functions. I’d recommend navigating around the Bond types (via cmd+click) as you read the explanation below.
Starting with your current code, the map function returns a Signal which fires Events whenever the search text field text is changed. You can bind that signal to the activityIndicator.reactive.isAnimating property, which is of type Bond.
A Bond just holds a weak reference to the target (the activity indicator) and acts as an observer of the signal. Whenever the signal emits a value, the Bond calls its setter and updates the target with the given value.
Note: SignalProtocol is where the map operation is defined via a protocol extension. You might have heard of “protocol oriented programming,” and this is a great example.
As well as binding to signals you can also observe them. For example, consider the code you first added:
_ = searchTextField.reactive.text.observeNext {
    text in
    print(text)
  }
The call to observeNext sets up the given closure to be executed every time the text property of searchTextField changes.
Note: This is based on a classic design pattern known as the Observer Pattern.
Finally, consider the reactive.text property of searchTextField. Clearly, this is a Signal as you are able to observe it. reactive.text is referred to as an Observer – and these allow you to get values from the observed object.
You may also like to set the text. That is, you would like the text property of the text field to observe other objects. This requires a Subject – an object that is both a Signal and Observer.
Bond extends UIKit, adding corresponding Bond or Subject properties. You’ve already seen UITextField has a reactive.text observable property. You’ll explore observables later in this tutorial.
MVVM
While Bond makes it easy to bind UI properties directly to each other, this isn’t how you’ll likely want to use it in practice. Bond is a framework that supports the Model-View-ViewModel (MVVM) pattern. If you haven’t come across this pattern before, I’d recommend reading the first few sections of this tutorial on that topic.
That’s enough theory for now — you’re probably itching to write some more code. :]
Adding a View Model
It’s time to get started with a more realistic application structure. Create a new file named PhotoSearchViewModel.swift in the ViewModel group. Replace the contents with the following:
import Foundation
import Bond
import ReactiveKit

class PhotoSearchViewModel {
  let searchString = Observable<String?>("")

  init() {
    searchString.value = "Bond"

    _ = searchString.observeNext {
      text in
      if let text = text {
        print(text)
      }
    }
  }
}
This creates a simple view model with a single searchString property. The closure for observeNext will print the contents of searchString when signaled by a change.
Open PhotoSearchViewController.swift and add the following property near the top of the class:
private let viewModel = PhotoSearchViewModel()
Next add the following method to PhotoSearchViewController:
func bindViewModel() {
  viewModel.searchString.bind(to:searchTextField.reactive.text)
}
bindViewModel() is where you’ll add further bindings, but for now you just connect searchTextField to the underlying view model.
Now replace the contents of viewDidLoad() with the following:
super.viewDidLoad()
bindViewModel()
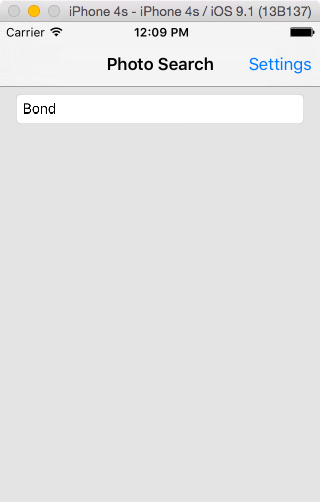
Build and run your application. You’ll see the text: “Bond”:
Your view model currently observes changes to searchString, but you’ll find that as you type text into the text field, the view model is not being updated. What gives?
Your current binding is one-way, which means it only propagates changes from the source (your viewModel property) to the destination (the text field reactive.text property).
How do you make changes propagate the other way? Simple – in PhotoSearchViewController update the binding in bindViewModel() to appear as follows:
viewModel.searchString.bidirectionalBind(to:searchTextField.reactive.text)
That was easy! bidirectionalBind(to:context:) establishes a bond that also signals changes in the destination back to the source.
Now, to clean up your prior test, open PhotoSearchViewModel.swift and remove the following line from init():
searchString.value = "Bond"
Build and run, then type “Bond Love”:
B
Bo
Bon
Bond
Bond
Bond L
Bond Lo
Bond Lov
Bond Love
Great – you confirmed that the text field updates are being propagated back to the view model.
Creating Observable from Observables
It’s time to do something a bit more useful with an observable mapping. You’ll enforce a requirement that searches contain more than three characters by making the text red until this is true.
Returning to PhotoSearchViewModel.swift, add the following property to the view model:
let validSearchText = Observable<Bool>(false)
This boolean property will indicate whether the searchString value is valid or not.
Now, replace the code in the initializer with the following:
searchString
  .map { $0!.characters.count > 3 }
  .bind(to:validSearchText)
This maps the searchString observable to a boolean which is true when the string length is greater than three characters, then binds it to the validSearchText property.
In PhotoSearchViewController.swift, locate bindViewModel() and add the following:
viewModel.validSearchText
  .map { $0 ? .black : .red }
  .bind(to: searchTextField.reactive.textColor)
This maps the validSearchText property to a color, based on the boolean value. It then binds the resulting color to the textColor property of searchTextField.
Now build and run and type some text:

When the text is too short to constitute a valid search, it is now colored red. It changes to black as soon as it’s considered valid.
Bond makes it very easy for you to connect and transform properties. As easy as…
Pie! Yep, it really is this easy.

Preparing To Search
The app you’re building will query 500px to retrieve photos as the user types, giving the same kind of immediate feedback users are used to from Google.
You could trigger a search each time the searchString view model property changes, however this could result in TONS of requests. It’s much better to throttle the queries so that at most only one or two are sent per second.
With Bond, this is really easy to do!
In PhotoSearchViewModel.swift add the following method to the class for searching:
func executeSearch(_ text: String) {
  print(text)
}
For now this just logs the passed search string so that you can see the throttle in action.
Now add the following to the bottom of init():
_ = searchString
  .filter { $0!.characters.count > 3 }
  .throttle(seconds: 0.5)
  .observeNext {
    [unowned self] text in
    if let text = text {
      self.executeSearch(text)
    }
}
This filters the searchString to exclude invalid (i.e. length <= 3) values, then applies the Bond throttle operation, which does exactly what you require, throttling changes so that at most you receive one notification each 0.5 seconds. When the event fires, executeSearch(_:) is called to complete the search.
Build and run, then try typing some text.
You will see something similar to the following, where the throttle disposes of events so that at most the text is logged once per 0.5 seconds once the four character threshold is reached:
Bond
Bond Th
Bond Throttles
Bond Throttles Good!
It would take forever to add this sort of functionality without Bond. Impressive stuff!