Unity Tutorial Part 1: Getting Started
In this Unity tutorial series, newly updated for Unity 2018.1, you’ll learn how to make your first game in Unity with C# from scratch: a twin-stick shooter called Bobblehead Wars! By Brian Moakley.
Learning the Interface
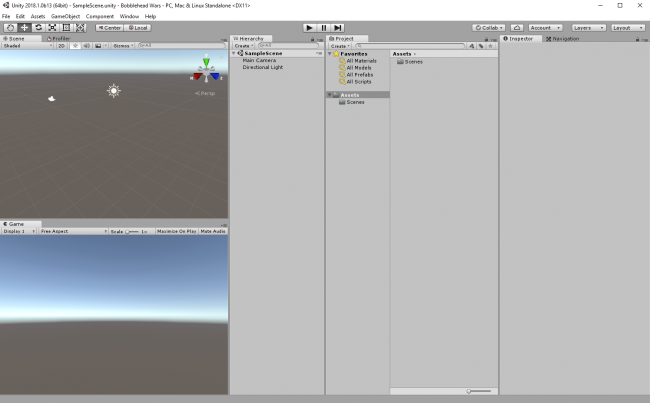
When your project loads, you’ll see a screen packed full of information. It’s perfectly normal to feel a little overwhelmed at first, but don’t worry — you’ll get comfortable with everything as you work through this tutorial.
Your layout will probably look like this:
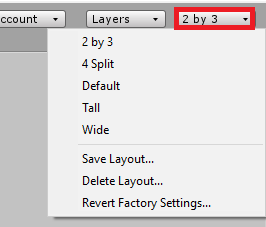
If not, click the Layout button in the top-right and select 2 by 3 from the dropdown menu.
Each layout is composed of several different views. A view is simply a panel of information that you use to manipulate the engine. For instance, there’s a view made for placing objects in your world. There’s another view for you to play the game.
Here’s what the interface looks like when broken down into individual views:
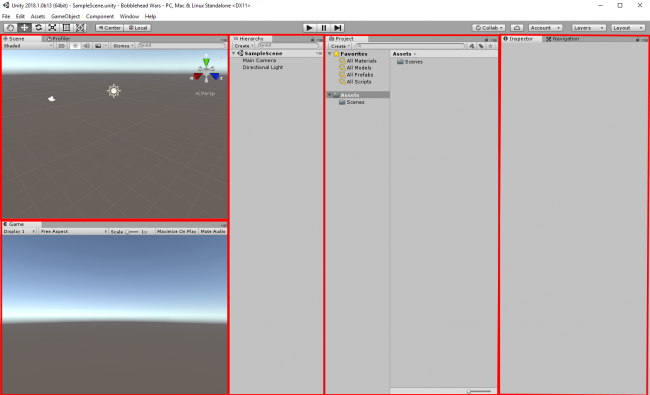
Each red rectangle outlines a view that has its own purpose, interface and ways that you interact with it.
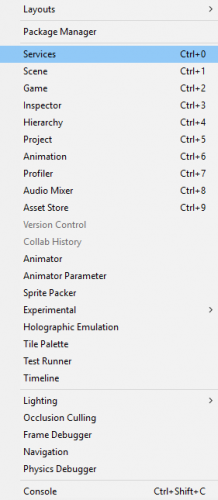
To see a list of all views, click the Window option on the menu bar.
The Unity user interface is completely customizable so you can add, remove and rearrange views as you see fit.
When working with Unity, you’ll typically want to rearrange views into a Layout that’s ideal for a given task. Unity allows you to save layouts for future use.
In the Editor, look for the Game tab (the view to the lower left) and right-click it. From the drop-down menu, select Add Tab then choose Profiler.
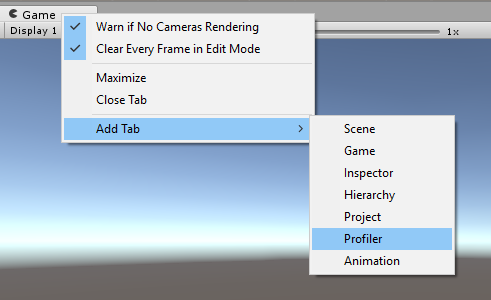
The Profiler view lets you analyze your game while it’s running. Unfortunately, the profiler is also blocking the Game view, so you won’t be able to play the game while you profile it — not so helpful.
Click and hold the Profiler tab and drag it to the Scene tab above.
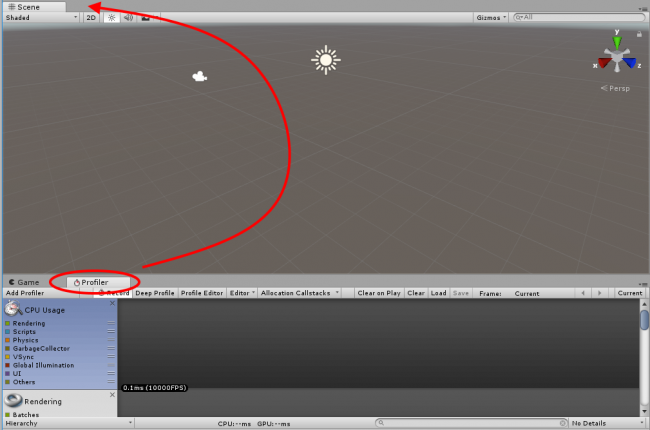
As you see, views can be moved, docked and arranged. They can also exist outside the Editor as floating windows.
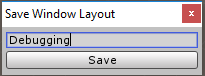
To save the layout, select Window\Layouts\Save Layout… and name it Debugging.
Whenever you need to access this particular layout, you can select the Layout button and choose Debugging.
![]()
When clicked, you’ll see a listing of all your views.
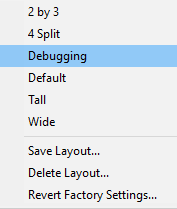
You can also delete layouts. If you ever accidentally trash a stock layout, you can restore the default layouts.
Organizing your Assets
Beginners to Unity might imagine that you develop your game from start to finish in Unity, including writing code, creating 3D models and textures, and so on.
In reality, a better way of thinking about Unity is as an integration tool. Typically, you will write code or create 3D models or textures in a separate program, and use Unity to wire everything together.
For Bobblehead Wars, we’ve created some 3D models for you, because learning how to model things in Blender would take an entire book on its own!
In this tutorial, you will learn how to import models into your game.
But before you do, it pays to be organized. In this game, you’re going to have a lot of assets, so it’s critical to organize them in way that makes them easy to find.
The view where you import and organize assets is called the Project Browser. It mimics the organization of your file system.

It previous versions of Unity, every Project Browser defaulted with nothing in it. With 2018, it now comes with a Scenes folder and a new scene called SampleScene. You can think of a scene as a level in your game. You can divide all your levels into individual scenes or you can keep everything in one scene. The choice is yours.
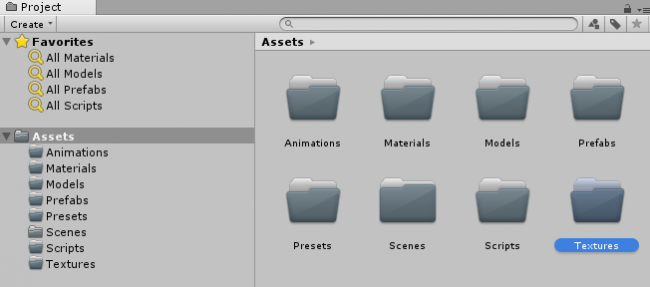
In the Project Browser, select the Assets folder and click the Create button. Select Folder from the drop-down menu and name it Models. This will be home to all your models. You may feel tempted to create folders and manipulate files in your file system instead of the Project Browser. That’s a bad idea — do not do that, Sam I Am!
Unity creates metadata for each asset. Creating, altering or deleting assets on the file system can break this metadata and your game.
Create the following folders: Animations, Materials, Prefabs, Presets, Scripts, and Textures.
Your Project Browser should look like this:
Personally, I find large folder icons to be distracting. If you also have a preference, you can increase or decrease the size by using the slider at the bottom of the Project Browser.
![]()
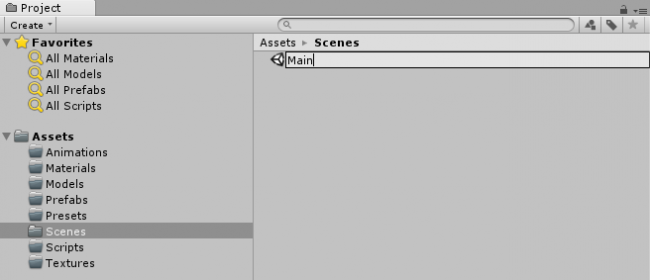
Finally, you may want to change the name of an asset. For instance, your current scene is called SampleScene. Select the Scenes folder, and then select SampleScene file. The name will become highlighted. Single click it one more time and you’ll be to write a new name. Change it to Main.
You can do this to any folder or asset in the Project Browser.
Importing Assets
Now that you’ve organized your folders, you’re ready to import the assets for the game. First, you’ll import the star of the show: the space marine.
Download the materials for this tutorial, open the resources folder and look for three files:
- BobbleMarine-Head.fbx
- BobbleMarine-Body.fbx
- Bobble Wars Marine texture.psd
Drag these three files into the Models folder. Don’t copy BobbleWars.unitypackage; that comes later.
Select the Models folder and you’ll see that you have a bunch of new files. Unity imported and configured the models for you.
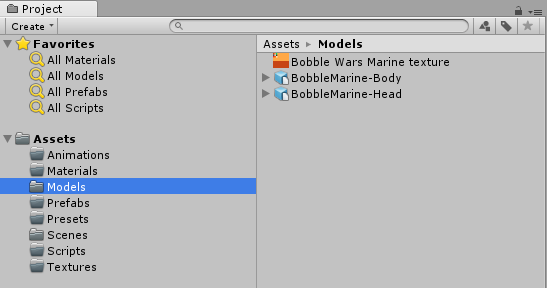
To keep things tidy, move Bobble Wars Marine texture from the Models folder to the Textures folder. Textures are the basis of Materials.
What are materials, you ask? Materials provide your models with color and texture based upon lighting conditions. Materials use what are known as shaders that ultimately determine what appears on screen. Shaders are small programs written in a specific shader language which is far beyond the scope of this tutorial. You can learn more about materials through Unity’s included documentation.
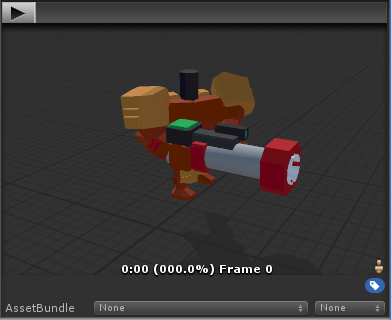
Switch back to the Models folder and select BobbleMarine-Body. The Inspector view will now display information specific to that model, as well as a preview.
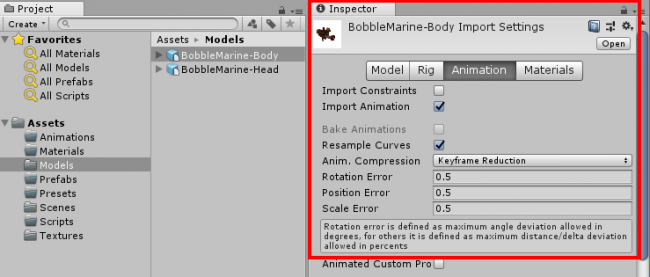
If you see no preview, then its window is closed. At the bottom of the Inspector, find a gray bar then drag it upwards with your mouse to expand the preview.
The Inspector allows you to make changes to the model’s configuration, and it allows changes to any selected object’s properties. Since objects can be vastly different from one another, the Inspector will change context based on the object selected.