AR Face Tracking Tutorial for iOS: Getting Started
In this tutorial, you’ll learn how to use AR Face Tracking to track your face using a TrueDepth camera, overlay emoji on your tracked face, and manipulate the emoji based on facial expressions you make. By Yono Mittlefehldt.
Changing the Bling
Now, that new nose is fine but maybe some days you feel like having a different nose?
You’re going to add code to cycle through your nose options when you tap on them.
Open Main.storyboard and find the Tap Gesture Recognizer. You can find that by opening the Object Library at the top right portion of your storyboard.

Drag this to the ARSCNView in your View controller.
With Main.storyboard still open in the Standard editor, open EmojiBlingViewController.swift in the Assistant editor just like you did before. Now Control-drag from the Tap Gesture Recognizer to your main EmojiBlingViewController class.

Release your mouse and add an Action named handleTap with a type of UITapGestureRecognizer.

Now, add the following code to your new handleTap(_:) method:
// 1
let location = sender.location(in: sceneView)

// 2
let results = sceneView.hitTest(location, options: nil)

// 3
if let result = results.first,
  let node = result.node as? EmojiNode {

  // 4
  node.next()
}
Here, you:
- Get the location of the tap within the
sceneView. - Perform a hit test to get a list of nodes under the tap location.
- Get the first (top) node at the tap location and make sure it’s an
EmojiNode. - Call the
next()method to switch theEmojiNodeto the next option in the list you used, when you created it.
It is now time. The most wonderful time. Build and run time. Do it! When you tap on your emoji nose, it changes.
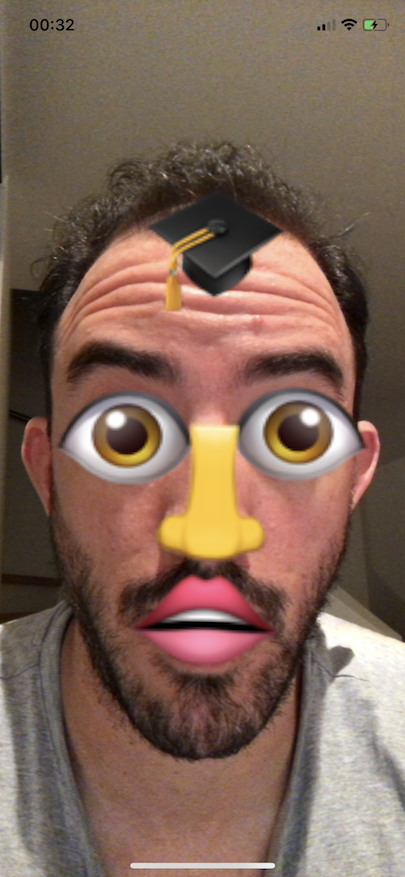
More Emoji Bling
With a newfound taste for emoji bling, it’s time to add the more bling.
At the top of of your EmojiBlingViewController class, add the following constants just below the noseOptions constant:
let eyeOptions = ["👁", "🌕", "🌟", "🔥", "⚽️", "🔎", " "]
let mouthOptions = ["👄", "👅", "❤️", " "]
let hatOptions = ["🎓", "🎩", "🧢", "⛑", "👒", " "]
Once again, feel free to choose a different emoji, if you so desire.
In your renderer(_:nodeFor:) method, just above the call to updateFeatures(for:using:), add the rest of the child node definitions:
let leftEyeNode = EmojiNode(with: eyeOptions)
leftEyeNode.name = "leftEye"
leftEyeNode.rotation = SCNVector4(0, 1, 0, GLKMathDegreesToRadians(180.0))
node.addChildNode(leftEyeNode)

let rightEyeNode = EmojiNode(with: eyeOptions)
rightEyeNode.name = "rightEye"
node.addChildNode(rightEyeNode)

let mouthNode = EmojiNode(with: mouthOptions)
mouthNode.name = "mouth"
node.addChildNode(mouthNode)

let hatNode = EmojiNode(with: hatOptions)
hatNode.name = "hat"
node.addChildNode(hatNode)
These facial feature nodes are just like the noseNode you already defined. The only thing that is slightly different is the line that sets the leftEyeNode.rotation. This causes the node to rotate 180 degrees around the y-axis. Since the EmojiNodes are visible from both sides, this basically mirrors the emoji for the left eye.
If you were to run the code now, you would notice that all the new emojis are at the center of your face and don’t rotate along with your face. This is because the updateFeatures(for:using:) method only updates the nose so far. Everything else is placed at the origin of the head.
You should really fix that!
At the top of the file, add the following constants just below your hatOptions:
let features = ["nose", "leftEye", "rightEye", "mouth", "hat"]
let featureIndices = [[9], [1064], [42], [24, 25], [20]]
features is an array of the node names you gave to each feature and featureIndices are the vertex indexes in the ARFaceGeometry that correspond to those features (remember the magic numbers?).
You’ll notice that the “mouth” has two indexes associated with it. Since an open mouth is a hole in the mesh mask, the best way to position a mouth emoji is to average the position of the top and bottom lips.
ARFaceGeometry has 1220 vertices, but what happens if Apple decides it wants a high resolution? Suddenly, these indexes may no longer correspond to what you expect. One possible, robust solution would be to use Apple’s Vision framework to initially detect facial features and map their locations to the nearest vertices on an ARFaceGeometry
Next, replace your current implementation of updateFeatures(for:using:) with the following:
// 1
for (feature, indices) in zip(features, featureIndices)  {
  // 2
  let child = node.childNode(withName: feature, recursively: false) as? EmojiNode

  // 3
  let vertices = indices.map { anchor.geometry.vertices[$0] }

  // 4
  child?.updatePosition(for: vertices)
}
This looks very similar, but there are some changes to go over. In this code, you:
- Loop through the
featuresandfeatureIndexesthat you defined at the top of the class. - Find the the child node by the feature name and ensure it is an
EmojiNode. - Map the array of indexes to an array of vertices using the
ARFaceGeometryproperty of theARFaceAnchor. - Update the child node’s position using these vertices.
Go a head and build and run your app. You know you want to.
Blend Shape Coefficients
ARFaceAnchor contains more than just the geometry of the face. It also contains blend shape coefficients. Blend shape coefficients describe how much expression your face is showing. The coefficients range from 0.0 (no expression) to 1.0 (maximum expression).
For instance, the ARFaceAnchor.BlendShapeLocation.cheekPuff coefficient would register 0.0 when your cheeks are relaxed and 1.0 when your cheeks are puffed out to the max like a blowfish! How… cheeky.
There are currently 52 blend shape coefficients available. Check them out in Apple’s official documentation.
Control Emoji With Your Face!
After reading the previous section on blend shape coefficients, did you wonder if you could use them to manipulate the emoji bling displayed on your face? The answer is yes. Yes, you can.
Left Eye Blink
In updateFeatures(for:using:), just before the closing brace of the for loop, add the following code:
// 1
switch feature {

// 2
case "leftEye":

  // 3
  let scaleX = child?.scale.x ?? 1.0

  // 4
  let eyeBlinkValue = anchor.blendShapes[.eyeBlinkLeft]?.floatValue ?? 0.0

  // 5
  child?.scale = SCNVector3(scaleX, 1.0 - eyeBlinkValue, 1.0)

// 6
default:
  break
}
Here, you:
- Use a
switchstatement on the feature name. - Implement the
caseforleftEye. - Save off the x-scale of the node defaulting to 1.0.
- Get the blend shape coefficient for
eyeBlinkLeftand default to 0.0 (unblinked) if it’s not found. - Modify the y-scale of the node based on the blend shape coefficient.
- Implement the default
caseto make theswitchstatement exhaustive.
Simple enough, right? Build and run!
