Document-Based Apps Tutorial: Getting Started
In this document-based app tutorial, you will explore how you can save and open custom documents and interact with the Files app. By Warren Burton.
Encoding the Document
First, add this import to the top of the file below the import UIKit statement:
import MarkupFramework
Next, add these variables to the MarkupDocument class:
static let defaultTemplateName = BottomAlignedView.name
static let filenameExtension = "rwmarkup"

var markup: MarkupDescription = ContentDescription(template: defaultTemplateName) {
  didSet {
    updateChangeCount(.done)
  }
}
The two type properties are constants that you’ll use in more than one place.
The markup property uses valid content as its default value. Each time you set this property, you update the change count so that UIDocument knows to save itself at appropriate times.
Now, replace the body of contents(forType:) with the following code:
let data: Data
do {
  data = try NSKeyedArchiver.archivedData(withRootObject: markup, requiringSecureCoding: false)
} catch {
  throw DocumentError.archivingFailure
}
guard !data.isEmpty else {
  throw DocumentError.archivingFailure
}
return data
This code encodes the current contents of the markup property using NSKeyedArchiver and returns it to UIDocument for saving to the file system.
Decoding the Document
For the decoding half, add this code to the body of load(fromContents:ofType:):
// 1
guard let data = contents as? Data else {
  throw DocumentError.unrecognizedContent
}

// 2
let unarchiver: NSKeyedUnarchiver
do {
  unarchiver = try NSKeyedUnarchiver(forReadingFrom: data)
} catch {
  throw DocumentError.corruptDocument
}
unarchiver.requiresSecureCoding = false
let decodedContent = unarchiver.decodeObject(of: ContentDescription.self,
                                             forKey: NSKeyedArchiveRootObjectKey)
guard let content = decodedContent else {
  throw DocumentError.corruptDocument
}

// 3
markup = content
In this method, you do the following:
- Confirm that the
contentsare an instance ofData. - Decode that data as a
ContentDescriptionusingNSKeyedUnarchiver. - Store that object so that it is ready to use in the rest of the module.
That’s all you need to do to create a basic UIDocument subclass.
Build the project just to check that everything compiles.
Installing UIDocumentBrowserViewController
In this section, you’ll add code to present a UIDocumentBrowserViewController and connect its associated delegate UIDocumentBrowserViewControllerDelegate.
Open the folder Markup/Primary Views in Project navigator. Open RootViewController.swift.
Presenting a Container View Controller
DocumentBrowserViewController is a stub that is provided in the starter app project; it is limited to keep you focused on the tutorial content. It acts as a container for UIDocumentBrowserViewController.
First, add this variable to the RootViewController class:
lazy var documentBrowser: DocumentBrowserViewController = {
  return DocumentBrowserViewController()
}()
This will allow you to create a DocumentBrowserViewController when it’s needed.
Add this method to the main class of RootViewController:
func displayDocumentBrowser(inboundURL: URL? = nil, importIfNeeded: Bool = true) {
  if presentationContext == .launched {
    present(documentBrowser, animated: false)
  }
  presentationContext = .browsing
}
In this code, if this is the initial launch, you present the DocumentBrowserViewController modally.
Later in this tutorial, you will use the two parameters in the method to handle incoming URLs, but don’t worry about them right now.
Finally, find the method viewDidAppear(_:) and replace:
displayMarkupController(presenter: self)
with:
displayDocumentBrowser()
Build and run. You should see a green background appear:
Success!
Configuring UIDocumentBrowserViewController
Now that you’ve pushed an empty modal view onto the screen, next you’ll learn how to display the built-in user interface for the document browser.
Open the folder Markup/UIDocument Mechanics in Project navigator. Open DocumentBrowserViewController.swift.
Add this code to the main class of DocumentBrowserViewController:
var browserDelegate = DocumentBrowserDelegate()
lazy var documentBrowser: UIDocumentBrowserViewController = {
  let browser = UIDocumentBrowserViewController()

  browser.allowsDocumentCreation = true
  browser.browserUserInterfaceStyle = .dark
  browser.view.tintColor = UIColor(named: "RazeGreen") ?? .white
  browser.delegate = browserDelegate

  return browser
}()

func installDocumentBrowser() {
  view.pinToInside(view: documentBrowser.view)
}
In viewDidLoad(), replace:
view.backgroundColor = UIColor(named: "RazeGreen")
with:
installDocumentBrowser()
In this code, you:
- Create an instance of
DocumentBrowserDelegate. - You then create an instance of
UIDocumentBrowserViewController, configure it with some properties and assign the delegate. - Lastly, you install the view of
UIDocumentBrowserViewControllerinsideDocumentBrowserViewControllerinviewDidLoad().
The key properties you’ve set on the view controller are:
-
allowsDocumentCreationistrue. You want to be able to create documents. -
browserUserInterfaceStyleis.dark. Delete this to use the default.lightstyle. -
tintColoris RazeGreen from Colors.xcassets because who doesn’t like Razeware Green?
Build and run. You’ll now see the UIDocumentBrowserViewController on launch:
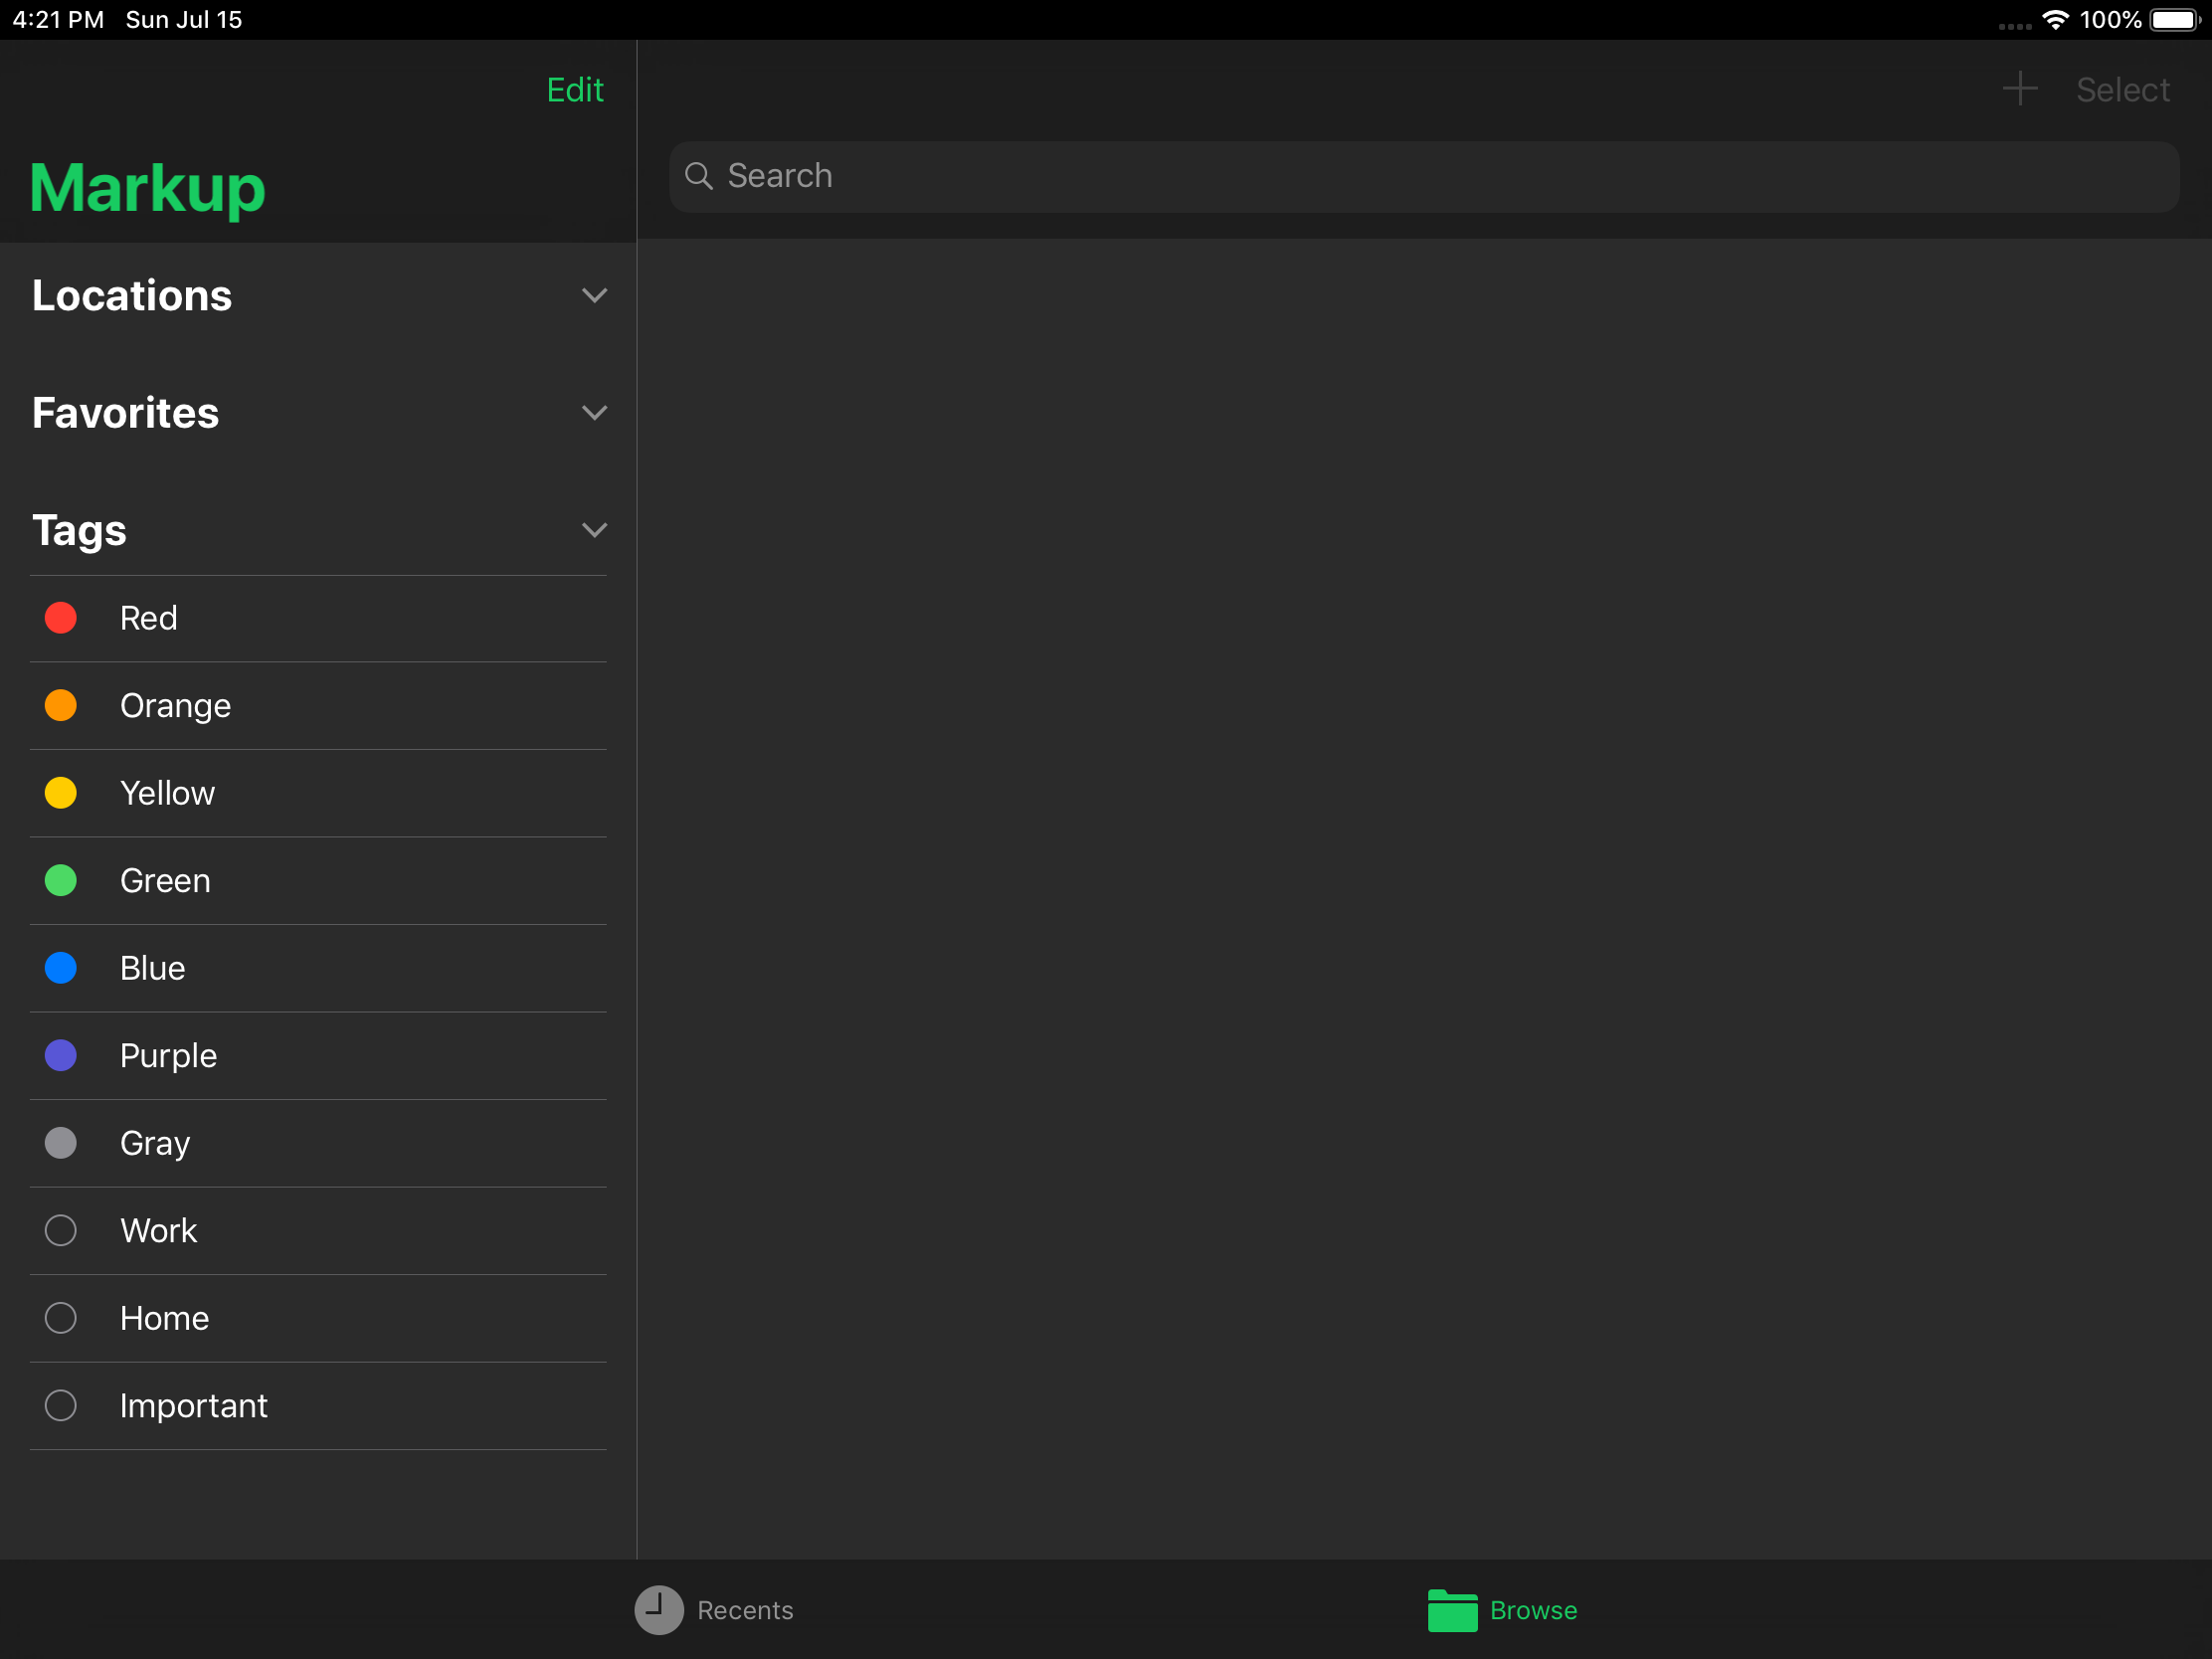
There are no locations available yet. You’ll fix that next.
Configuring Info.plist
You can’t use UIDocumentBrowserViewController just by instantiating it. You need to add some key-value pairs to your Info.plist. These values inform iOS about the file types your app supports.
Open Markup/Info.plist from the Project navigator. Then, open Markup/Resources/Template.plist in the assistant editor by holding down Alt and clicking on Template.plist.

In Template.plist, there are three key-value pairs to add to Info.plist:
-
UISupportsDocumentBrowsernotifies iOS that you want to useUIDocumentBrowserViewController. -
CFBundleDocumentTypesis an array of dictionaries that defines the properties of the documents that your app will support. -
UTExportedTypeDeclarationsis an array of dictionaries that exposes the document properties to other apps and services on the device.
It’s possible to set these up manually in the info section of your target properties.

In this tutorial, you will copy and paste them into your Info.plist.

Select each one in turn from Template.plist and copy it (Command-C). Then click inside Info.plist and paste (Command-V). Click the images above for larger versions if you want to see more detail.
Build and run. Now, something cool happens. Select On My iPad from the Locations list and there will be a folder named Markup with the app icon on it. Open that folder. The document Default that you created at the beginning of this tutorial is there waiting for you:


Your app gets its own folder in Files, a special icon, and a new document button, just from adding those lines to your Info.plist. Next, you’ll make it all work.
Responding to UIDocumentBrowserViewController Delegate Actions
Most stock view controllers in iOS use a delegate to perform customization rather than encouraging subclassing. UIDocumentBrowserViewController is no exception.
In this section, you’ll configure a UIDocumentBrowserViewControllerDelegate to create a new document and open an existing document.
Open the folder Markup/UIDocument Mechanics in Project navigator. Find DocumentBrowserDelegate.swift.
DocumentBrowserDelegate conforms to UIDocumentBrowserViewControllerDelegate. It provides empty implementations of four optional delegate methods:
-
documentBrowser(_:didRequestDocumentCreationWithHandler:)is called when you select Create Document in the browser UI. -
documentBrowser(_:didPickDocumentURLs:)is called when you select an existing document in the browser. -
documentBrowser(_:didImportDocumentAt:toDestinationURL:)informs the delegate that a document has been imported into the file system. -
documentBrowser(_:failedToImportDocumentAt:error:)informs the delegate that an import action failed.