Unreal Engine 4 UI Tutorial
In this Unreal Engine 4 UI tutorial, you will learn how to create, display and update a HUD. By Tommy Tran.
4.8 (38) · 2 Reviews
Functions
In Blueprints, functions are graphs similar to the Event Graph. Unlike the Event Graph, you can call a function using a node. But why would you want to do this?

Organization
One of the reasons to use functions is organization. By using functions, you can collapse multiple nodes into a single node.
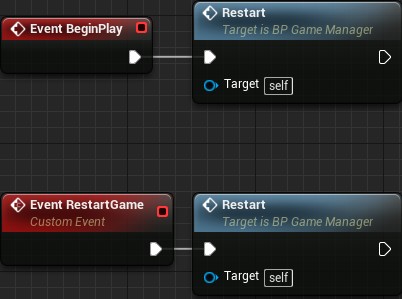
Take a look at the Event BeginPlay section of BP_GameManager. There are two functions: Restart and SetUpCamera.

Here is what that section would look like without functions:

As you can see, it looks a lot cleaner using functions.
Reusability
Another reason to use functions is reusability. For example, if you wanted to reset the counter and timer, you could easily do so by using the Restart function.
This saves you the work of having to recreate the nodes every time you want to reset those variables.
Now that you know what functions are, you will use one to update the CounterText widget.
Updating a Widget
By default, Text widgets are not accessible from Blueprints. This means you won’t be able to set their Text property. Luckily, this is an easy fix.
Click Compile and then open WBP_HUD. Switch to Designer mode.
Select CounterText and then go to the Details panel. Check the Is Variable checkbox located at the very top.
![]()
Now, you will be able to update CounterText. The next step is to create a function to update the text.
Creating the Update Function
Switch back to Graph mode and then go to the My Blueprint tab. Click the + sign to the right of the Functions section.
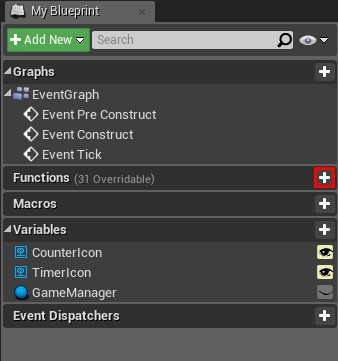
This will create a new function and take you to its graph. Rename the function to UpdateCounterText.
By default, the graph will contain an Entry node. When the function executes, this is where it will start.

To make CounterText display the ShapesCollected variable, you’ll need to link them.
Drag the GameManager variable into the graph. Left-click and drag its pin and then release left-click on an empty space. From the menu, select Get Shapes Collected.
![]()
To set the text, you will use the SetText (Text) node. Drag the CounterText variable into the graph. Left-click and drag its pin and then release left-click on an empty space. From the menu, add a SetText (Text) node.

The SetText (Text) only accepts an input of type Text. However, the ShapesCollected variable is of type Integer. Luckily, Unreal will do the conversion automatically when you try to plug an Integer to a Text input.
Connect the ShapesCollected variable to the In Text pin for the Set Text (Text) node. Unreal will automatically create a ToText (int) node for you.
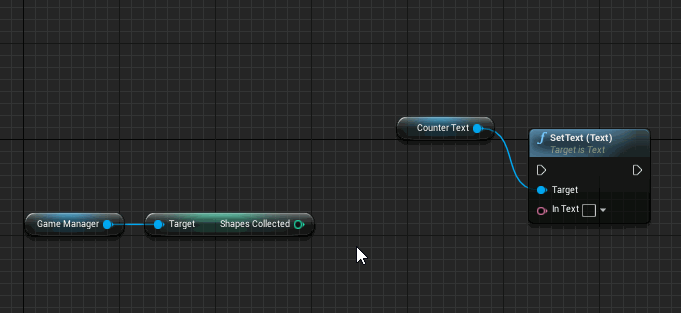
To complete the function, connect the Entry node to the Set Text (Text) node.

Order of events:
- When you call UpdateCounterText, the function will get the ShapesCollected variable from BP_GameManager
- The ToText (int) node converts the value of ShapesCollected to a Text type
- SetText (Text) will set the text for CounterText to the value from ToText (int)
The next thing to do is call UpdateCounterText whenever the player collects a shape.
Calling the Update Function
The best place to call UpdateCounterText is right after the game increments ShapesCollected. I’ve created a function called IncrementShapesCollected that increments the counter for you. The shapes call this function whenever they overlap the player.

Click Compile and then go back to BP_GameManager.
Before you can call UpdateCounterText, you need a reference to WBP_HUD. See if you can store a reference by yourself!
[spoiler]
- Locate the section where you created and displayed the WBP_HUD.
- Left-click and drag the Return Value pin of the Create Widget node.
- Release left-click on an empty space and then select Promote to variable from the menu.
- Add the new node to the end of the node chain
[/spoiler]
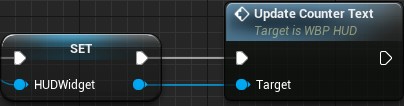
Once you have created the variable, rename it to HUDWidget.

Next, drag-click the right pin of the Set HUDWidget node and release on an empty space. Add an UpdateCounterText node. This will make sure CounterText displays the value of ShapesCollected when the game starts.
Afterwards, navigate to the My Blueprint panel and go to the Functions section. Double-click on IncrementShapesCollected to open its graph.
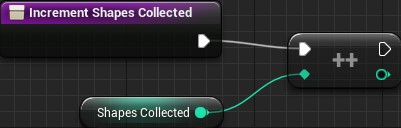
Drag the HUDWidget variable into the graph. Left-click drag its pin and release on an empty space. Add an UpdateCounterText node and connect it like so:
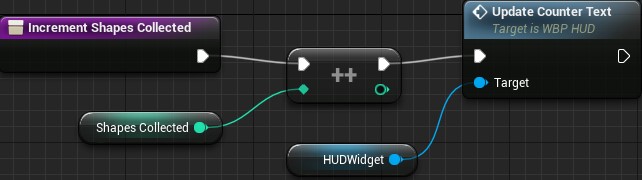
Now, whenever IncrementShapesCollected executes, it will increment ShapesCollected and then call UpdateCounterText. This function will then update CounterText to the value of ShapesCollected.
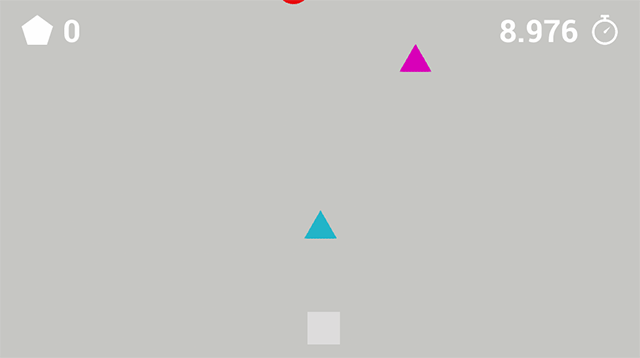
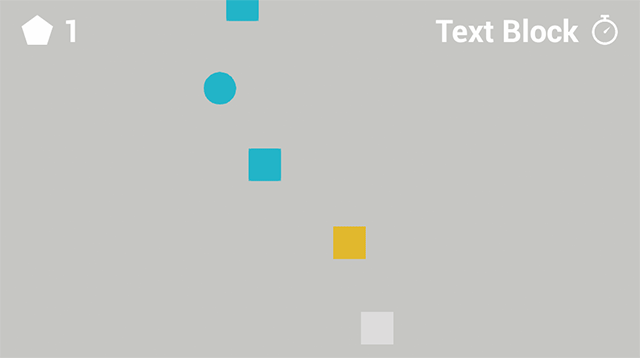
Click Compile and then close BP_GameManager. Press Play and collect some shapes to see the CounterText widget update.
Next, you will update the TimerText widget using a different method called binding.
Bindings
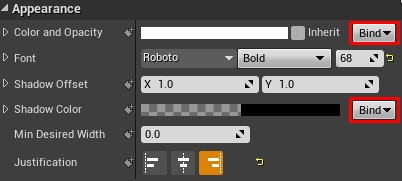
Bindings allow you to automatically update certain widget properties. To be bindable, the property must have the Bind drop-down.
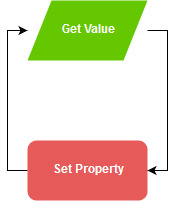
You can bind properties to a function or variable contained within the widget. The binding will constantly obtain a value from the function or variable. It will then set the bound property to that value.
You might be wondering why you shouldn’t just use bindings all the time. Bindings are inefficient because they are constantly updating. This means the game wastes time updating the property even if there isn’t any new information. Compare it to the previous method where the widget only updates when it needs to.
With that said, bindings are great for elements that change frequently such as the timer. Let’s go ahead and create a binding for TimerText.
Creating a Binding
Open WBP_HUD and switch to Designer mode.
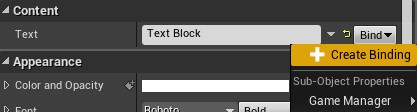
Select TimerText and then go to the Content section in the Details panel. You will see that the Text property is bindable. Click the Bind drop-down and select Create Binding.
This will create a new function for you and take you to its graph. Rename the function to UpdateTimerText.
The function will have a Return node with a Return Value pin of type Text. TimerText will display whatever text you plug into this pin.

Drag GameManager into the graph and then get the TimeRemaining variable from it.
Connect the TimeRemaining variable to the Return Value of the Return node. Like last time, Unreal will automatically add a conversion node for you.

Summary:
- The binding will constantly call the UpdateTimerText function
- The function will get the TimeRemaining variable from BP_GameManager
- The ToText (float) node will convert the value from TimeRemaining to a Text type.
- The converted value is then outputted to the Return node
The HUD is finally complete. Click Compile and then close WBP_HUD. Press Play to see the final results.