Beginning Android Development with Kotlin, Part One: Installing Android Studio
In this Beginning Android Development tutorial, you will learn how to set up all the tools needed to start Android development. By Joe Howard.
Android Studio Welcome Screen
After a few minutes, you’ll have the welcome screen, which serves as your gateway to building all things Android.
Even though you just downloaded Android Studio, it’s possible that it’s not the latest version. Select Configure/Check for Update at the bottom of the welcome screen to check whether any updates are available.

If an update is available, a window like the screenshot below will appear (although the version number should be something bigger than 3.3, if you’re following along). Click the Update and Restart button and let it do its thing.

The Android SDK Manager
Each version of Android has its own SDK (Software Development Kit) that enables you to create applications for the Android platform. Since you just went through the setup wizard, you’ll already have the latest version of the SDK available to you.
Installing a New SDK
It’s useful to know how to install additional versions of the SDK to help you develop for all supported versions of Android.
SDKs allow you to create Android Virtual Devices (AVDs) according to your personal configuration for the purpose of testing your app.
From the Android Studio welcome screen, select Configure/SDK Manager.

Once it launches, you’ll see a window like the one below:

SDK Platforms
The first tab of this window, SDK Platforms, lists the Android SDK platforms available for download.
Enabling the Show Package Details option in the bottom right displays the individual SDK components, such as the platform itself and the sources pertaining to the API level like system image.

Take note of the checkbox next to the SDK platform; it will be pre-selected if an update is available.
By default, the SDK Manager installs the latest packages and tools. Select the SDKs as shown in the screenshot above. If you wish to install other SDKs, just select them for installation.
SDK Tools
The SDK Tools tab lists developer tools and documentation along with the latest versions. Similar to the first tab, checking Show Package Details will display available versions of the SDK tools.
Three of the selected components in this list, for example, are Android SDK Build-Tools, Android SDK Tools and Android SDK Platform-Tools. Each contains components that are designed to assist in the development of Android and work across multiple SDKs. Go with the default selection on this tab, no matter whether you’re on macOS, Windows, or Linux.

SDK Update Sites
The SDK Update Sites tab displays the update sites for Android SDK tools and add-ons. You’re not limited to what’s listed under that tab. You can add other sites that host their own Android SDK add-ons, and then download them from those sites.
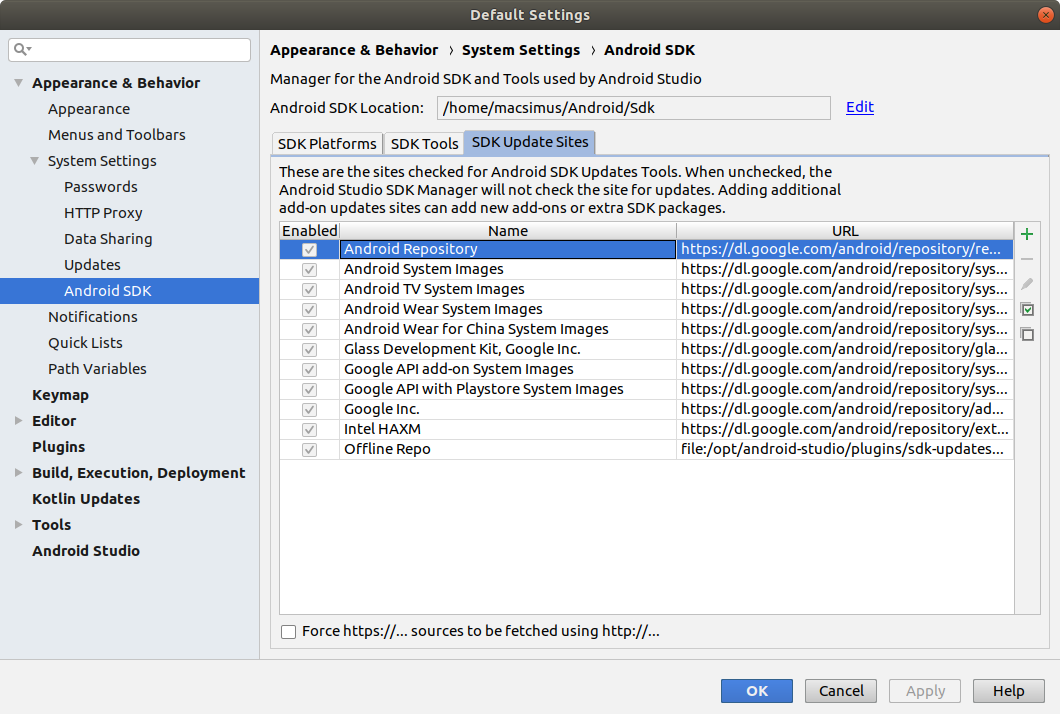
For the purpose of setting up correctly, select the options that are checked in the screenshot above. Click Apply at the bottom if it’s active. You’ll see a confirmation dialog for the chosen packages; accept and continue. Click OK to close the window.
The confirmation dialog will disappear and a license agreement will popup.

Read through it, select the Accept checkbox and click Next. The SDK Manager will download and install the selected items. Once it’s done, click Finish. You’ll be directed back to the SDK Manager window where clicking OK will take you back to the Welcome to Android Studio screen.
This is where the fun begins!
Creating Your First Project
Android Studio has a nice little step-by-step tool to help you create your project. Click Start a new Android Studio Project from the Welcome to Android Studio screen:
Note: If you currently have an Android Studio project open and can’t see the welcome screen, select File\New Project from the menu to create a new project.
Identify Your Project
Android Studio will present you with a project creation screen:

Enter OMG Android in Application name as shown above. Feel free to put your own name in the Company domain text field. As you type, you’ll notice the Package name automatically changes to create a reverse domain style name per your entries.
The Package name is used to uniquely identify your app so that any work done on a device is always properly attributed to the source, thus preventing confusion between apps.
You can set the Project location to any location on your hard drive — keep the default if you don’t have a preference.
You should check the Include Kotlin support checkbox if you’re building a project using Kotlin. This will configure Kotlin in your project, and all template source files will be created in Kotlin.
Click Next at the bottom of the window.
Choose an SDK
The next screen is the Target Android Devices window. This is where you select device types and operating systems to target.
The Minimum SDK drop-down menu sets the minimum version of Android requires to run your app. The newer the SDK, the more features you’ll have at your disposal; however, newer SDKs support fewer devices.
Selecting this value is simply a matter of balancing the capabilities you want and the devices you want to support. This is where developing for Android can get a little tricky.
If you really want to get into the details of what Minimum SDK version is best for your App, let Android Studio help you out.
As you change the Minimum SDK in the drop down menu, the percentage in the text underneath reflects what percentage of devices currently run that version of Android.
Click Help me choose underneath the drop down list to learn more about each SDK’s set of features.

For more on API versions statistics, check out the Android Dashboards, which are updated periodically.
For now, you just want an App that works on an Android Phone, and that is what you’ll see by default, alongside the default Minimum SDK. For this project, select SDK of API 19: Android 4.4 (KitKat) and click Next.

Set the Default Activity
The next step is to select your default Activity.

Think of an Activity as a window within your app that displays content with which the user can interact. An Activity can take up the entire screen or it could be a simple pop-up.
Your options on this particular template range from a Basic Activity, which is a blank screen with an Action Bar and a Floating Button right up to an Activity with an embedded MapView.
You’ll make a lot of activities as you develop more apps, so get to know them and know them well.
Select the Basic Activity and click Next.

To speed this part up a little bit you’ll use the pre-populated default values, but what is actually done with these values?
-
Activity Name: This gives your Activity a name to refer to in code. A
.ktfile will be created and will use the contents of this text field to give the Activity subclass a name, which will ultimately be the name you use to refer to this Activity in your code. - Layout Name: You’re going to define your Activity in Kotlin, but the layout it shows to the user is defined in a special sort of Android XML. You’ll learn how to read and edit those files shortly.
Click Finish.