How to Create a Simple FPS in Unreal Engine 5
In this Unreal Engine 5 tutorial, you’ll create a simple first-person shooter while learning how to create a first-person character equipped with a gun, and you’ll learn how to apply damage to other actors in your game. By Ricardo Santos.
Defining the Gun Location
To create the gun location, you’ll use a Scene component. These components are perfect for defining locations because they only contain a Transform. Make sure you have FpsCamera selected, and then add a Scene component to attach it to the camera. Name it GunLocation.
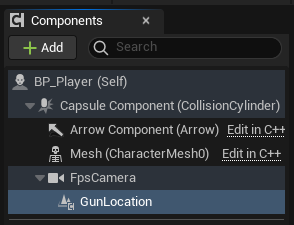
By attaching GunLocation to FpsCamera, the gun will maintain the same position relative to the camera, always keeping the gun in view.
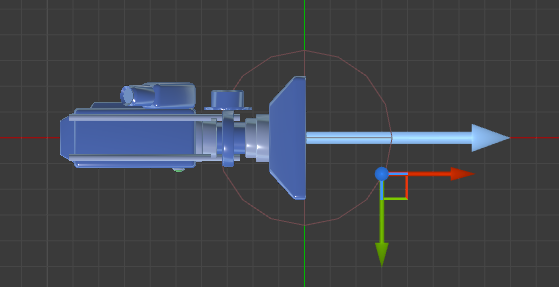
Next, in the Details panel, set the location of GunLocation to (X:30, Y:14, Z:-12) to place it to the front and slightly to the side of the camera.
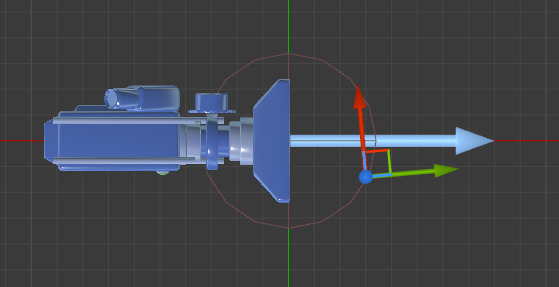
After that, set the rotation to (X:0, Y:0, Z:-95) to make it appear as though it’s aiming toward the center of the screen.
Now, you need to spawn the gun and attach it to GunLocation.
Spawning and Attaching the Gun
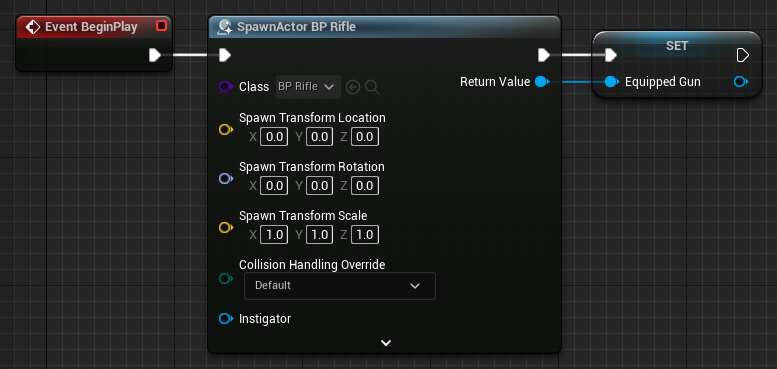
Locate Event BeginPlay on the BP_Player event graph, create and connect a Spawn Actor From Class to it. Set Class to BP_Rifle.
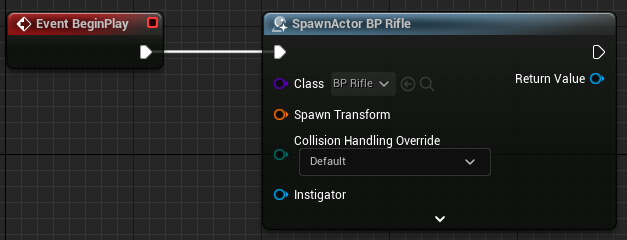
If you compile now, you’ll receive an error saying that the Spawn Transform node must have an input wired into it. This happens because, in the current form, this pin is a struct and needs proper initialization. To avoid this error, right-click Pawn Transform and select Split Struct Pin. This displays the variables that make up the pin and assigns initial values to them. Now the code compiles successfully.
Since you’ll need to use the gun later, you’ll store it in a variable, just as you created variables earlier for the base gun class. Now, create a variable of type BP_BaseGun, and name it EquippedGun.
By making the variable of type BP_BaseGun, you’re creating a big hole that can accept many shapes.
Next, set EquippedGun to the Return Value of Spawn Actor From Class.
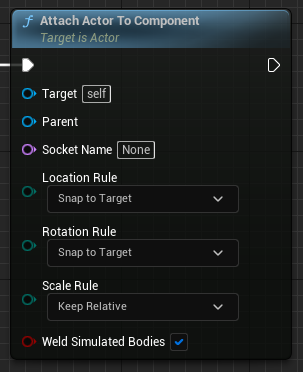
To attach the gun, you use an AttachActorToComponent. Create one and set Location Rule and Rotation Rule to Snap to Target to make the gun have the same location and rotation as its parent.
Next, create a reference to GunLocation and connect everything:
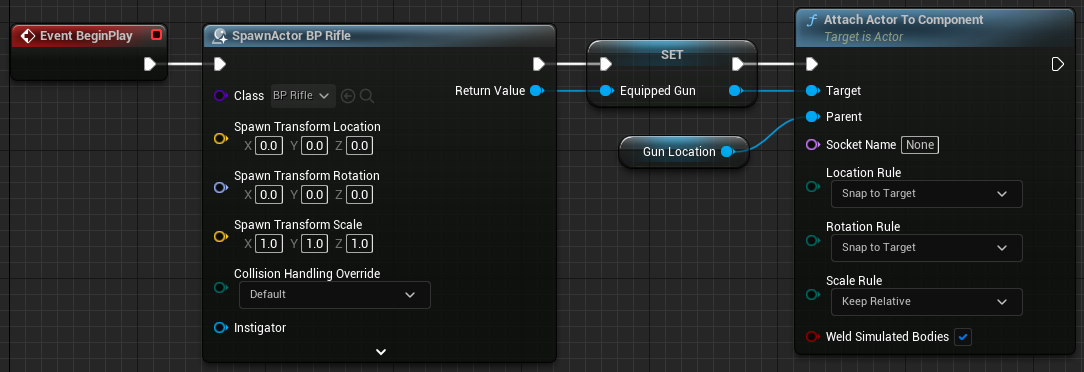
So, to summarize:
- When BP_Player spawns, it spawns an instance of BP_Rifle.
- EquippedGun keeps a reference to the spawned BP_Rifle for later use.
- AttachToComponent attaches the gun to GunLocation.
Click Compile, and then press Play. Now, you’ll have a gun when you spawn! When you look around, the gun will always be in front of the camera.
Shooting Bullets
Now comes the fun part: shooting bullets! To check if a bullet hits something, you’ll use a line trace.
A line trace is a function that takes in a start and end point, which form a line. It then checks each point along the line, from start to finish, until it hits something. This is the most common method in games to check if a bullet hits something.
Since shooting is a function of guns, it should go in the gun class rather than the player. Open BP_BaseGun and create a function called Shoot by clicking the + at the top of the Functions panel, on the left side of the screen.

After you enter the name of the Shoot function, UE5 should automatically open a blueprint tab for it on the center of the screen with a purple-colored Shoot node. If it doesn’t open automatically, double-click the newly created function on the left side panel.
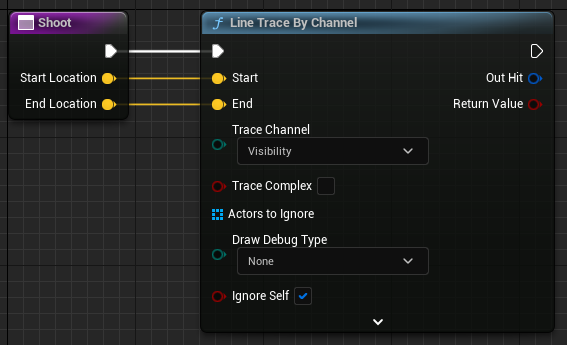
Afterward, on the Input panel on the right side, click + to create two Vector inputs. Name them StartLocation and EndLocation to represent the start and end points of the line trace, which you’ll pass in from BP_Player. Notice that the Inputs are added to the Shoot node, just like function arguments.

You can perform a line trace using a LineTraceByChannel. This node checks for hits using the Visibility or Camera collision channel. Create one and connect it:
Next, you need to check if the line trace hit anything. Create a Branch and connect it:
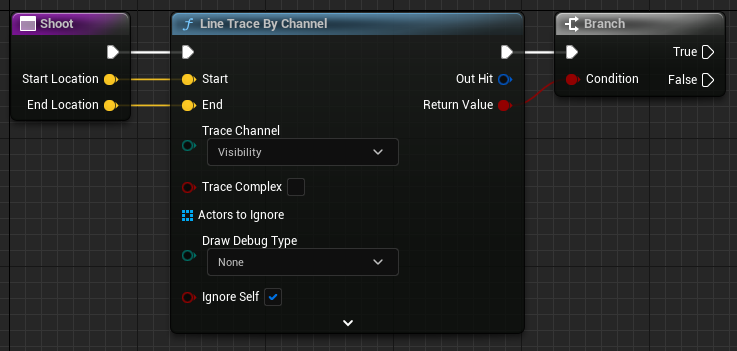
Return Value outputs true if there was a hit and a false otherwise.
Next, to give the player visual feedback on where the bullet hit, you’ll use a particle effect.
Spawning Bullet Impact Particles
First, you need to get the location of the trace hit. Drag-click on Out Hit and release left-click in the graph. From the menu, select Break Hit Result.
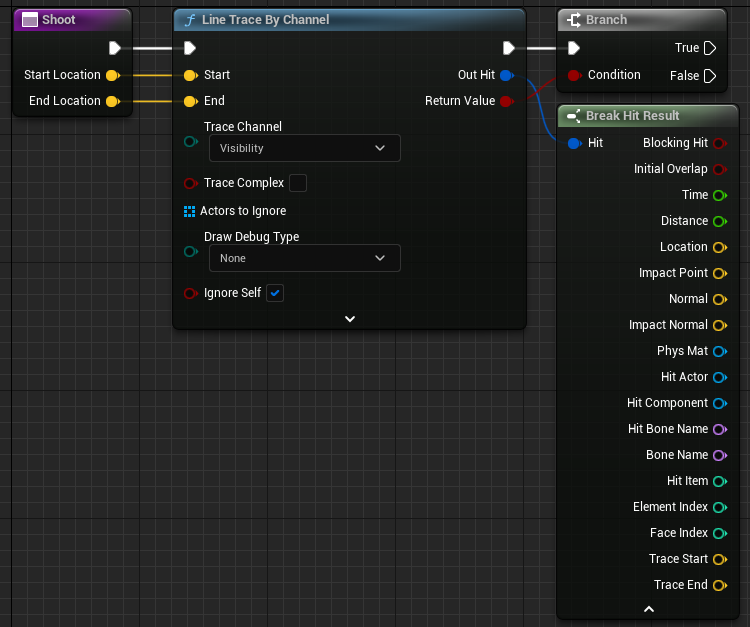
This gives you a node with various pins relating to the result of the line trace.
Create a Spawn Emitter at Location and set Emitter Template to PS_BulletImpact. Then, connect its Location to Location of Break Hit Result.
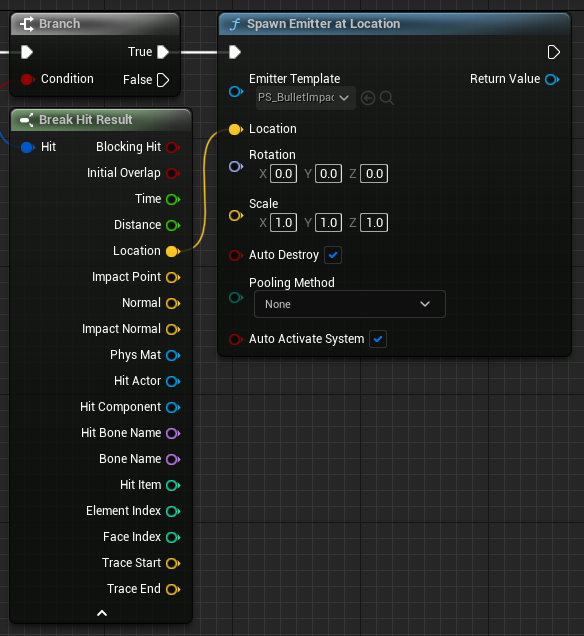
Here’s the function so far:
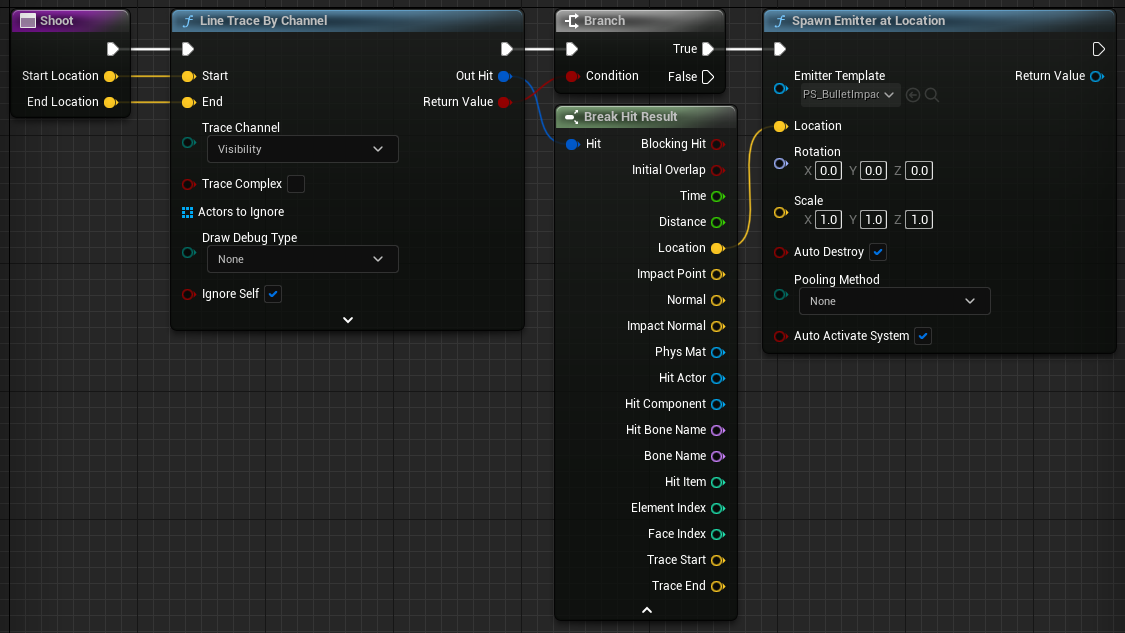
So, to summarize:
- When Shoot executes, it performs a line trace using the provided start and end points.
- If there was a hit, Spawn Emitter at Location spawns PS_BulletImpact at the hit location.
Now that the shooting logic is complete, you need to use it.
Calling the Shoot Function
First, you need to create a key mapping for shooting. Click Compile and open Project Settings. Create a new Axis Mapping called Shoot. Set its key to Left Mouse Button, and then close Project Settings.

Next, open BP_Player, and create a Shoot event.

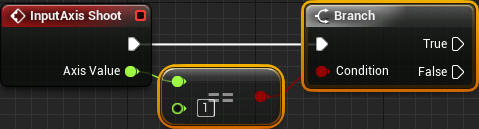
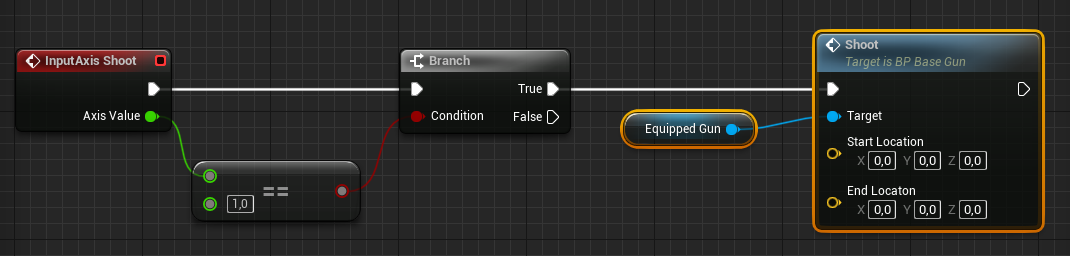
To check if the player is pressing the Shoot key, you just need to check if Axis Value equals 1. Create the highlighted nodes. One is a Branch, the other is an Equal operator:
Next, create a reference to EquippedGun, and then call its Shoot function.
Now, you need to calculate the start and end points for the line trace.
Calculating the Line Trace Locations
In many FPS games, the bullet starts from the camera rather than the gun, as the camera is already perfectly aligned with the crosshair. So if you shoot from the camera, the bullet is guaranteed to go where the crosshair is.
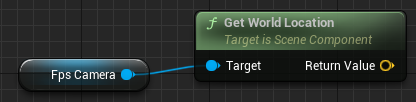
Still in the BP_Player Blueprint Class, create a GetWorldLocation (FpsCamera).
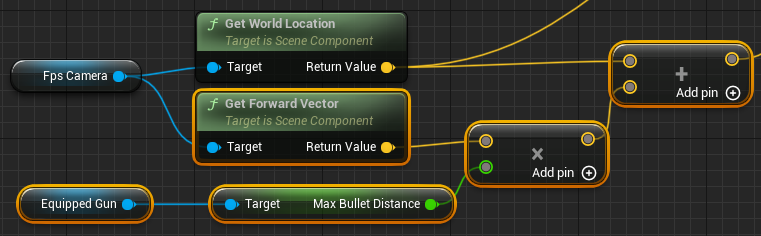
Next, you need to add a GetForwardVector to the FpsCamera. Click-drag from the FpsCamera and type getforwardvector.

Now, you need the end location. Guns have a MaxBulletDistance variable, so the end location must be MaxBulletDistance units from the camera. Click the EquippedGun variable and drag it into the blueprint graph, and click-drag out of this node. Then, type Max Bullet Distance, and select it in the window. To perform the mathematical calculations needed, click-drag from Max Bullet Distance, type * to create the multiplication node, click-drag from the multiplication node and type + to create the add node. The process should look like this:
Then, finalize by connecting the nodes:
After that, connect everything:

So, to summarize:
- When the player presses or holds left-click, the gun shoots a bullet starting from the camera.
- The bullet travels forward by the distance specified by MaxBulletDistance.
Click Compile, and then press Play. Hold left-click to start shooting.
Currently, the gun shoots in every frame. That’s too fast, so the next step is decreasing the gun’s fire rate.