Introduction to the TestFlight SDK
Learn how to distribute ad-hoc builds and integrate the TestFlight SDK into your iOS apps. By Dani Arnaout.
Integrating Crash Reporting
Watch out, this may be the only tutorial that teaches you how to crash an app.
Crash reporting is arguably the most important of TestFlight’s features for a developer. TestFlight automatically reports crashes without you having to write a single line of code. In other words, you don’t have to do anything to integrate it into your app except add the SDK.
So then, what should you do in this section? Hey, how about you crash your app? You have to have something to test, after all. Here’s a list of the most creative ways:
assert(! "crashing on purpose to test crash logs reporting.");[[NSThread mainThread] exit];exit(0);- No selector found
- Index out of bounds
You may have your own preference, but assertion looks good to me. Go to crashButtonEventTouchUpInside in MMSettingsViewController.m and modify it to look like this:
- (IBAction)crashButtonEventTouchUpInside
{
    assert(! "Crashing on purpose to test crash logs reporting.");
}
Of course your real apps won’t have this kind of button, and ideally won’t have any crashes at all!
Build your app for the last time to ensure that it’s ready for an ad hoc build.
Once you get a Build Succeed message, you’re ready to go.
Testing the APIs
You have now reached the testing phase of this tutorial, where you get to see these TestFlight’s APIs at work. Before you can test, though, you need to generate another ad hoc build. If you don’t remember how to do that, you’re about to get more practice.
Generating a New Build
Select your project in the navigator on the left. In the General tab, increment the build version from 1.0 to 2.0.

As you did before, archive your project for a device and export the ad hoc build. If you’re unsure at any point, revisit the Exporting a Build section to see all the steps required. Upload your build to TestFlight and you should be ready to go.
Now you are ready to start testing! Remove the app from your device to get a clean install, and follow the same steps as before to visit testflighapp.com on your device. You should see the new version 2.0 of MotivateMe available to install.
So… what’s the most interesting of the features to test? I have a hunch you are itching to try crash reporting, but you’re going to save the best for last.
Testing Remote Logging
Run MotivateMe on your device and enter your full name as you did before. Click Next.

Before you go any further with the app, log in to the TestFlight website.

Go to the Apps section and choose MotivateMe.

Select Build 2.0:

Choose the Sessions tab.

Click on the Anonymous User to get more info. In the post-iOS 7 world without UDIDs, all users will show up as “Anonymous”.

Select the Events drop-down list and choose Log instead of Events.

You can clearly see that TestFlight has logged whatever name you entered thanks to the TFLog call.
Remote logging is a success. As you move on, make sure not to close the webpage – you’re going to use it to monitor the other APIs.
Testing the Checkpoint API
Return to MotivateMe on your device and continue configuring the app until your reach the motivator view controller, just as you did when you were first exploring the app.
Once you’re on the motivator view controller, tap Start.

Back on the TestFlight website, select the Checkpoints section.

You’ll find a list of checkpoints and some statistics on how many times they were reached. With your own apps, you could check up on this screen to see what your testers are up to.
Checking the checkpoints… check!
Testing the Feedback API
To test the Feedback API, you first need to send some feedback from your device. Go to the Settings screen in MotivateMe and tap the Feedback button.

Type in a nice little message for yourself and tap Send.

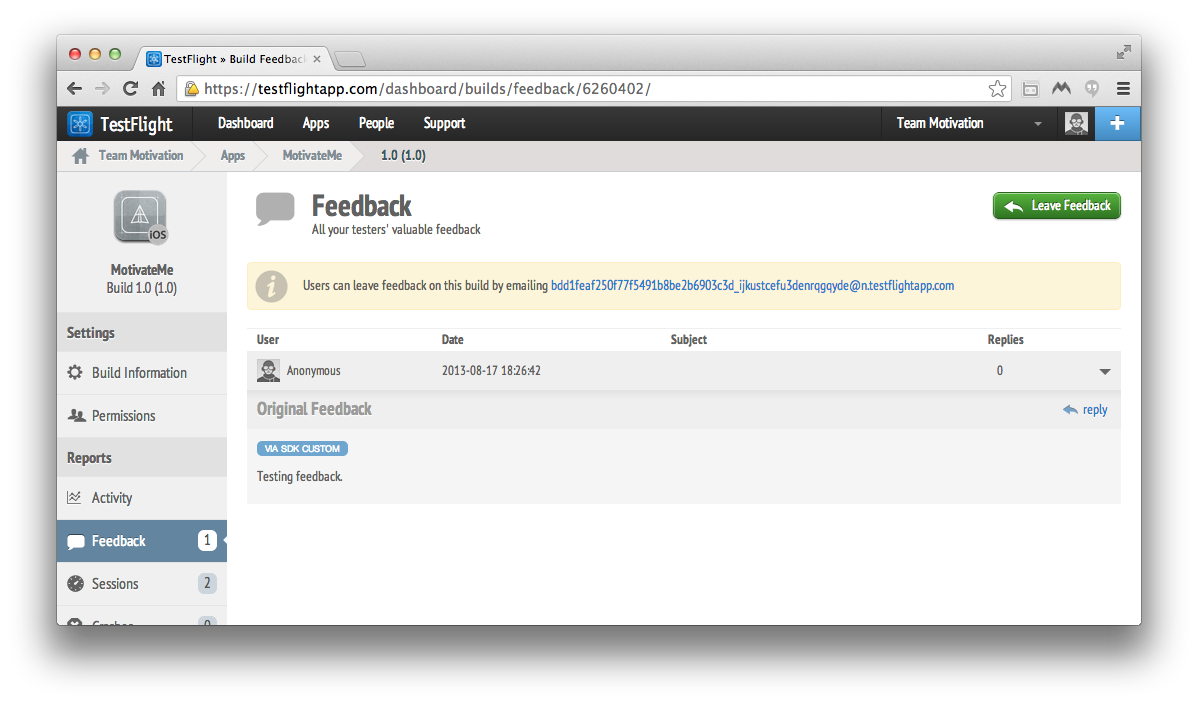
Return to the TestFlight website and find the Feedback section. Select it and choose Anonymous User to get more info. There you’ll find the feedback you sent to yourself. Nice of you to respond – you are a model tester.
Testing Crash Reporting
Finally, it’s time for the big one… CRASHING YOUR APP! Get ready to do some controlled destruction.
Go to the Settings screen in MotivateMe and tap the red CRASH APP button.

Booom! The app should crash and you’ll be back on the home screen.
Go to your TestFlight page and check out the Crashes section. Ta-da! You have a crash report.

BUT! What is it you’re looking at?
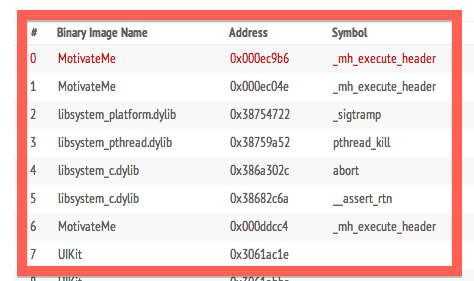
Is there a way to make it readable? What’s with all the strange memory addresses?

Don’t you want to know exactly where the crash occurred – the specific class name and line? Yes. You need to symbolicate your crash report to be able to read it.
If you remember way back to the first time you ran the Archive operation on your project: archiving creates a bundle of your app and its symbols. The symbol list is called a dSYM file, and is the final piece that will turn those memory addresses into human-readable class and method names.
To access your app archive, go to Xcode and choose Window\Organizer. Navigate to the Archives tab.

Make sure to select your app from the left-side column.
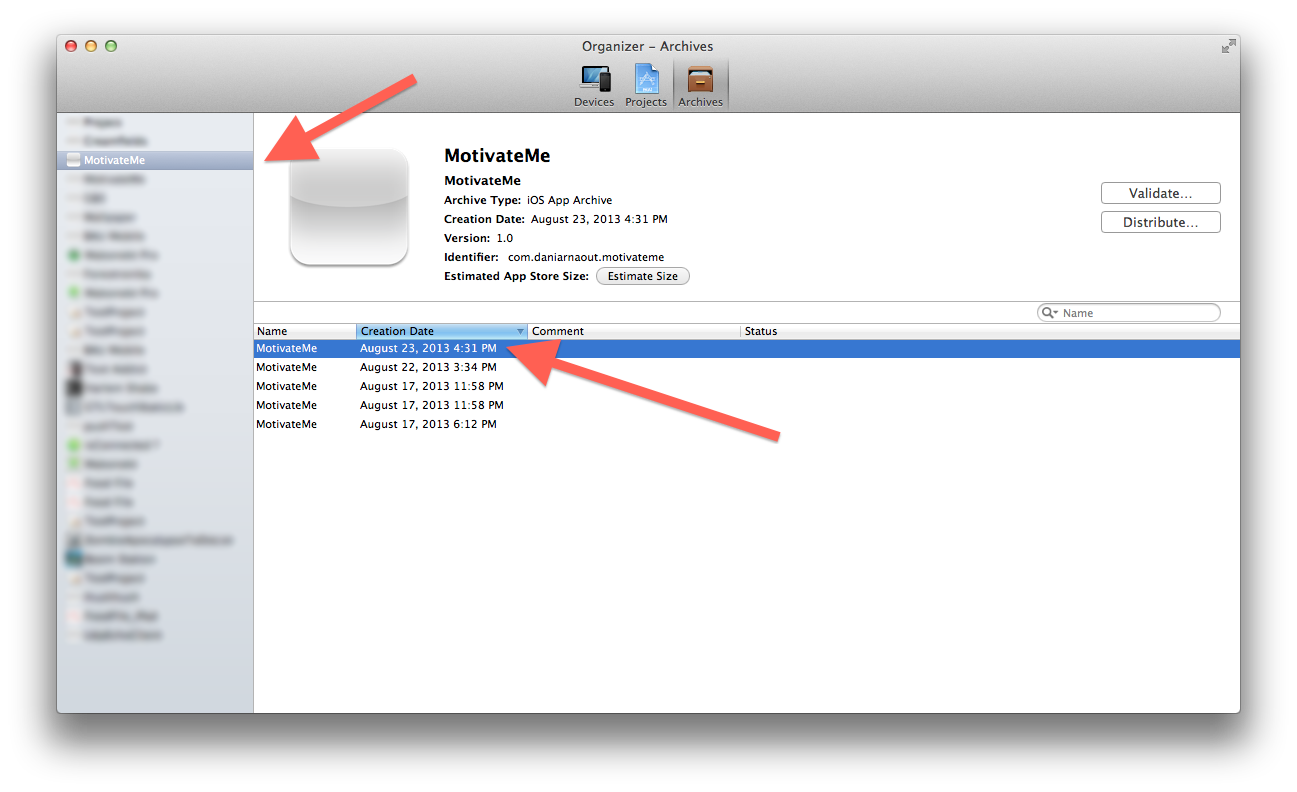
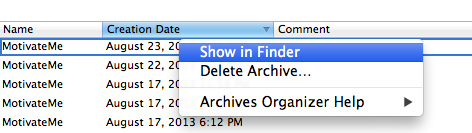
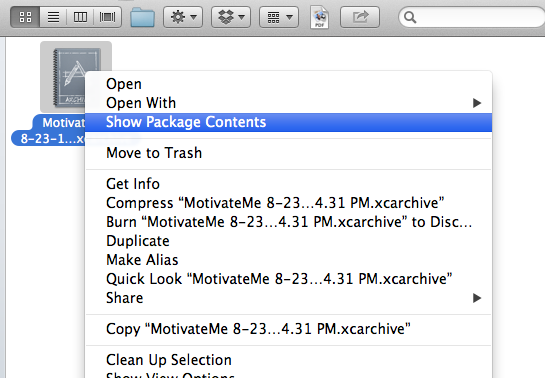
Right-click your latest build and choose Show in Finder.
Right-click on the file and choose Show Package Contents.
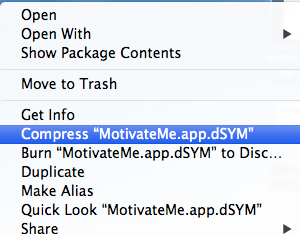
You’ll find a dSYMs folder. Open it to find your app’s dSYM. Right-click the file and then select Compress. TestFlight expects your dSYM inside a ZIP file.
Go back to the crash report on the TestFlight site. There should be a yellow alert box prompting you to upload a dSYM which you can conveniently do by dragging the ZIP file you just made onto the that alert area.

You are all set. TestFlight will need a minute or two to process the dSYM.
Note: Need a refresher on dealing with crashes and crash reports? Check out some of our other tutorials while you wait for TestFlight to symbolicate.
Eventualy when you refresh the Crashes page on TestFlight, you’ll see your crash report is now human-readable, allowing you to determine exactly where your crash happened.

Follow the lead by going into MMSettingsViewController.m and finding line 53.

That’s the source of the crash – the assert you added earlier.
Now that you’ve uploaded your dSYM, any future crashes will be automatically symbolicated as they happen. You can check the status of each uploaded build on TestFlight to see whether you remembered to upload the dSYM.

Let’s hope you don’t get too many crashes! Unless, of course, you set them up on purpose.