Automator for Mac OS X: Tutorial and Examples
Learn how to use Automator for Mac OS X to automate tedious workflows in this tutorial with five complete examples. By Neil North.
Using Variables from your Workflow in AppleScript
It’s very easy to use Automator to collect variables, files, text, etc. Combine that with the power of AppleScript and you can do some pretty nifty stuff.
If you take a look at the standard data added to a Run AppleScript you’ll see the following:
on run {input, parameters}
	return input
end run
The input at the end of the Run Applescript action is actually an array of all data collected prior to this action in the workflow. To use these inputs, you need to assign them to a variable in your AppleScript.
set documentsDirectory to item 1 of input
You can assign variables with either set or copy, followed by the name of the variable. You can assign it a value straight away, above where you assign the value of the first item in the array of inputs.
If you have multiple variables, they are available based on their position in the workflow:
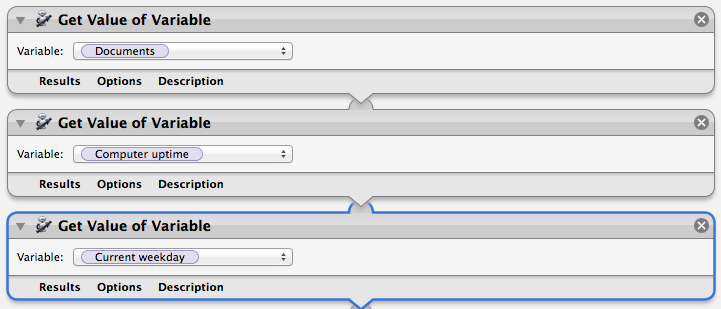
The variables could be assigned as follows:
set documentsDirectory to item 1 of input
set computerUptime to item 2 of input
set currentWeekday to item 3 of input
Let’s try this out. You’ll be making a simple workflow that takes a variable (in this case your computer’s documents directory) and runs a command in terminal, based on the variable.
In Automator start a new project and select Workflow as the project type.
Select Variables in your library and search for Documents and drag it onto your workflow.

Go back to your Actions library and drag a Run AppleScript action onto the workflow:

Enter the following into your AppleScript text box:
on run {input, parameters}

	set documentsDirectory to item 1 of input

	tell application "Terminal"
		activate
		do script "cd " & documentsDirectory
	end tell

	return input
end run
Run the workflow. The current directory will change to your documents directory:

To recap, you first instantiate a new variable called documentsDirectory which is then assigned to the first item in the array of inputs. You then tell your terminal application to activate it. Once activated, it will run the text string script which is made up of text and the documentsDirectory variable.
This is a very simple example but will give you some ideas about how you can expand it, and how AppleScript can become even more useful to you.
If you plan on doing a lot of shell command automation, then there is an action called Run Shell Script to make this process even more efficient.
Where To Go From Here?
Congratulations! You’re now familiar enough with Automator to create your own workflows and automate some of those tedious tasks.
You also had an introduction to the lightweight — but powerful — language of AppleScript. If you want to learn more about AppleScript, have a look at the official Applescript Documentation, which dives much deeper into the language.
If you want to see more practical examples using Automator or AppleScript, be sure to let us know.
Also, I would also love to hear about your workflows and the creative ways you’ve managed to save time, so be sure to leave a comment or two about your discoveries. Happy automating!