Contacts Framework Tutorial for iOS
In this Contacts Framework tutorial for iOS, learn how to select, display, save and edit contacts from the user’s device. By Andy Pereira.
One of a mobile device’s most integral functions is storing contact information for people you want to communicate with. Whether it be through phone calls, messaging or sharing very important memes, your device would be useless for communicating without this information. You can get this information with the Contacts framework.
As an app developer, it’s important to understand how you can use contact information to better integrate your app with the user’s device. In this Contacts framework tutorial, you’ll learn how to use both the Contacts and ContactsUI frameworks.
The Contacts framework allows you to read or modify the user’s contacts from your apps. These are the same contacts that show up in the Contacts app. It replaces the old Address Book framework.
For this tutorial, you’ll be working on a modified version of an app used in a previous screen cast. You’ll be able to select, display, save and edit contacts stored on the user’s device.
Getting Started
Use the Download Materials button at the top or bottom of this tutorial to download the starter project. The app has some basic interface to show a list of default contacts. There are some buttons that you’ll be implementing actions for, so not everything works in the UI yet.
Build and run the project, and you’ll see a list of famous contacts that have been hard-coded in the app.

Before you can work with contacts, you’ll want to become familiar with CNContact, the class used to store all of the contact’s information your app has the potential to access. Open Friend.swift and look around. Friend, a class for this project, has the property contactValue.
Showing Contacts Information
If you’re working with contacts, chances are you’ll want to show this information at some point. Apple has provided a built-in view controller that can display a CNContact with very little work.
Open FriendsViewController.swift and add this import at the top of the file:
import ContactsUI
Next, add this code to tableView(_:didSelectRowAt:):
// 1
let friend = friendsList[indexPath.row]
let contact = friend.contactValue
// 2
let contactViewController = CNContactViewController(forUnknownContact: contact)
contactViewController.hidesBottomBarWhenPushed = true
contactViewController.allowsEditing = false
contactViewController.allowsActions = false
// 3
navigationController?.navigationBar.tintColor = .appBlue
navigationController?.pushViewController(contactViewController, animated: true)
Here’s what you’ve added:
- You got the
CNContactvalue from the friend. - You created a
CNContactViewControllerand configured it. Here, you turned off editing and actions. If you wanted the UI to show buttons which would allow you to share the contact or your location with the person, you can setallowsActionstotrue. - The
CNContactViewControllerhas a lighter colored theme, much the same as when you view a contact in Contacts.app. Because of the app’s theme, you need to adjust the navigation bar’s tint before presenting the contact controller, so the navigation buttons will be visible. The color is already switched back inviewWillAppear(_:).
Build and run and select any of the contacts in the list. You’ll now see the contact presented in a nice view controller without much work from you at all.

Picking Contacts
Next, you can take even more advantage of the ContactsUI framework by using the contact picker. It’s the built-in way to select a contact from the user’s device and import the data into your app.
Open FriendsViewController.swift and add the following code to the bottom of the file:
//MARK: - CNContactPickerDelegate
extension FriendsViewController: CNContactPickerDelegate {
  func contactPicker(_ picker: CNContactPickerViewController,
                     didSelect contacts: [CNContact]) {
    let newFriends = contacts.compactMap { Friend(contact: $0) }
    for friend in newFriends {
      if !friendsList.contains(friend) {
        friendsList.append(friend)
      }
    }
    tableView.reloadData()
  }
}
Here, you make sure the contact picked from the CNContactPickerViewController is properly added to the list, but only if they weren’t previously added.
Finally, add the following implementation to addFriends(sender:):
// 1
let contactPicker = CNContactPickerViewController()
contactPicker.delegate = self
// 2
contactPicker.predicateForEnablingContact = NSPredicate(
  format: "emailAddresses.@count > 0")
present(contactPicker, animated: true, completion: nil)
Here’s a quick breakdown of what you added:
- You created a contact picker and set the delegate.
- You set a predicate on the contact picker. You can use a predicate to filter contacts that meet a certain criteria of your choosing. In this case, you ensure that the contacts to choose from have at least one email address.
Build and run, then select the add button from the top right.
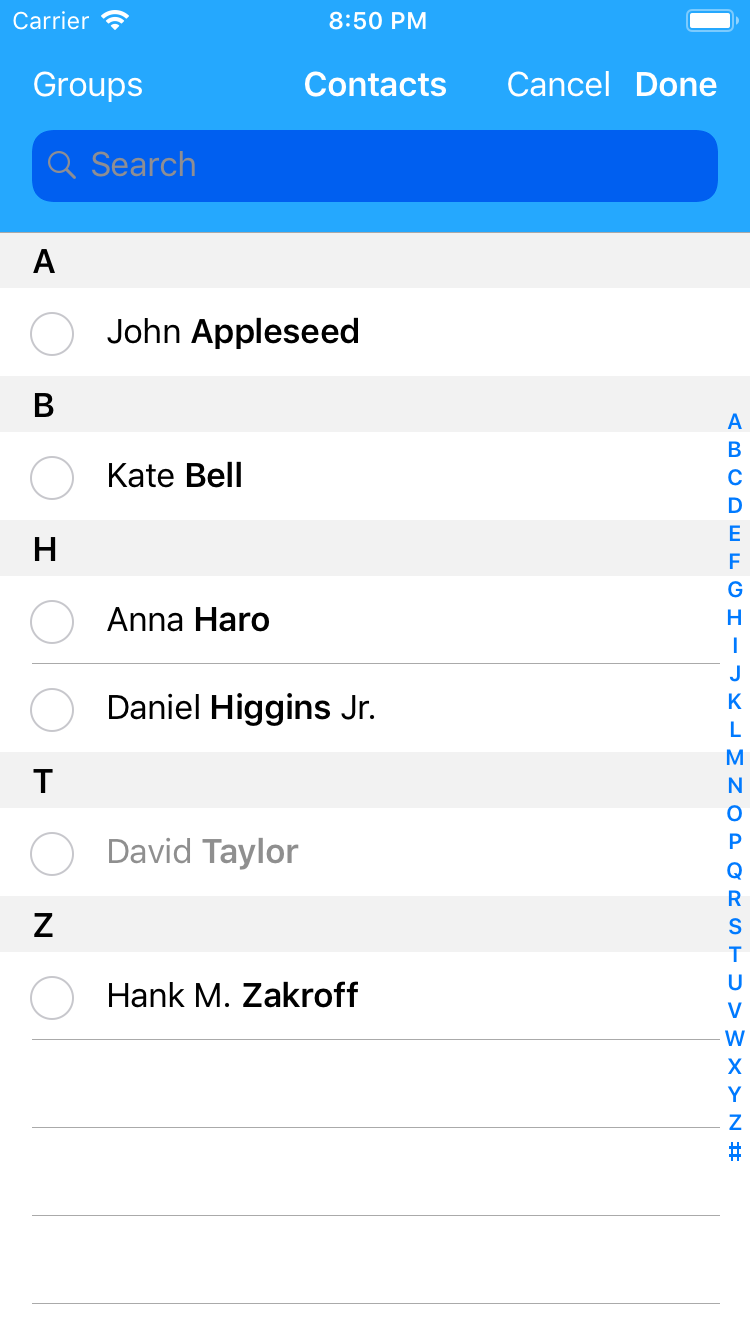
If you’re running in the simulator, you’ll see a list of the default contacts with David Taylor grayed out. This is because his contact has no email address.
Select one of the other contacts from the list and then Done. You should see the contact is in the list with the default contacts.
Setting Up Contacts Permissions
Up to this point, you were able to access the user’s contacts data without asking permission to do so. You can do that because of what Apple calls out-of-process pickers. The picker runs outside your app process and the only information you get back is the data selected by the user.
For the next steps, you’ll access the contacts store directly. You’ll need the proper permissions to do that.
First, open Info.plist and select the add button next to any of the items in the property list. In the newly added item, find or type:
Privacy - Contacts Usage Description
In the value field, add the following description:
Access is needed to save your RWConnect friends information to your Contacts list.

The system will show this property’s value to the user when presenting the alert asking for permission.
Next, open AppDelegate.swift and add the import for Contacts to the top of the file:
import Contacts
Finally, add the following code to application(_:didFinishLaunchingWithOptions:) right before it returns:
CNContactStore().requestAccess(for: .contacts) { (access, error) in
  print("Access: \(access)")
}
This code will trigger the system to ask for the user’s permission for access to Contacts.
Build and run the project and you’ll see the permission alert with the text value added in Info.plist. Be sure you select OK.
